Correcting Freestyle2 Scan Misalignments

|
OverviewFrom time to time you will run into issues with multiple scan misalignments. This is usually evident from doubling or ghosting around objects. Watch the video and read the accompanying procedure for an easy fix to correct any misalignments. |
|
- Delete any existing points from the project by right-clicking on the point(s) in the Structure Tree and select Delete.
- Next, we will create new points in each individual scan observing the following guidelines:
- Place points as far apart as possible
- Ensure you are placing points on locations that exist in each scan.
- The corners of markers can serve as excellent locations to place points, however if markers are not available, use easily identifiable features such as bolt heads or holes.
- Right-click on the scan within the Structure Tree and select View > 3D View.
- Using the Mark Point tool
 , create new points at the desired locations. You will need a minimum of three points, however adding additional points will ensure a better alignment. Repeat this procedure for each scan you wish to align.
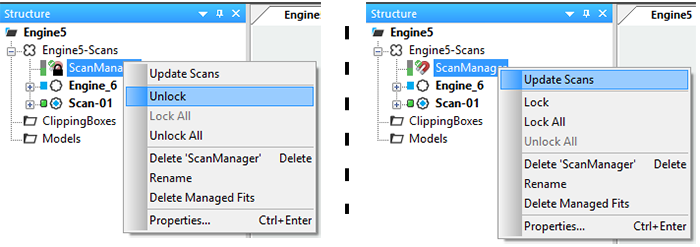
 - Once all points are placed, (on each scan), right click on the ScanManger item within the Structure Tree and select Unlock, then right-click again and choose Update Scans. If you do not have a ScanManager element in your Structure Tree, then right-click on the parent scan group ("Engine5-Scans", in this example) and select Operations > Registrations > Place Scans.
- In the Place Scan window:
- In the Placement Mode drop down, select Target Based.
- Drag the Target Distribution Threshold slider to the middle of its range.
- (Optional) If your project contains a large number of scans, click on the General Tab and uncheck the Enable auto clustering checkbox.
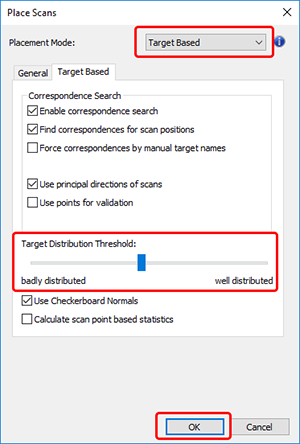
- Click OK to execute and complete the scan realignment. In the next window, you may view the results and Target Tensions. Click OK to close the window and return the project.