Registering with Survey Data in SCENE

Overview
External reference objects, such as survey data, can be used to align scan projects with real-world coordinates. This data can be imported through both SCENE interfaces.
Survey Data Format
SCENE will recognize COR, CSV, and TXT survey data formats. Each row of the survey data file should contain a single reference point with the following specifications: name, x coordinate, y coordinate, and z coordinate.
Note: When importing survey data, SCENE uses a right-handed coordinate system.
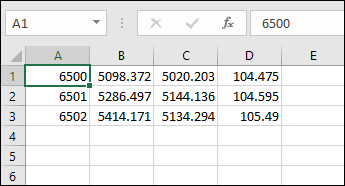
Example CSV file
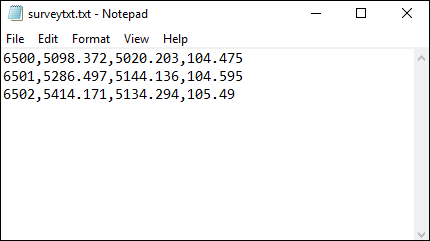
Example TXT file
If you are using a TXT file, data must be separated by the same type of separator, which can be a blank space, a colon, a semicolon, or a tab.
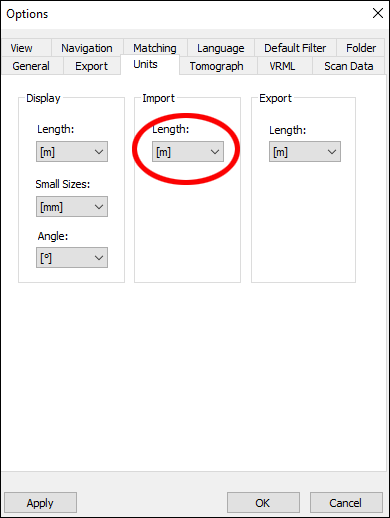
Verify Measurement Units
The measurement units of the import setting must match the units of the data being imported. This setting can be checked in both interfaces.
Workflow Interface
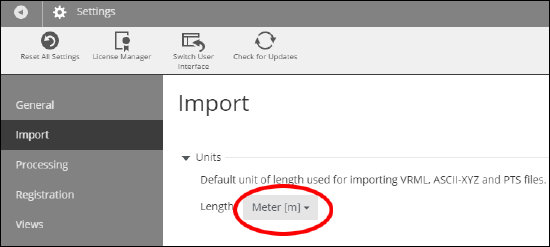
- Click the Settings icon
 on the top-right of the window.
.png?revision=2)
- Click Import on the left side of the window.
- Choose the measurement unit of the survey data to be imported.
Classic Interface
- Click Tools > Options in the main menu.
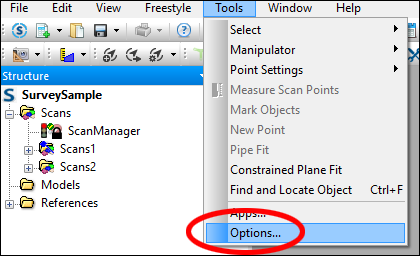
- In the Options window, click the Units tab and select the correct measurement unit in the Import menu.
Importing Survey Data
You can import survey data by dragging the file from your desktop onto the white area of the Structure tree. You can also import survey data through both SCENE interfaces.
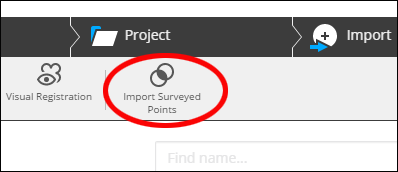
Workflow Interface
- Click Import Surveyed Points on the Registration ribbon.
- Navigate to the folder containing the survey point data. Click the file to be imported and click Open. Note: You may have to adjust the file-type filter to make sure the survey data file is visible.
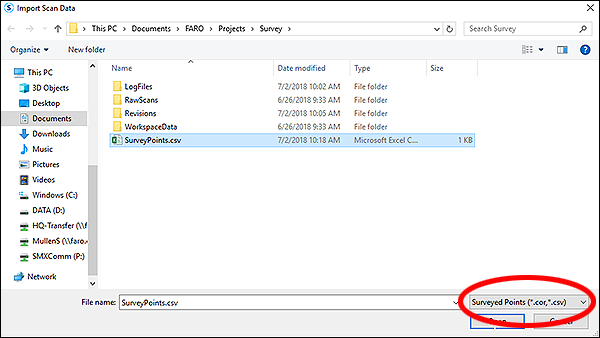
Note: TXT files can not be imported with this method. They have to be dragged and dropped from the desktop to the Structure tree. - In the dialog box, choose which structure level should contain the imported points.
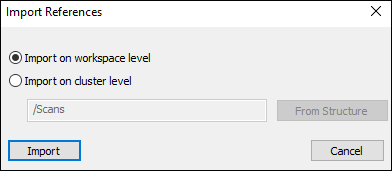
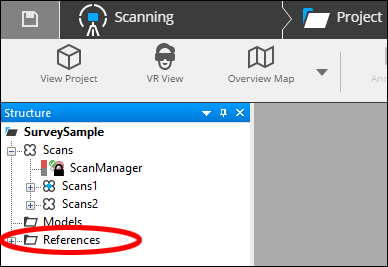
Note: Importing data on the workspace level will make that data available to the entire project. Importing data on the cluster level will restrict data to a specific cluster. - A References folder will appear in the structure view.
Classic Interface
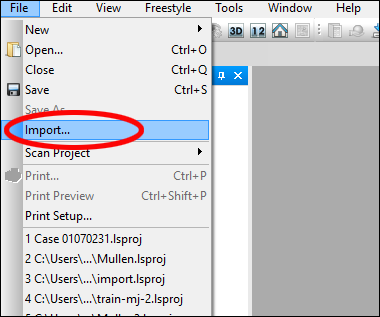
- Click File > Import in the main menu.
- Navigate to the folder containing the survey point data. Click the file to be imported and click Open. Note: You may have to adjust the file-type filter to make sure the survey data file is visible.
Note: TXT files can not be imported with this method. They have to be dragged and dropped from the desktop to the Structure tree. - In the dialog box, choose which structure level should contain the imported points.
Note: Importing data on the workspace level will make that data available to the entire project. Importing data on the cluster level will restrict data to a specific cluster. - A References folder will appear in the structure view.
Survey Data and Project Structure
When using survey data to align or transform your project, you can protect the registration of the project's individual scans by moving them into a cluster.
To create a cluster, follow these steps.
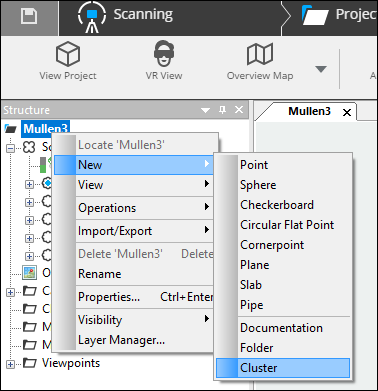
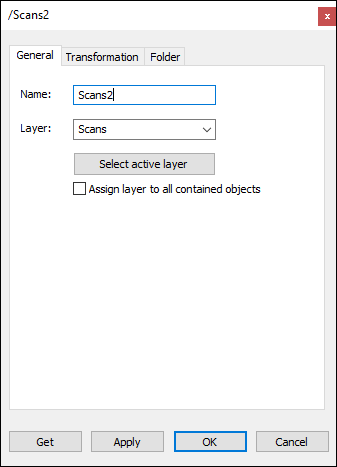
- Right-click the project folder and click New > Cluster.
- Enter a name for the new cluster in the Name field of the cluster properties box and click OK.
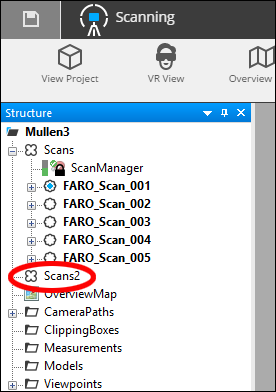
- The new cluster will appear in the top level of the Structure tree.
- Click the
 icon next to the original scan cluster and drag it into the new cluster.
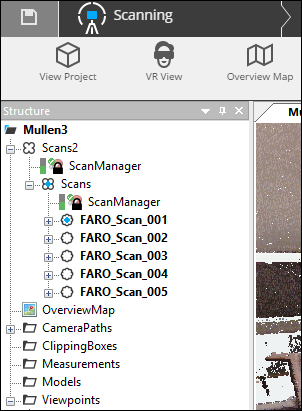
Note: Clusters can be created on any level of the project structure tree and moved as needed.
Registering Scans with Survey Data
Once survey data is imported, SCENE will prioritize reference points in the registration process. To successfully register scans, you will need correspondences between at least three scan targets and the imported reference points. You can register and verify these correspondences during the registration process using the steps below.
Workflow Interface
- In the Registration ribbon, click the Registration icon
 next to the scan cluster to be registered and click Start Automatic Registration.
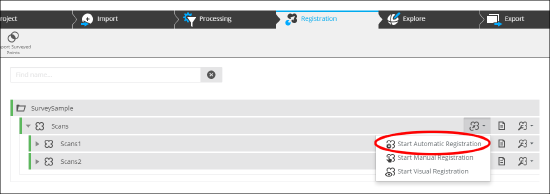
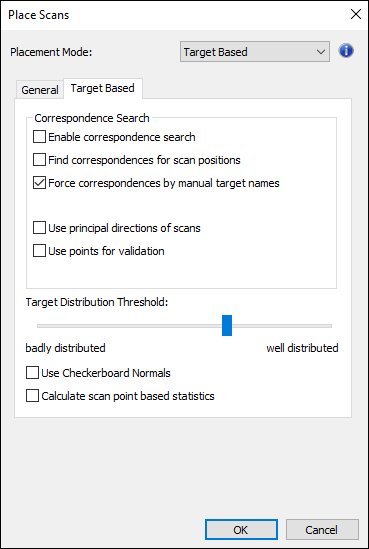
- In the Select Method pull-down menu, click Target Based.
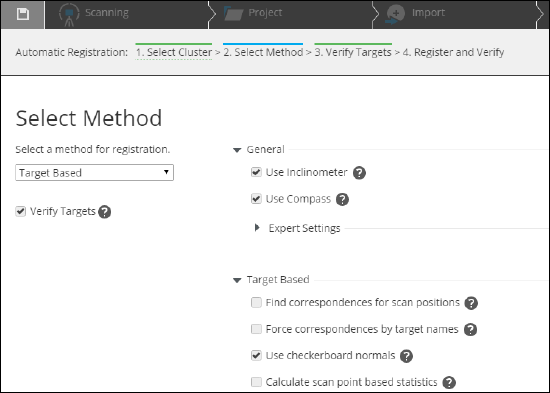
- Verify Targets - Check this box to manually inspect survey point correspondences before registration.
- Find correspondences for scan positions - Check this box if survey data corresponds with scanner positions.
- Force correspondences by target names - Check this box to force correspondences between scans by giving objects the same name.
- Use checkerboard normals - Disable this setting if checkerboard targets are placed at angles to the scanner.
- Click the green Verify Targets or Register and Verify button on the top-right.
Verifying Targets
The Verify Targets window contains verification controls on the left and a loaded scan on the right.
- To verify survey data, click a scan name on the scan list.
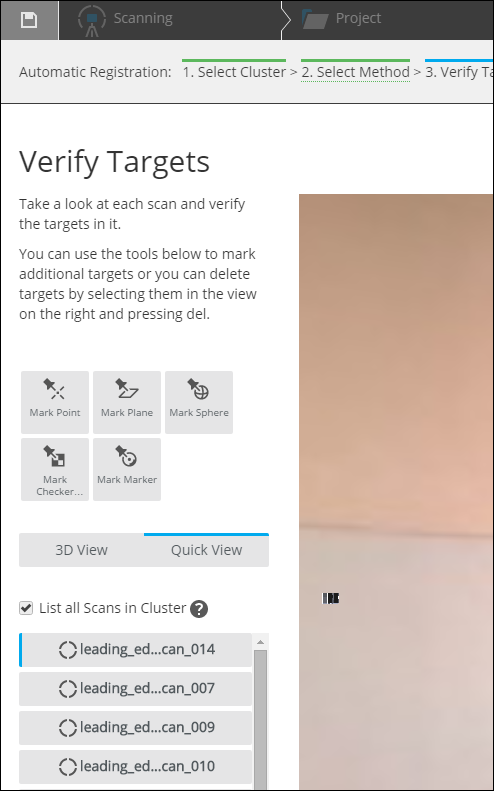
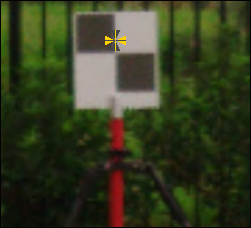
- You should see the survey point displayed on the corresponding target.
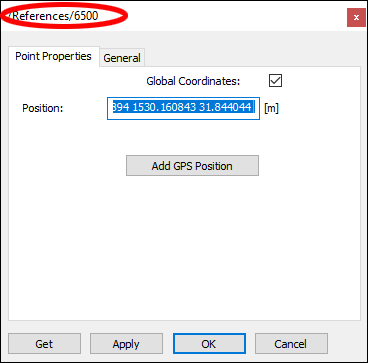
- To check the point, right-click it and click Properties.
- You should see the corresponding reference point in the window label.
- When you are done verifying targets, click Register and Verify on the top-right.
Classic Interface
- In the Structure tree, right-click a scan containing a reference point and click View > Planar View.
- You should see the survey point placed on the corresponding target.
- To check the point, right-click it and click Properties.
- You should see the corresponding reference point in the window label.
- When you are done verifying targets, right-click the top-level Scan Manager and click Update Scans. Note: You may be prompted to unlock the scan manager.
- Verify the results in the Scan Manager window.
- Click OK.
See Also
Keywords: registration, scans, external reference features, survey points