Software Download and Installation Instructions for WebShare Enterprise

Quick Steps
Click the link below to download the latest FARO® WebShare Enterprise.
| Date | Version | |
|---|---|---|
| Dec 19 2023 |
WebShare Enterprise 1.5 |
Download - Ubuntu (.deb) Download - Red Hat (.rpm) |
What's New in v1.5:
- Removed the functionality “WebShare Generator”
- Reduced installation package size (2 GB instead of 4 GB)
- Multilingual manual
- Updated 3rd party dependencies
Server Administration - Installation
Preparation
WebShare Enterprise requires a server or virtual machine running a 64-bit Linux operating system, (RedHat 8.2, Ubuntu 18.04, 20.04, or a later LTS version).
- For full server requirements, refer to: System Requirements for WebShare Enterprise
- For full server installation instructions, refer to the Sever Administration section of the User Manual for WebShare Enterprise
- Troubleshooting information can be found here: Troubleshooting and Server Logs for WebShare Enterprise
- Depending on your server environment, you may want to have the WebShare Enterprise program and data mounted from a separate partition or disk, and not from the root filesystem. In this case, the following folders should be mounted from the separate partition or disk:
/var/lib/docker

    /opt/faro-webshare
It is easier to prepare the disk setup before installing Docker and WebShare Enterprise. After adapting the disk setup, please reboot your server to ensure that the disk configuration is configured persistently.
- If you want to install WebShare Enterprise on a server without an Internet connection, make sure to have Docker already installed:
sudo apt-get update

    sudo apt-get install docker.io
Installation/Update
- If currently running, stop WebShare Enterprise:
sudo faro-webshare stop
- Install WebShare Enterprise:
- You should have at least 20G available to have enough space to extract and update the docker images.
sudo apt-get update

        sudo apt-get install <Folder>/faro-webshare-<Version>.deb
E.g. if the *.deb file is in your current folder, use something like:sudo apt-get install ./faro-webshare-1.0.0+123.abcd123.ws2.12.1.234.deb
- You should have at least 20G available to have enough space to extract and update the docker images.
- Wait until the installation is complete.
- To start WebShare Enterprise, use
sudo faro-webshare up -d- To stop use:
sudo faro-webshare stop
- To stop use:
- If this is a new installation, proceed to Server Administration - Activation and Configuration.
Server Administration - Activation and Configuration
Before attempting to configure WebShare Enterprise, make sure the server installation is complete and the service has been started, see: Server Administration - Installation
Note: If you are renewing your WebShare license, proceed to Server Administration - Renewals
When you first run WebShare Enterprise, it will show only the Server Configuration UI. You will at least have to complete the License and Admin account steps before WebShare Enterprise can be used. To start the initial configuration:
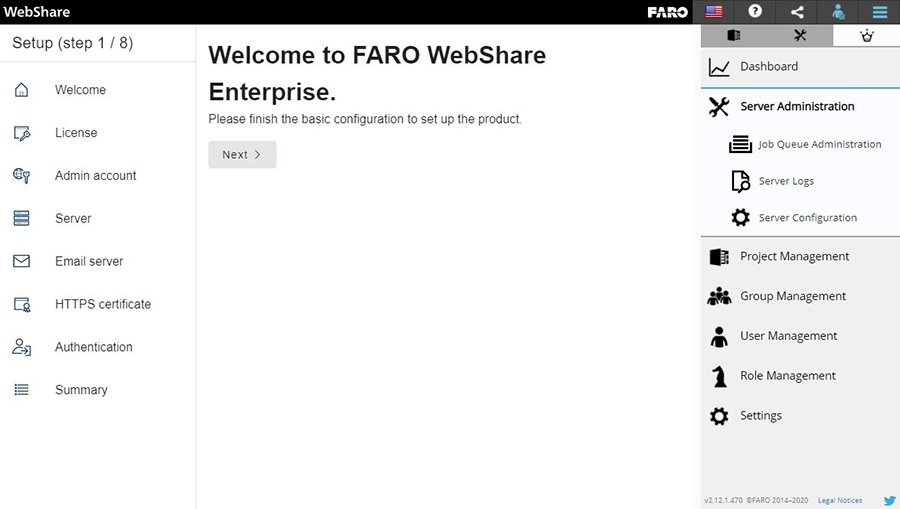
Step 1 of 8 - Welcome
- Open a web browser and goto: https://<IPAddressOrHostname>/
- Where <IPAddressOrHostname> is your server’s IP address or hostname. Example: https://123.45.67.89/ or https://webshare.example.com/
- It is expected to get a security warning in the browser as no valid HTTPS certificate has been configured yet. In the warning dialog, please tell the browser to ignore the warning for now.
- You will be prompted for a username and password. The default credentials are:
- Username: faroadmin
- Password: FaroAdmin1
- The Webshare Enterprise welcome page will be displayed. Click Next to continue. The sections below will guide you through each of the configuration steps.
- After WebShare is initially set up, any user with the Domain Administrator role can re-configure the server using Server Administration > Server Configuration from right sidebar menu.
- After WebShare is initially set up, any user with the Domain Administrator role can re-configure the server using Server Administration > Server Configuration from right sidebar menu.
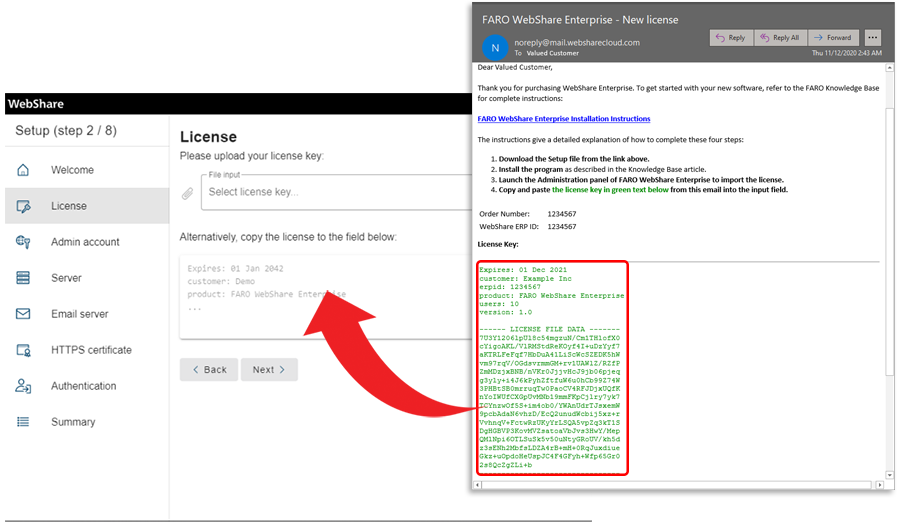
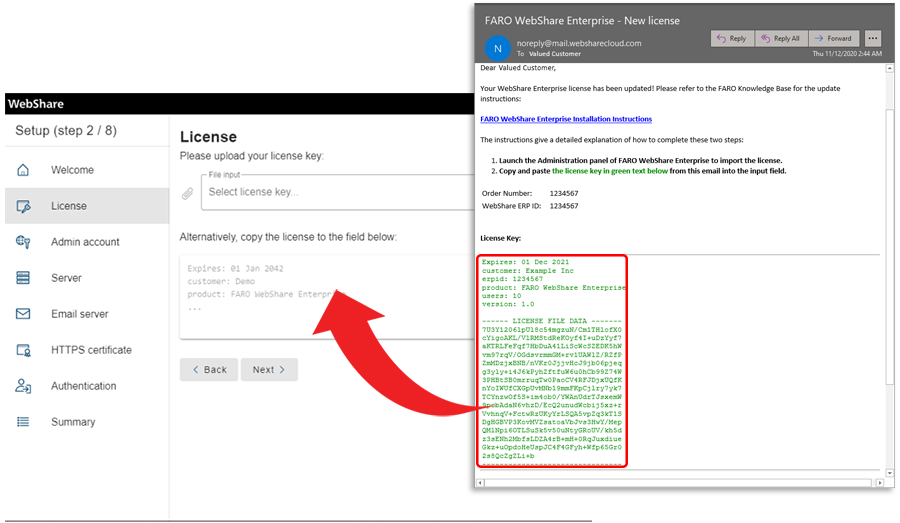
Step 2 of 8 - License
Upon purchase of WebShare Enterprise, you will receive a confirmation email containing your License Key. Copy and paste your WebShare Enterprise license key into the area shown below. Be sure to copy and paste all the information contained between the two horizontal lines as shown.
Note: You will also use this step for renewing the license. A new license key is generated for every renewal period.
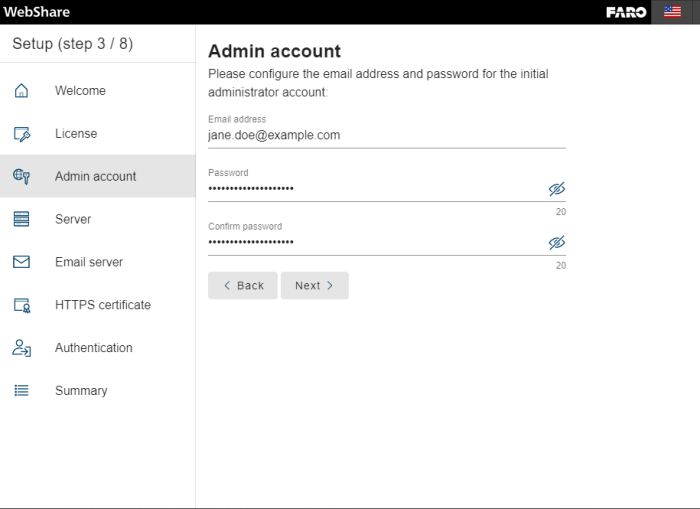
Step 3 of 8 - Admin Account
Update the admin account email and password. Upon installation, the default credentials are: Username: faroadmin and Password: FaroAdmin1
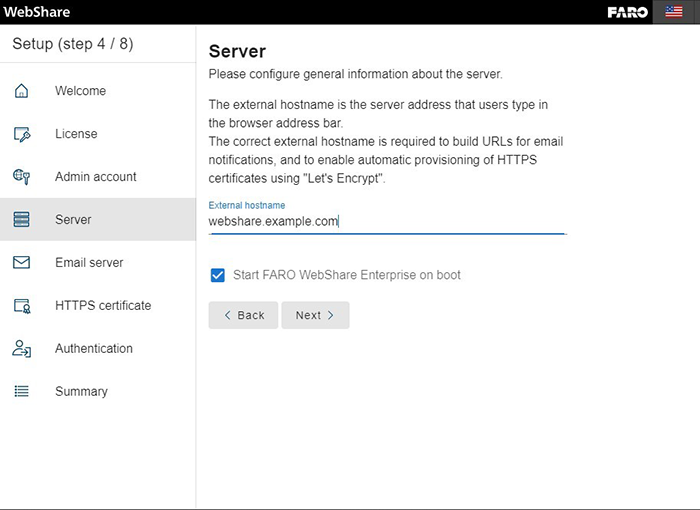
Step 4 of 8 - Server
Configure the external hostname of your server. This is important for emails sent by WebShare and for automatic provisioning of HTTPS certificates using Let’s Encrypt. The external hostname is the address that your users will use to connect to WebShare in the browser.
If "Start WebShare Enterprise on boot" is enabled, WebShare will automatically be started when your Linux server boots up, e.g. after you restarted it after installing operating system updates.
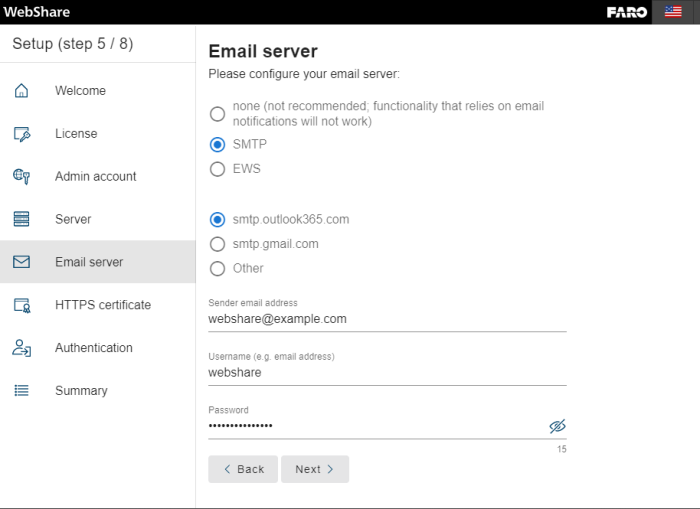
Step 5 of 8 - Email Server
Configure the SMTP or EWS connection that WebShare should use to send emails. For the best user experience, it is recommended to configure an email server. There are some preconfigured connections, or choose "Other" to configure an arbitrary email server. For most email servers, the Username will be your email address.
When creating a fresh Google account, there is a security mechanism that blocks the mail-sending from WebShare. To use your GMail account to send emails from WebShare:
Go to your Google account settings, under the Security settings, and enable "Less secure app access". Further information: https://support.google.com/accounts/answer/6010255
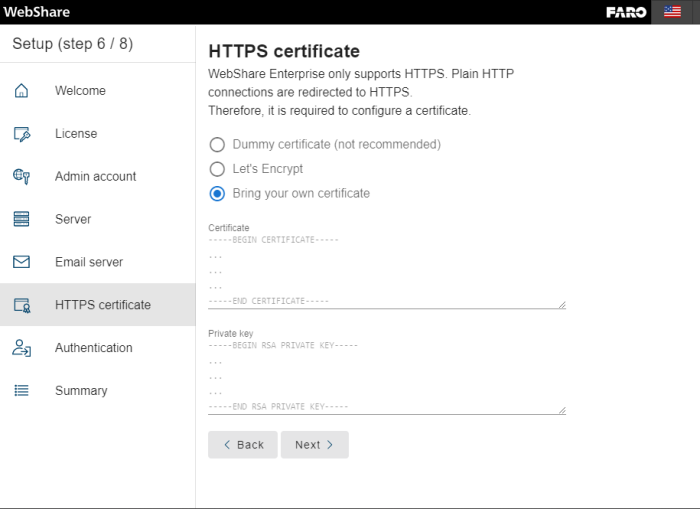
Step 6 of 8 - HTTPS Certificate
Configure the HTTPS certificate for the WebShare server.
- Dummy certificate:
- WebShare will generate a dummy certificate. This is insecure, and will result in a browser warning in the users' browsers.
- Let’s Encrypt:
- Automatic and free-of-charge provisioning of HTTPS certificates by the non-profit certificate authority Let’s Encrypt, using the ACME protocol. This option requires your server to be accessible from the public internet on port 443, and to have a public DNS record. Let’s Encrypt will connect to your server to verify that the server belongs to the hostname that you specified.
- Bring your own certificate:
- Copy and paste your own certificate and private key. The certificate should match the private key, and also match the hostname configured in Step 4 of 8 - Server.
- Copy and paste your own certificate and private key. The certificate should match the private key, and also match the hostname configured in Step 4 of 8 - Server.
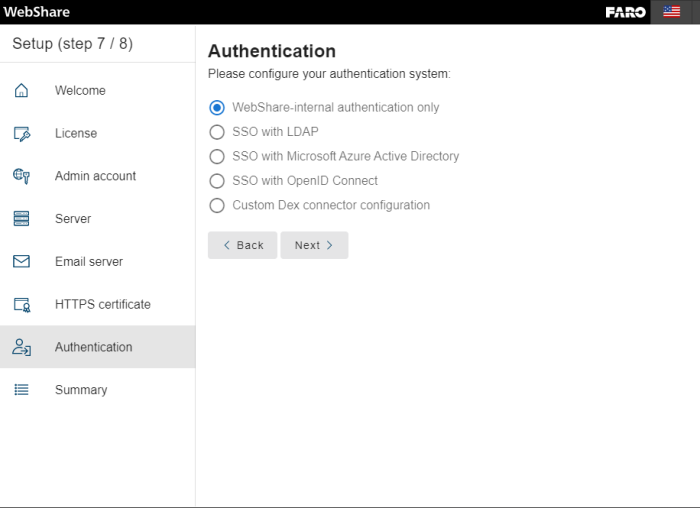
Step 7 of 8 - Authentication
Configure how your users will authenticate to WebShare. Among the selectable authentication systems, there are two main log in options for the users. WebShare internal authentication and several SSO (single sign-on) options:
If WebShare internal authentication only is selected the login workflow is the same as for the cloud version of WebShare. The users can be added and managed only using the Administration page of the WebShare. The other options can be used if company-wide authentication system exist (or simply single sign-on). In this case the Domain Administrator also has the option to require the users to log in only with single sign-on.
If you have enabled the option Require users to log in with SSO, then the WebShare internal authentication will yield an error message. Note this difference between the cloud version and WebShare (applies for both internal and SSO authentication):
When inviting a new user to the cloud version of WebShare, the User role is granted by default. When inviting a new user to your WebShare site, no roles will be granted by default. You must grant all roles explicitly using. Refer to the Role Management section in the User Manual for WebShare Enterprise.
Q&A about the single sign-on options
Q: What happens when a previously unknown user logs in with SSO?
A: The user will be automatically created in the WebShare database, but without any initial permissions.
Q: In which case one would use which option (LDAP, OIDC, ...)?
A: Depending on your company’s available authentication system choose the most specific one from the list. In case there is no option for required system please refer to the next point.
Q: What is Dex, and what is a custom connector configuration useful for?
A: Dex is an identity service that acts as a portal to other identity providers through connectors. This lets Dex defer authentication to previously mentioned SSO systems (LDAP, OIDC, …). With custom connector configuration you can use other SSO systems which are not on the list but which Dex supports, like SAML, GitHub, Google…
Q: When using SSO, how can users authenticate to WebShare in FARO applications without SSO support, e.g. SCENE?
A: If you have disabled the option Require users to log in with SSO, then SSO users will still be able to use internal authentication with a WebShare password. If you have enabled this option, then SSO users can create an App Password for SCENE in their WebShare account settings. Refer to the Role Management section in the User Manual for WebShare Enterprise.
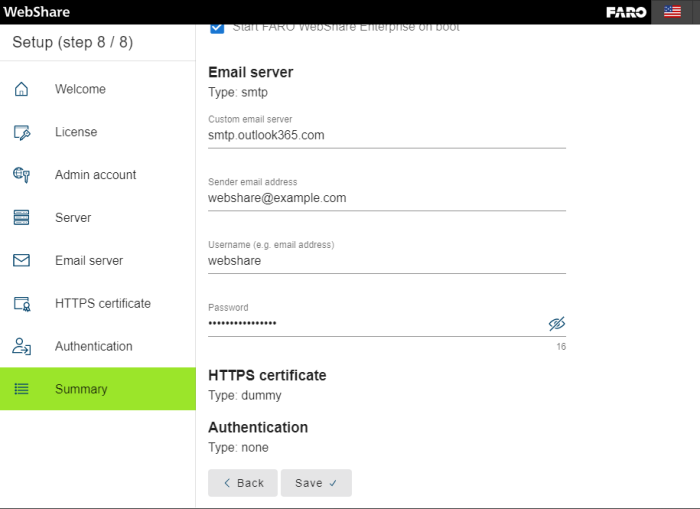
Step 8 of 8 - Summary
Review your changes and then click Save. Depending on the changes you made, a confirmation dialog will be shown to restart WebShare.
Server Administration - Renewals
A new license key is generated for every renewal period. Upon renewal of WebShare Enterprise, you will receive a confirmation email containing your License Key.
- Open a web browser and goto: https://<IPAddressOrHostname>/
Where <IPAddressOrHostname> is your server’s IP address or hostname. Example: https://123.45.67.89/ or https://webshare.example.com/ - You will be prompted for a username and password. Login using your administrator credentials. If you have not changed them, the default credentials are:
- Username: faroadmin
- Password: FaroAdmin1
- From the Server Administration menu click "Server Configuration"

- Copy and paste your WebShare Enterprise license key into the area shown below. Be sure to copy and paste all the information contained between the two horizontal lines as shown.
Server Administration - Migrating the Data to Another Disk
Make sure you a have a fixed path to an empty folder prepared on the new disk. You will need this path in the next steps.
Please note that all existent docker images/containers/volumes on the machine will be affected as well, not only those for WebShare Enterprise.
In the procedure below, we’ll use the folder location `/new/path/docker` as example.
- Stop WebShare Enterprise:
sudo faro-webshare stop - Stop docker service:
sudo systemctl stop docker - Edit docker configs on
/etc/docker/daemon.json
(This file may not exist yet, but will be created with the first command below):sudo vim /etc/docker/daemon.json- Insert the following with the new path:
{
"data-root": "/new/path/docker"
}
- Copy the files to the new location:
sudo cp -axT /var/lib/docker /new/path/docker - Rename the old docker folder as a temporary backup. This allows testing the migration to check if everything works as expected:
sudo mv /var/lib/docker /var/lib/docker_old - Restart docker daemon:
sudo systemctl start docker - Restart WebShare Enterprise:
sudo faro-webshare up -d - Test and make sure that everything is still working as expected.
- (Optional) After confirming step 8, you can delete the old docker folder:
sudo rm -rf /var/lib/docker_old