Installation and Configuration for the Renishaw TP20 and Sensor Probes
Overview
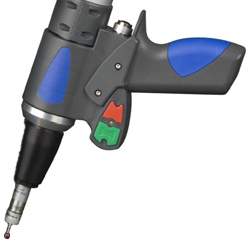
Renishaw TP20The Renishaw TP20 touch-trigger probe automatically digitizes a point by touching the stylus to the part, which allows for the measurement of flexible parts without part deflection. The probe system is ideal for complex part measurement, where a range of stylus configurations is needed to access all features on the part. The probe's unique sensing mechanism also overcomes the need to press capture buttons (green/red) and ensures that data is taken only when the stylus is in contact with the part, eliminating the need to remove erroneous data collected when a hard probe leaves the work-piece while measuring. This helps minimize operator influence. Renishaw offers many accessories for these probes. They have low, standard, medium and extended force modules to name a few. FARO ships the Renishaw TP20 kit with two medium force modules.
|
 |
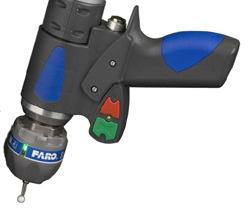
Renishaw Sensor ProbeThe Renishaw Sensor Probe function is similar to the TP20 probe. The only difference you will notice is that the sensor probe is rigid, where the TP20 probe has “play”. It uses a different sensing mechanism but provides all the same benefits as the TP20. One additional benefit of the Sensor Probe are the feedback LED’s on the body of the probe.
|
 |
Model Support
| FaroArm®/ScanArm | TP20 Probe Part# | Sensor Probe Part# |
|---|---|---|
| Quantum Series, Design ScanArm 2.0/2.5† | 11769*** | 11903 |
| Edge, Design ScanArm, Forensic ScanArm† | 11769** | 11903 |
| Fusion | PROBE0072* | Not Compatible |
| Prime | PROBE0072* | Not Compatible |
| Platinum | PROBE0072* | Not Compatible |
| Legacy Quantum | 11769** | 11903 |
| Titanium | PROBE0072* | Not Compatible |
| Advantage | PROBE0072* | Not Compatible |
| Digital Template | Not Compatible | Not Compatible |
| Gage | PROBE0072* | Not Compatible |
† TP20 touch probes are not supported on the Edge FaroArm with the 8-Axis. TP20 touch probes are supported on the Quantum/Quantum Max FaroArm with the 8-Axis. However, you must compensate the 8-Axis using the 6mm or 3mm hard probe. Once complete then reattach the TP20 touch probe.
* The Renishaw port is optional. To use the TP20 probe, this option must have been selected at the time of order. If your FaroArm does not have the option port, it must be returned for service to have the port added (part# 1001-1024).
** Requires adapter part# 11713
*** Requires adapter part# 20735
Installation and User Guides
Click a link below to download the latest Renishaw Sensor Probe or TP20 Probe Installation and User Guide. Also see the FaroArm Accessories Manual for more documentation about Renishaw probes.
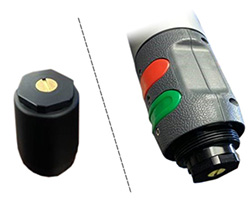 |
Before installation of the TP20 probe, remove the brass set screw from the end of the FaroArm (or adapter if required for your model). The set screw is installed to protect a very sensitive pin that allows the Renishaw probe to read movement from the probe tip. The set screw should always be reinstalled when the Renishaw probe is not in use. Use extreme caution when reinstalling the set screw, if tightened or screwed in to far it will damage the pin and could void warranty if improperly installed. |
| Date | Model | Download |
|---|---|---|
| Jan 2014 | Sensor Probe | |
| Dec 2007 | TP20 |
Configuration and Compensation
FaroArm Manager, CAM2, and Measure 10
After the touch probe/adapter is installed…
|
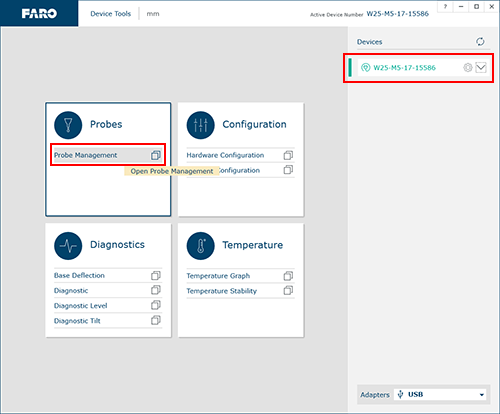
FaroArm Manager: Open the FaroArm manager, Start> FARO> FaroArm Manager Verify the FaroArm you are using is selected on the right and then click Probe Management. |
 |
|
CAM2/Measure 10: Press the “P” key or on the Home tab, click the Device Center icon Click on the FaroArm you are using. |
|
 to open the Device Center window.
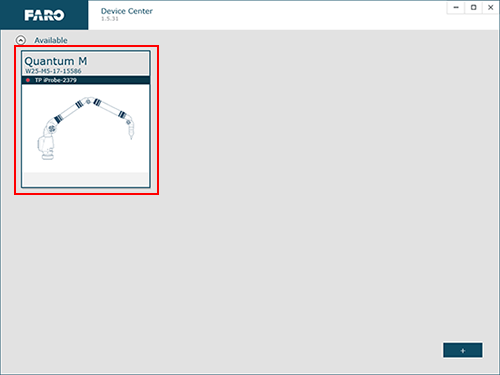
|
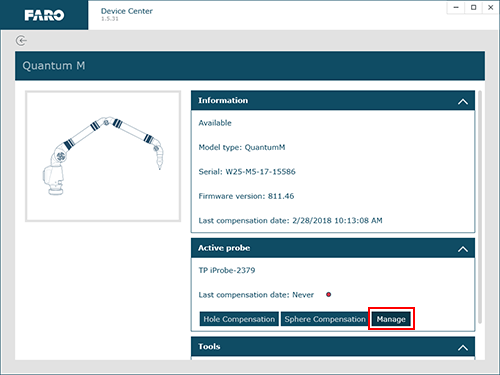
Click the Manage button. |
 |
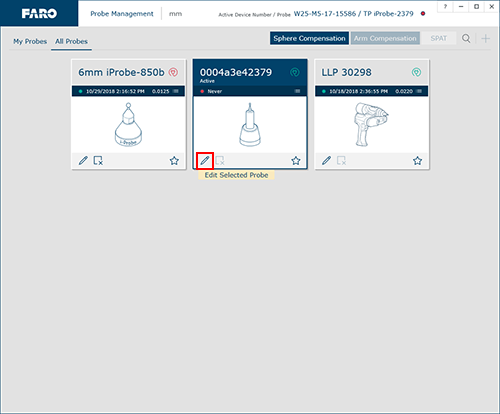
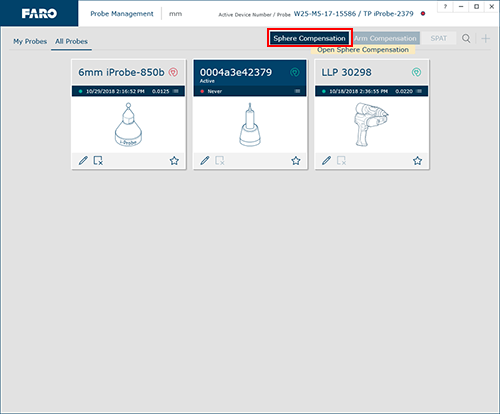
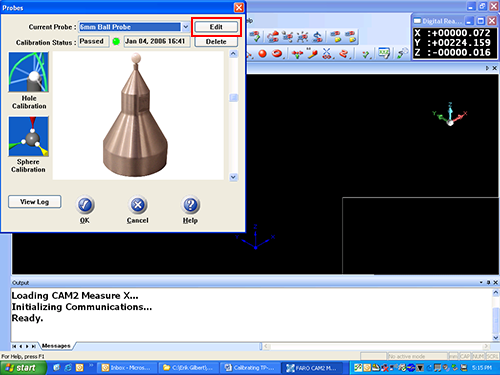
On the Probe Management screen, verify the TP20 Probe is active and then click the pencil icon to edit the probe values.
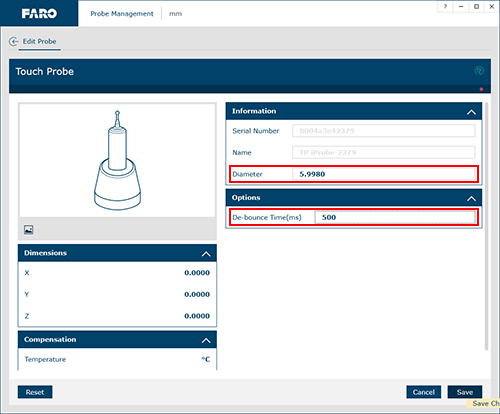
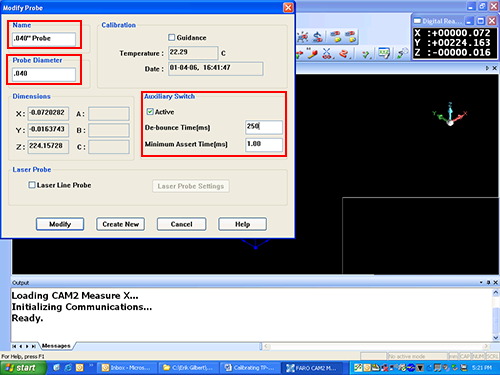
Enter the Probe Diameter and then enter 500-1000 for a De-bounce Time and then click Save.
Click the back arrow  (at the top right of the window) to return to Probe Management screen and click the Sphere Compensation button.
Click Start Compensation and follow the on-screen instructions to compensate the probe. For more information, search for “Sphere Compensation Method" in the User Manual for your FaroArm model.
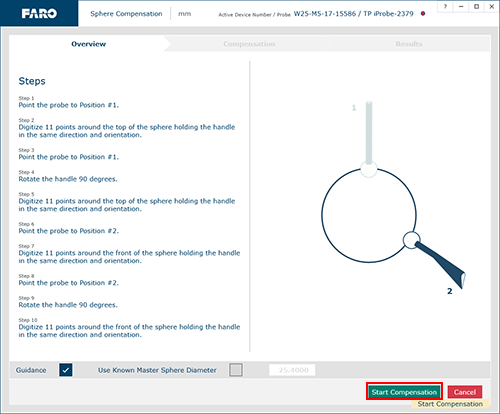
NOTE: The probe compensation stores information for the adapter. However, since the probe tip is removable, do not rely on an existing compensation unless you are certain that the TP20 body or the probe tip have not been changed.
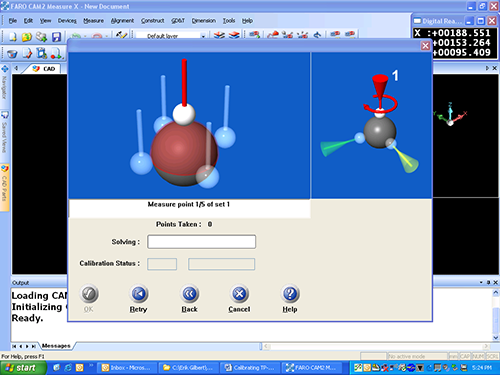
Measure X
|
 |
|
 |
|
 |
Handling and Storage
When using the Renishaw, be sure not to apply excessive pressure on the tip as this may damage the delicate parts inside the Renishaw and may not be covered under the Renishaw Warranty Plan. When the Renishaw is not in use, disconnect it from the FaroArm and store in the Renishaw case in order to reduce any potential damage. Should any damage occur due to neglect of proper storage, this may not be covered under the Renishaw warranty plan. Refer to the Installation and User Guides for the Renishaw Sensor Probe and TP20 Probe for the FaroArm for details or contact Renishaw directly.