                     
As-Built As-Built - Revit As-Built - AutoCAD VirtuSurv - VirtuSurv 2018 As-Built - Modeler VirtuSurv - VirtuSurv 2019          
BuildIT BuildIT - Projector BuildIT - Construction BuildIT - Metrology              
CAM2 CAM2 - SmartInspect CAM2 - 2023 CAM2 - 2018 CAM2 - Measure 10 CAM2 - Measure Q CAM2 - Measure X CAM2 - Measure 3/4 CAM2 - AnthroCAM CAM2 - 2019 CAM2 - 2020
CAM2 CAM2 - 2021                  
Cobalt 3D Imager 3D Imager - Cobalt                  
Cobalt Design Cobalt Design - M Cobalt Design - S Cobalt Design - Dual              
Computers Computers - All Computers                  
FARO Aras 360 & CAD Zone FARO CAD Zone - Fire & Insurance FARO CAD Zone - Crime & Crash FARO CAD Zone - CZ Point Cloud FARO CAD Zone - First Look Pro FARO 360 - Reality FARO 360 - HD FARO 360 - Blitz FARO 360 - Genius    
FARO Connect FARO Connect - Connect                  
FARO Zone present4D - present4D                  
FARO Zone 2D FARO Zone 2D - 2018 FARO Zone 2D - 2019 FARO Zone 2D - 2020 FARO Zone 2D - 2021 FARO Zone 2D - 2022 FARO Zone 2D - 2023        
FARO Zone 3D FARO Zone 3D - 2018 FARO Zone 3D - 2019 FARO Zone 3D - 2020 FARO Zone 3D - 2021 FARO Zone 3D - 2022 FARO Zone 3D - 2023 FARO Zone 3D - 2024      
FARO Zone 3D Advanced FARO Zone 3D Advanced - 2018 FARO Zone 3D Advanced - 2019 FARO Zone 3D Advanced - 2020 FARO Zone 3D Advanced - 2021 FARO Zone 3D Advanced - 2022          
FaroArm/ScanArm FaroArm/ScanArm - Quantum S FaroArm/ScanArm - Quantum M FaroArm/ScanArm - Quantum E FaroArm/ScanArm - Edge FaroArm/ScanArm - Fusion FaroArm/ScanArm - Prime FaroArm/ScanArm - Platinum FaroArm/ScanArm - Legacy Quantum FaroArm/ScanArm - Titanium FaroArm/ScanArm - Advantage
FaroArm/ScanArm FaroArm/ScanArm - Digital Template FaroArm/ScanArm - Gage FaroArm/ScanArm - Quantum S Max FaroArm/ScanArm - Quantum M Max FaroArm/ScanArm - Quantum E Max FaroArm/ScanArm - Gage Max        
GeoSLAM Software GeoSLAM Software - Connect GeoSLAM Software - Draw GeoSLAM Software - Hub GeoSLAM Software - Volumes            
GeoSLAM ZEB GeoSLAM ZEB - Horizon GeoSLAM ZEB - Horizon RT GeoSLAM ZEB - Revo GeoSLAM ZEB - Revo RT GeoSLAM ZEB - Go          
Hand Held Scanner 2D Hand Held Scanner - ScanPlan 3D Hand Held Scanner - Freestyle3D 3D Hand Held Scanner - Freestyle3D X 3D Hand Held Scanner - Freestyle3D Objects 3D Hand Held Scanner - Freestyle 2          
Language Quality HT MT AT NT INT - Internal Sales - Internal Resources Sales - Order and Quote Sales - Product Info Sales - Sales Readiness Sales - Training
Language Quality Sales - Product Launch Sales - Promotions CS - Quote to Invoice CS - Phone System CS - New Hire Training CS - General CS - Product Info CS - Licensing CS - Procedures General CS - Procedures Salesforce
Language Quality CS - Procedures Loaner CS - Procedures SAP                
Languages Language - English Language - Japanese Language - German Language - Chinese Language - Spanish Language - Italian Language - Portuguese Language - French Language - Korean  
Laser Projector RayTracer - RayTracer Laser Projector - Tracer M Laser Projector - Tracer SI              
Laser Radar Imaging Laser Radar - VectorRI                  
Laser Scanner 3D Laser Scanner - Focus S 3D Laser Scanner - Focus M 3D Laser Scanner - Focus3D 3D Laser Scanner - Focus3D X 3D Laser Scanner - Focus3D X HDR 3D Laser Scanner - Focus3D S 3D Laser Scanner - Photon 3D Laser Scanner - Focus S Plus 3D Laser Scanner - Swift 3D Laser Scanner - Focus Premium
Laser Scanner 3D Laser Scanner - Focus Core                  
Laser Tracker Laser Tracker - Vantage Laser Tracker - ION Laser Tracker - Vantage S Laser Tracker - Si Laser Tracker - X Laser Tracker - Xi Laser Tracker - Vantage E Laser Tracker - Vantage S6 Laser Tracker - Vantage E6  
Legacy Gage Legacy Gage - Bluetooth Legacy Gage - Plus Legacy Gage - Standard Legacy Gage - Power            
Legacy Software Legacy Software - CAM2 Gage Legacy Software - Gage Software Legacy Software - Insight              
Mobile Scanner Mobile Scanner - Orbis                  
PointSense PointSense - Basic PointSense - Pro PointSense - Building PointSense - Plant PointSense - Heritage PointSense - Revit CAD Plugin - TachyCAD Building CAD Plugin - TachyCAD Archeology CAD Plugin - TachyCAD Interior CAD Plugin - PhoToPlan Basic
PointSense CAD Plugin - PhoToPlan CAD Plugin - PhoToPlan Pro CAD Plugin - PhoToPlan Ultimate CAD Plugin - DisToPlan CAD Plugin - MonuMap CAD Plugin - hylasFM CAD Plugin - VirtuSurv      
RevEng RevEng - RevEng                  
ScanArm ScanArm - Design ScanArm 2.0 ScanArm - Design ScanArm ScanArm - Forensic ScanArm ScanArm - Design ScanArm 2.5C            
SCENE SCENE - Capture and Process SCENE - WebShare Server and 2Go SCENE - WebShare 2Go App SCENE - 2018 SCENE - 7.x SCENE - 6.x SCENE - 5.x SCENE - 4.x SCENE - LT SCENE - 2019
SCENE SCENE - 2go App SCENE - 2020 SCENE - 2021 SCENE - 2022 SCENE - 2023          
Serial FaroArm Serial FaroArm - Silver Serial FaroArm - Gold Serial FaroArm - Bronze              
Sphere FARO Sphere - Sphere                  
Visual Inspect Visual Inspect - App Visual Inspect - CAD Translator                
WebShare WebShare - Enterprise WebShare - WebShare Cloud                

3D Laser Scanner

Focus Core

Focus Premium

Focus S

Focus S Plus

Focus M

Focus3D

Focus3D X

Focus3D X HDR

Focus3D S

FARO® Knowledge Base

Cleaning the Focus Laser Scanner

FocusSME.jpg

Overview

In the following article you can find step-by-step instructions on how to properly clean FARO® Focus Laser Scanners.

Attention Focus Premium Users:
The performance of any measurement device will degrade due to contamination of the optical system. Due to the high accuracy of the Focus Premium Laser Scanner, these models tend to be more susceptible to dust/dirt contamination of the optical system. It is recommended to inspect (and clean if necessary) the mirror and sensor optic glass cover frequently, particularly when scanning is performed in very dusty environments. Please follow the cleaning guidelines in this article.


Before You begin

  • To avoid unnecessary damage or wear, clean the optics only if the degree of contamination requires cleaning for proper functioning, for example, if an increase in noise or a decrease of the scan range is observed. 
  • Cleaning must be performed only by trained personnel, as any damage occurred during cleaning may require a complete replacement of the part at the expense of the customer. If in doubt, contact the customer service at FARO.
  • Do not touch the mirror with tweezers or forceps. 
  • Do not touch the optical surfaces with your bare hands. We recommend using latex gloves. If you have latex allergies, use gloves that are suitable for you or have someone else carry out the cleaning.
  • If the scanner is accidentally switched on, the mirrors may start to turn and result in hand injuries. So before starting cleaning shut-down the laser scanner module and remove the battery pack. If using an external power supply, remove the power line. This will prevent the mirror from turning during the cleaning.

Required Materials

Cleaning Slightly Contaminated Optics

To learn how to proper clean slightly contaminated optics, watch the following video:


Below you can find the illustrated step-by-step process.

Dry Pre-Cleaning (Non-Contact Cleaning)

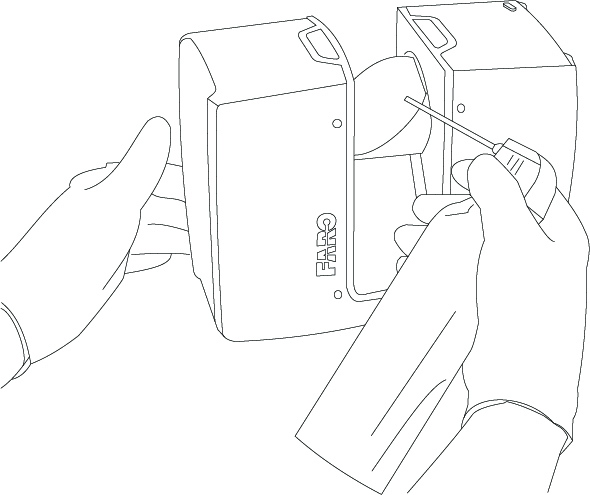
Start by removing any dust or liquid droplet from the mirror or sensor cover by using compressed dry air or special duster sprays (dry cleaning gas), without touching the optical surface of the object.

  1. Gently blow off particles from the optical surface with compressed dry air or special duster sprays. While using the spray, do not shake the bottle or turn it upside down.


    Cleaning the FARO Focus Premium Laser Scanner_Fig.1.jpg
     
  2. Perform visual inspection.
     
  3. Repeat dry cleaning as required.
     
  4. Proceed with Wet Cleaning with Tissue and Optical Cleaning Fluid below.

Wet Cleaning with Tissue and Optical Cleaning Fluid

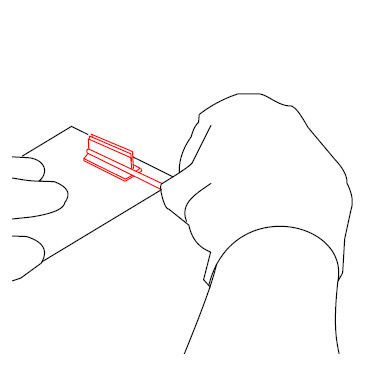
  1. While using a new pair of gloves, put together two or three sheets of optics cleaning tissue.
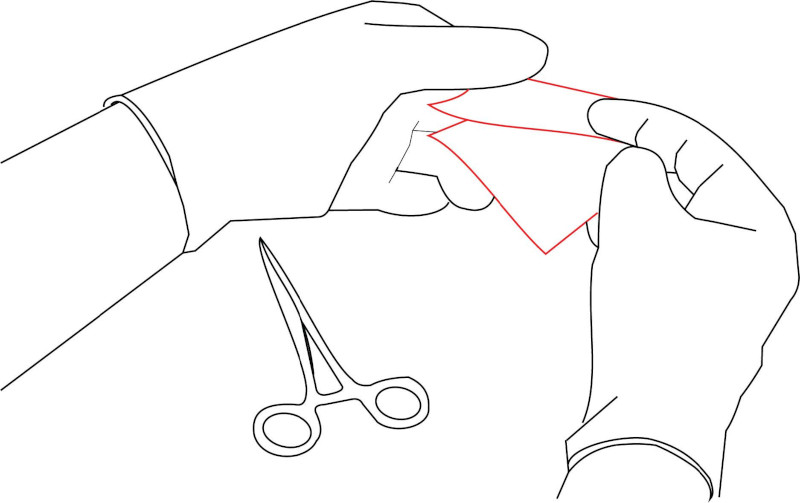
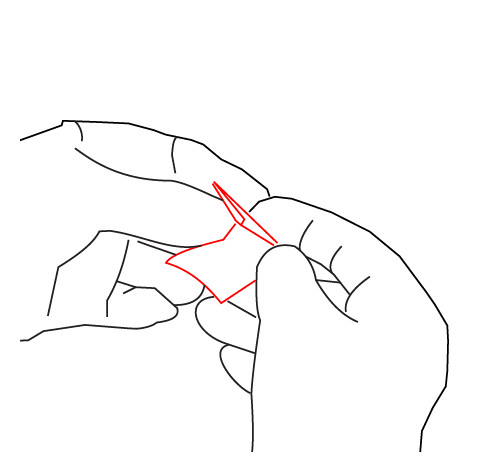

    Cleaning the FARO Focus Premium Laser Scanner_Fig.2.jpg
     
  2. Fold the cleaning pads in half

    Cleaning the FARO Focus Premium Laser Scanner_Fig.3.jpg
     
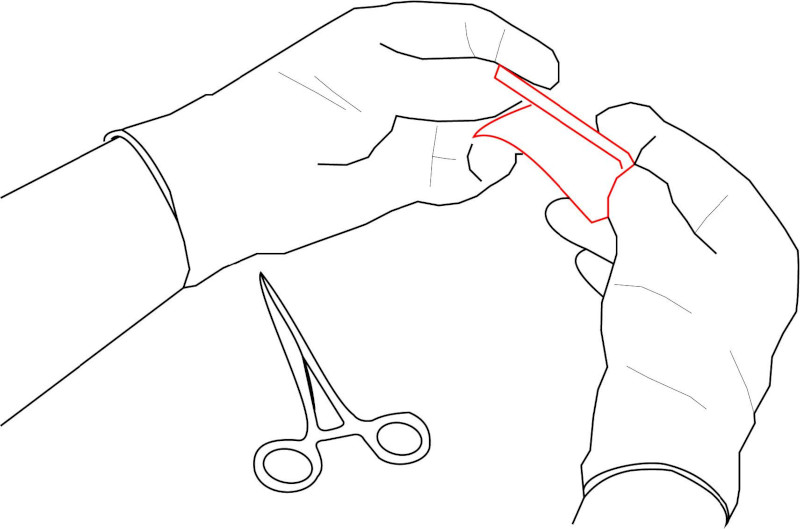
  3. Fold the pads in half once more ir order to create a squared soft pad that is about 30 mm (1.18 in) long.
    Cleaning the FARO Focus Premium Laser Scanner_Fig.4.jpg
     
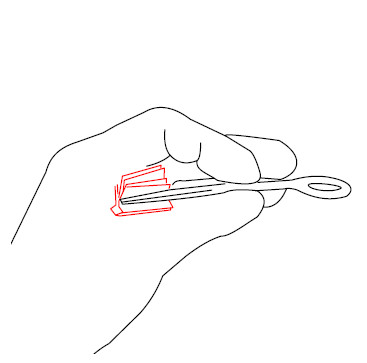
  4. Use the forceps to fix the cleaning pad. Leave at least 2-3 mm (0.078 in - 0.118 in) between the edge of the pad and the forceps.

    Cleaning the FARO Focus Premium Laser Scanner_Fig.5.jpg
     
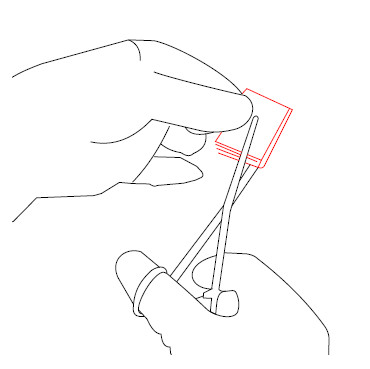
  5. Slightly compress the pad on top of the spare cleaning tissues to create a T-shaped cleaning pad.

    Cleaning the FARO Focus Premium Laser Scanner_Fig.6.jpg                              Cleaning the FARO Focus Premium Laser Scanner_Fig.7.jpg
     
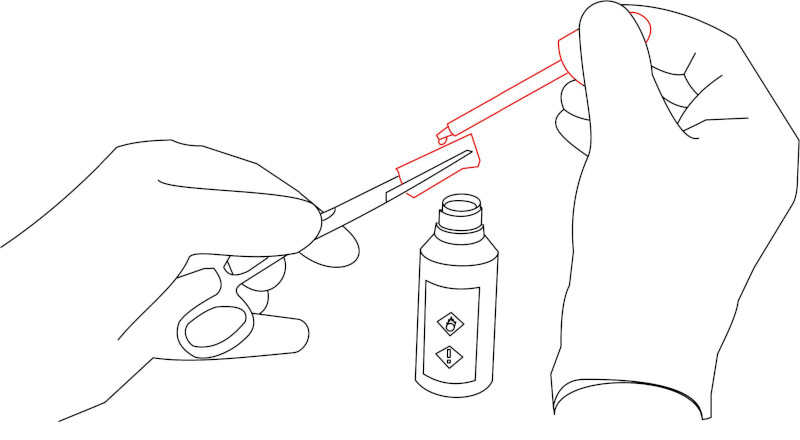
  6. Use the eye-dropper to soak the cleaning pad with optical cleaning fluid.

    Cleaning the FARO Focus Premium Laser Scanner_Fig.8.jpg
  7. With a single, consistent linear motion from one end to the other, gently wipe the mirror or sensor cover glass with the cleaning pad. Do not apply pressure while wiping, to avoid damaging the optical surface. The forceps mus not in any circumstances touch the mirror or sensor cover glass.

    Cleaning the FARO Focus Premium Laser Scanner_Fig.9.jpg                   Cleaning the FARO Focus Premium Laser Scanner_Fig.10.jpg
     
  8. After each cleaning cycle, discard the cleaning pad and prepare a new pad as described above.
  9. Repeat the cleaning until the full mirror or sensor cover aperture has been wiped once.
  10. Check cleaning status by visual inspection.
  11. Prepare another cleaning pad with optical cleaning fluid and gently wipe the mirror's entire surface with gentle pressure and in a linear direction.
  12. Check cleaning status by visual inspection. Ensure that no contamination remains. If there is still contamination, repeat the cleaning with the optical cleaning fluid.
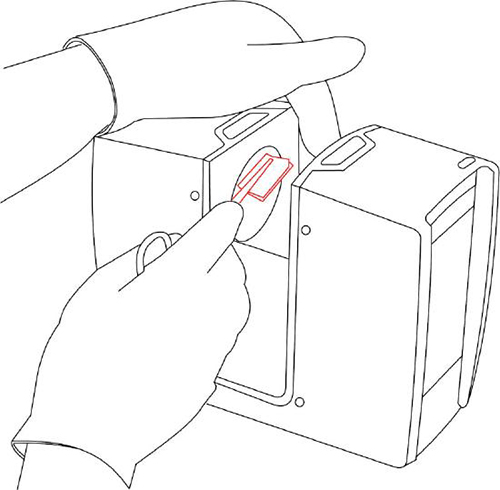
Cleaning Strongly Contaminated Optics

Dry Pre-Cleaning (Non-Contact Cleaning)


Start by removing any dust or liquid droplet from mirror or sensor cover by using compressed dry air or special duster sprays (dry cleaning gas), without touching the optical surface of the object.

  1. Gently blow off particles from the optical surface with compressed dry air or special duster sprays. While using the spray, do not shake the bottle or turn it upside down.

    Cleaning the FARO Focus Premium Laser Scanner_Fig.1.jpg

  2. Perform visual inspection.
  3. Repeat dry cleaning as required.
  4. Proceed with Wet Cleaning with Water or Diluted Mild Soap Solution below.

Wet Cleaning with Water or Diluted Mild Soap Solution

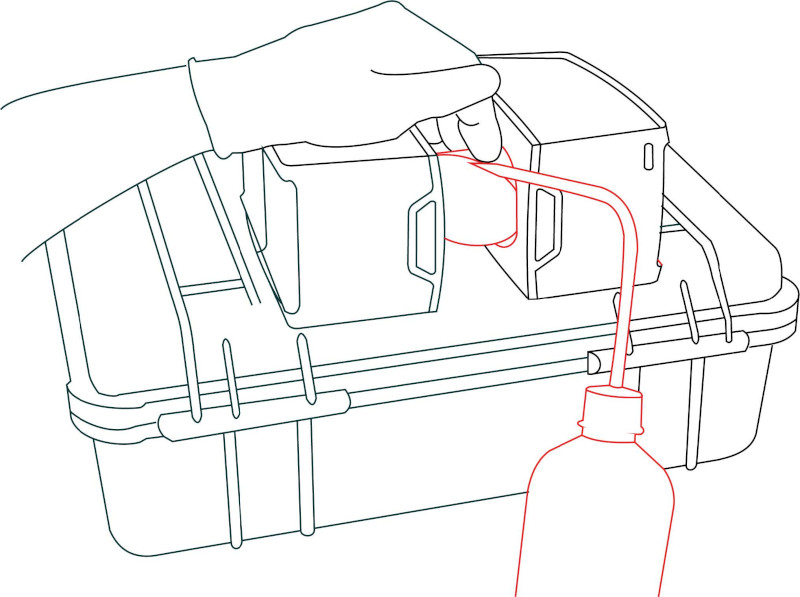
  1. In a stable rigid base, like a table or transport box topside, remove the laser scanner unit from its tripod.


    Cleaning the FARO Focus Premium Laser Scanner_Fig.11.jpg
     
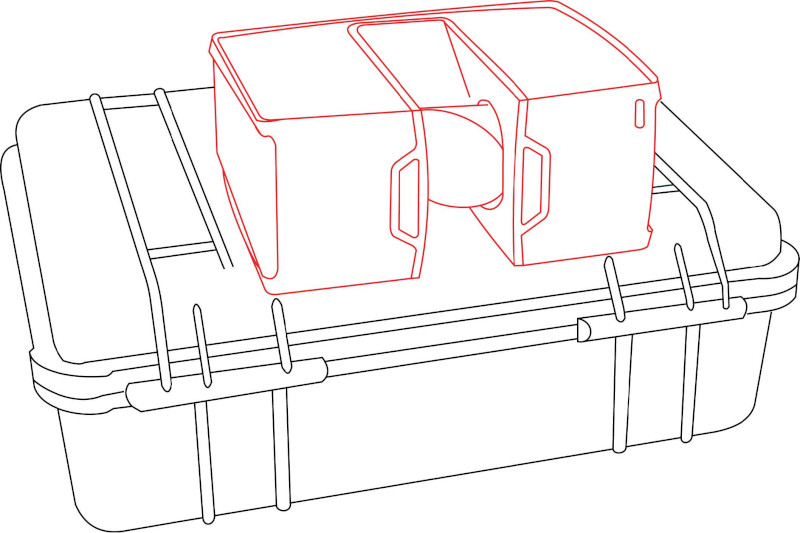
  2. Lay the scanner on its long side.
  3. Ensure that the mirror can move freely and is easily accessible for wet cleaning.

    Cleaning the FARO Focus Premium Laser Scanner_Fig.12.jpg
     
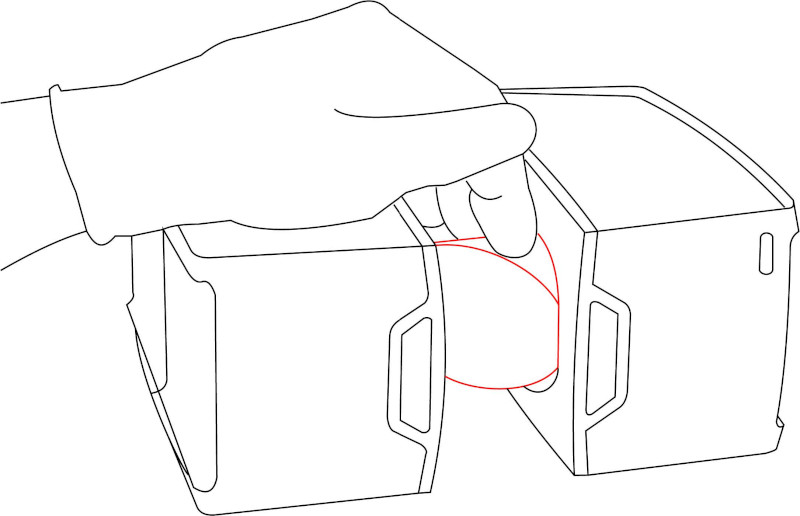
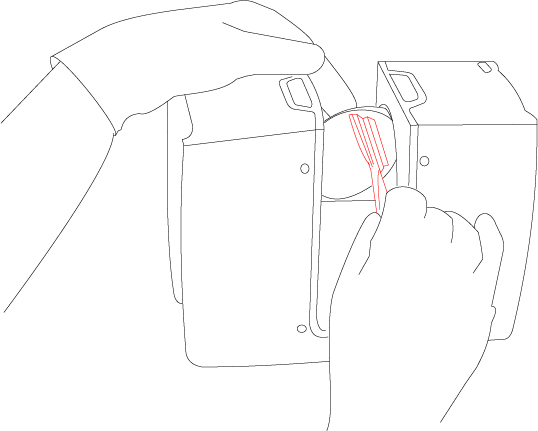
  4. Using dust-free gloves, turn the mirror module into a vertical position, so the mirror points away from the scanner. Secure the mirror with your fingertips to maintain it in this position.
  5. Clean the mirror module (that is, the sensor cover) by rinsing it with water or diluted neutral soap solution in oscillation motion.

    Cleaning the FARO Focus Premium Laser Scanner_Fig.13.jpg
     
  6. Wait for the cleaning liquid to drain or dry off. Do not try to dry the optics by wiping with tissue at this stage, because residual contamination may cause severe damage to optics.
  7. Perform visual inspection of cleaning status.
  8. Repeat the rinsing step until contamination is significantly reduced or removed.
  9. Wait for the optics to dry.
  10. Turn laser scanner into upright (normal) position and ensure stable placement. For example, place scanner on a table or transport box. Alternatively, use the tripod for mounting.
  11. Proceed to the Cleaning Slightly Contaminated Optics process as explained above.