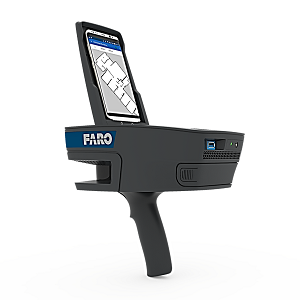
Exporting ScanPlan Files
Overview
ScanPlan projects can be exported in a variety of formats for use with FARO applications or other 3rd party programs.
Note: Some formats are only available with the latest versions of the firmware and app.
Optimizing Your Project
A ScanPlan project must be optimized before it can be exported for most formats.
- When you finish scanning a project, tap Optimize to begin the optimize process.
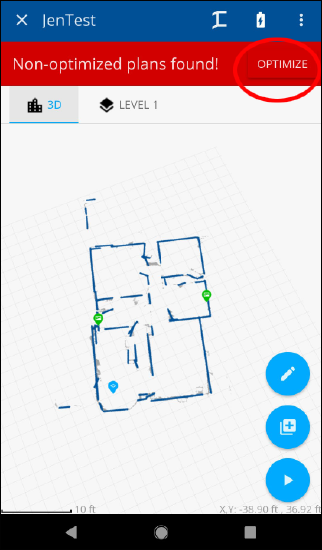
- Select the project from the project list, and tap START.
Note: Optimization times will vary depending on the size of your project. - When optimization is complete, tap < and click YES to exit the map optimizer.
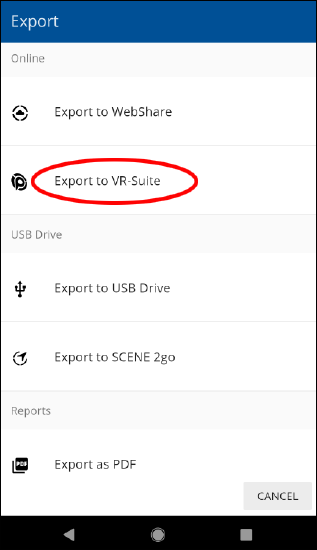
Exporting to SCENE 2go
- Click the Menu button.
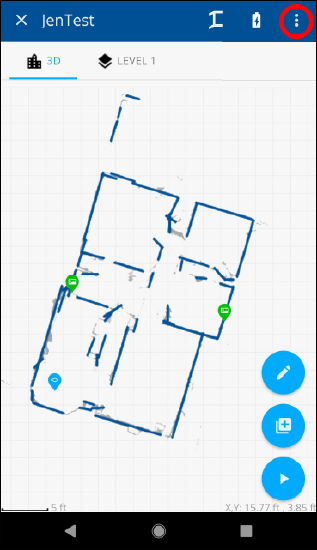
- Click Export.
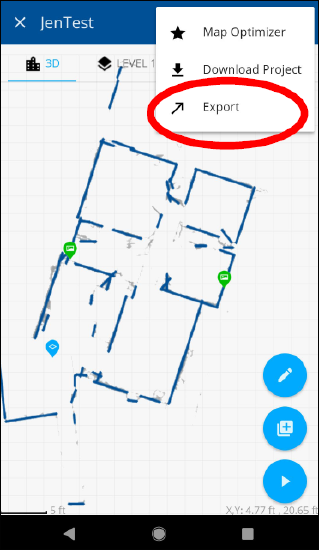
- Tap Export to SCENE 2go.

- Click OK when the export is completed.
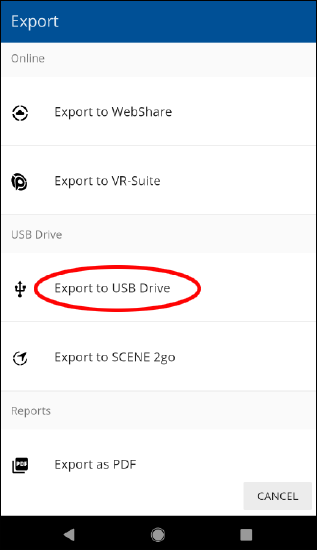
Exporting to USB Drive
Before beginning, make sure you have inserted a USB drive into the ScanPlan, and the software has recognized the device.
- Click the Menu button.
- Click Export.
- Tap Export to USB Drive.
- When the export is finished, either click the X at the top of the screen or DISMISS at the bottom.
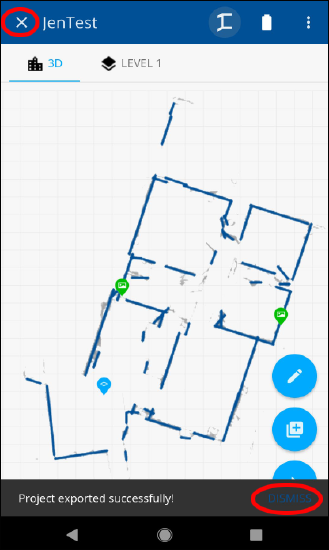
- Click YES to confirm closing the project.
Exporting to WebShare Cloud
Note: In order to upload a project to WebShare Cloud, you will need to have an active account for one of the WebShare Cloud Domains. You will also need to ensure your phone is connected to a WiFi source or equipped with a SIM card.
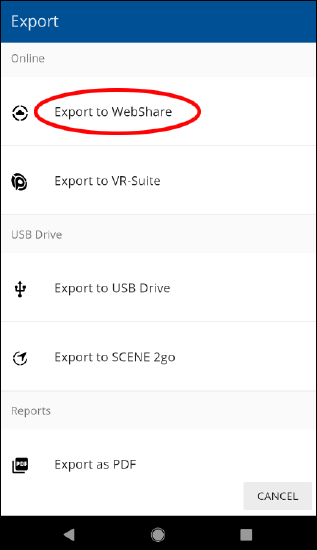
- Click the Menu button.
- Click Export.
- Tap Export to WebShare.
- Enter your account information.
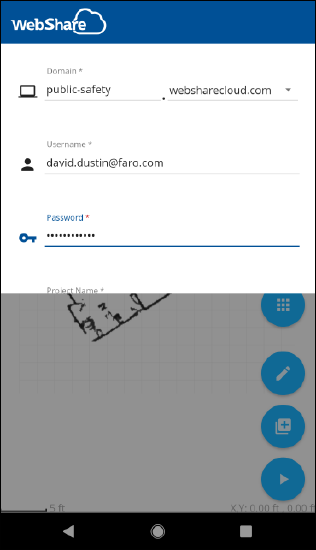
- Slide the area up and tap EXPORT.
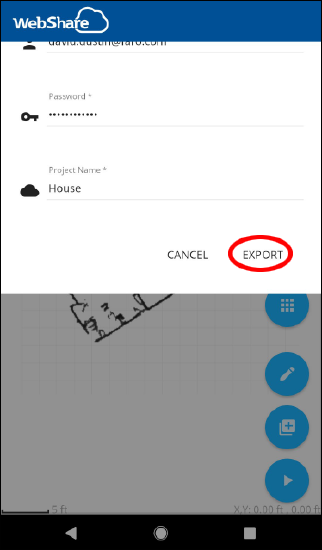
- When the export is complete, tap OK.
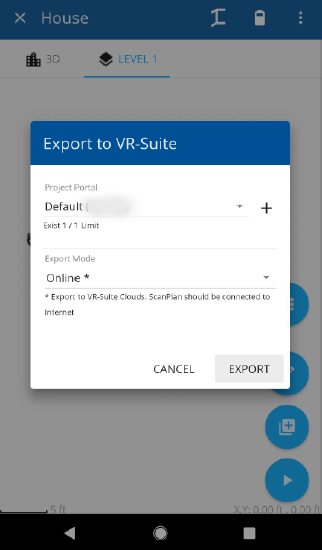
Export to VR-Suite
Note: In order to upload a project to VR-Suite, you will need a VR-Suite account and license. You will also need to ensure your phone is connected to a WiFi source or equipped with a SIM card.
- Click the Menu button.
- Click Export.
- Tap Export to VR-Suite.
- If you have not activated a new VR-Suite License, you will be prompted to do so. Enter the serial number and click ACTIVATE.
- If the license has been activated, you will be prompted to enter your six-digit portal number in the Export to VR-Suite window. Enter the number and tap EXPORT.
Export to DXF
- Click the Menu button.
- Click Export.
- Tap Export as DXF (AutoCAD).
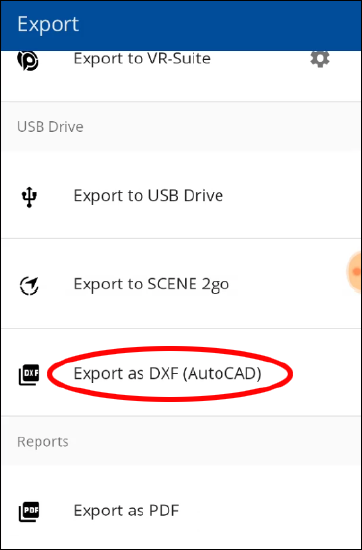
- You may be prompted to insert an USB stick, if you have not already done so.
- Choose the project level to be exported and press OK.
- Click OK when the export is complete.
Note: The DXF file and an image of the map are saved on the USB stick in the folder FAROScanPlanCADExport.
Export a Point Cloud
You can export as a Point Cloud in different formats (CPE, PLY, XYZ) to a USB flash drive or locally to your phone or PC. The maps are exported per level.
- Open your project.
- Select the options icon > Export Manager > Export as Point Cloud.
- Choose the destination (USB or Local).
- Enter a Point Cloud Height. Note: A leading zero (0) is required if you enter a decimal value.
- Select the Point Cloud Type that you want to export (PLY, CPE, XYZ).
- Tap CONTINUE.
The project will be converted and copied to the USB flash drive under the following path: /FAROScanPlanPCExport/PROJECTNAME_pc/PROJECTNAME_level_LEVELNUMBER or you can download it to your phone or PC.Files are saved as zip files. Annotations are not exported.
Export ESRI Shapefile
You can export to ESRI Shapefile to the USB or locally to your phone/PC. The maps are being exported per level.
- Open your project.
- Select the options icon > Export Manager> Export as Shapefile (GIS).
- Choose the destination (USB or Local).
If you choose USB, the project will be converted and copied to the USB flash drive under the following path: /FAROScanPlanGISExport/PROJECTNAME_shape/ PROJECTNAME_level_LEVELNUMBER.
If you choose Local, you can download to your phone.You will find two .shp files: map.shp exported as "points" and lines.shp for the lines exported as line geometries.
Export Image
Export your ScanPlan project maps as PNG image files to a USB flash drive or locally to your phone or PC. The maps are exported one per level.
- Open your project.
- Select the options icon > Export Manager > Export as Image.
- Choose the destination (USB or Local).
The project is converted and copied to the USB flash drive under the following path: /FAROScanPlanImageExport/PROJECTNAME_image/PROJECTNAME_level_LEVELNUMBER or you can download it to your phone or PC.