Importing WebShare Projects into BuildIT Construction
Objective
Share analysis data with stakeholders to collaborate on issues using BuildIT Construction and WebShare Cloud.
You’ll Learn
- How to login to your WebShare account.
- Download scan data from a WebShare project.
- Upload scan data to a WebShare project.
- Upload annotations to a WebShare project.
Login to WebShare
- When first using the WebShare functions within BuildIT Construction, you will be prompted to login. After logging in once, your login information will be remembered.
- To save your login information, start either File > FARO WebShare > Import Cloud from WebShare or File > FARO WebShare > Import Annotations from WebShare.
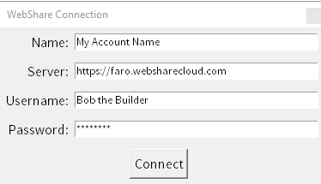
- After starting one of these commands, you will be prompted to enter:
- Name
- This will be the remembered name for this account.
- Server
- This is the server for your account. You’ll need to enter it in this format: https://faro.WebSharecloud.com.
- Username
- This is the username associated with your WebShare Cloud account. You can also enter your email if you do not remember your username.
- Password
- Enter your password for your account.


- Enter your password for your account.
- Name
- Note: If your login information is incorrect, BuildIT will indicate this in the message bar and you can try again.

- Once you select connect, you can proceed to the next step.
Download scan data from WebShare
- Use File > File > FARO WebShare > Import Cloud from WebShare to start the import process.
- After logging in, you will be prompted with tiles representing all the projects on you WebShare Cloud server.
- Note: If you have logged in previously, you will need to select what account to use for the import. Once the proper account is selected, use select to proceed.

- When hitting select, the various tiles from your projects will be downloaded. This process can take a moment depending on the number of WebShare projects on your domain.

- Note: if there are a high number of projects on your domain, you will be instead presented with a smaller selection to select from, similar to the account selection.
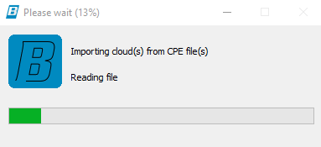
- Once you select a project, the available CPE scan files will be presented for download. Simply select the one you wish to download.


- Note: if no CPE files exist in the WebShare project, you will be prompted that none are available in the project and that you should create them in WebShare first.
Upload scan data to WebShare
- Once analysis has been completed, upload the scan data by selecting File > FARO WebShare > Upload Cloud to WebShare.

- The command will request the cloud(s) to upload and the intended name for the cloud in WebShare. Select the point cloud and enter a relevant name for the point cloud.

- When hitting apply, the point cloud will be uploaded to the selected project and 3D processing will begin within WebShare.


- Once the point cloud is processed, an email will be sent to the login email and the scan will be displayed in 3D.
Upload annotations to a WebShare project
- If annotations were created in analysis, such as the grid-based analysis, you can also upload those to WebShare by selecting File > FARO WebShare > Export Annotations to WebShare.

- Select the annotations to upload.

- Select apply and the annotations will be uploaded to your selected project.
Recap
- You have learned how to:
- Login to your WebShare account within BuildIT Construction.
- Download scan data from a WebShare project.
- Upload scan data to a WebShare project.
- Upload annotations to a WebShare project.
