Using AniBuddies to Animate Symbols in FARO Zone 3D

Overview
The AniBuddies feature allows you to animate two symbols as if they were one. For example, you could use AniBuddies to place a driver within a vehicle.
Details
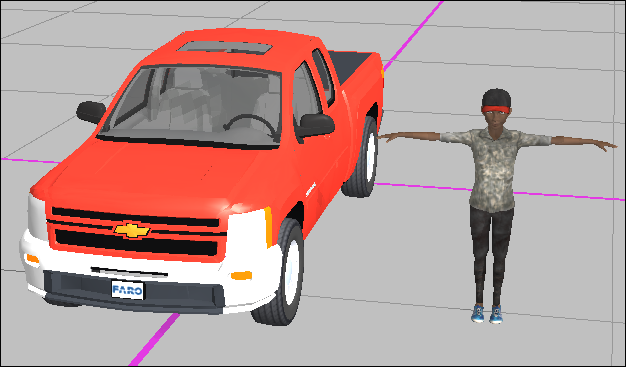
- Place two symbols that will require an AniBuddies relationship. In this case we will use a vehicle and a body.
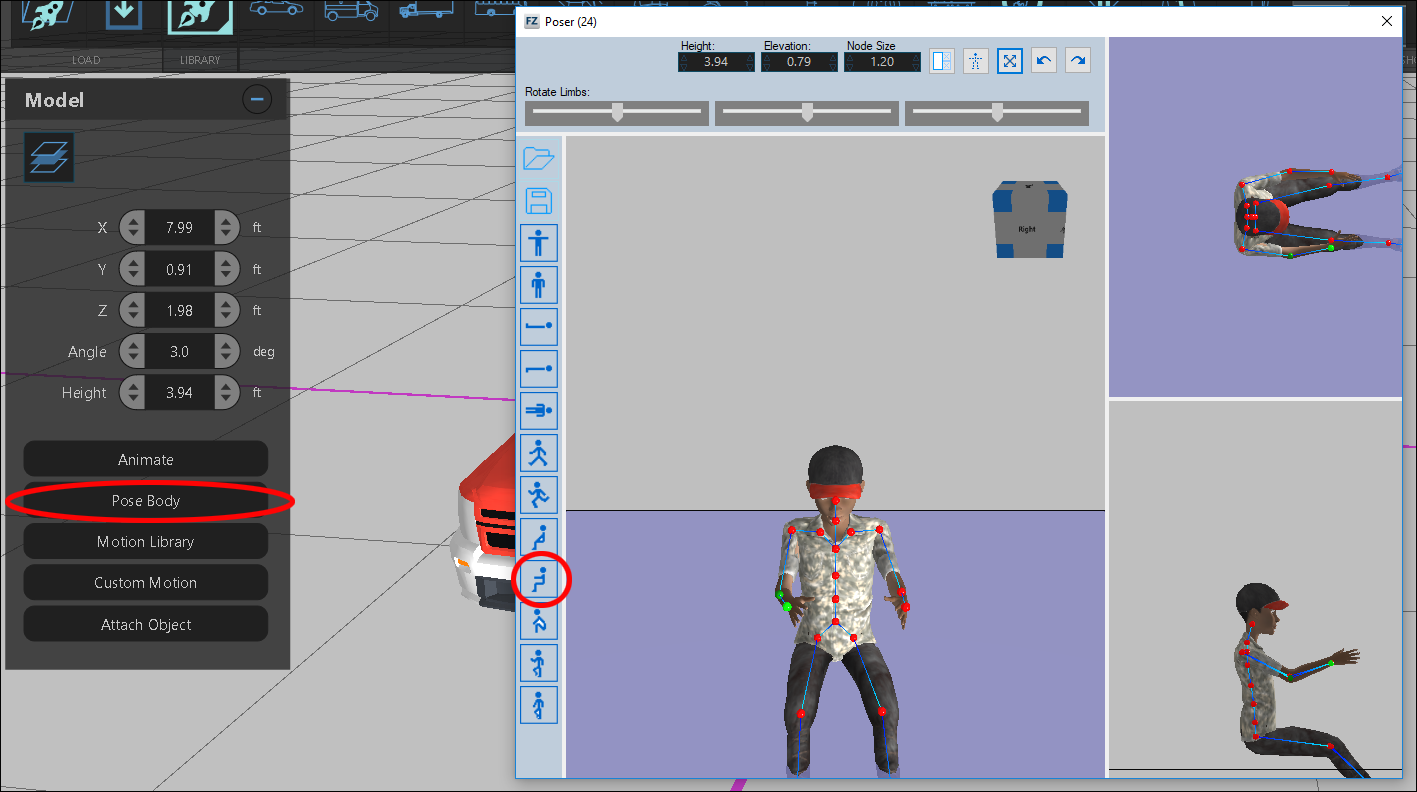
- Click the body, and use the Pose Body menu to move the body into a driving position.
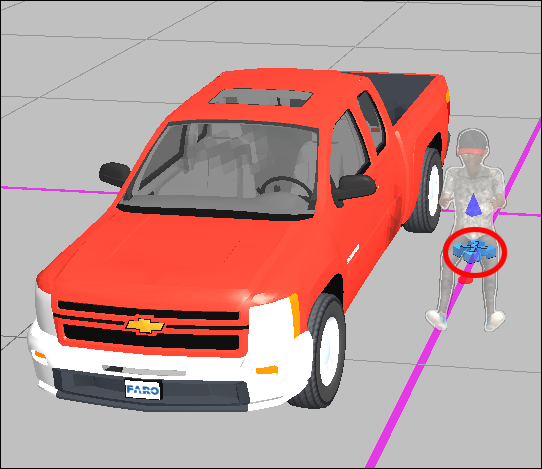
- Use the arrow icon to move the body into the vehicle.
Note: It's easier to switch to a top-down view to align the driver with the vehicle, and then use a side view to adjust the elevation of the driver in the Pose Body menu. - Create a selection window (left-click and drag right) to select the vehicle and driver.
- Click AniBuddies in the Multi-Select window.
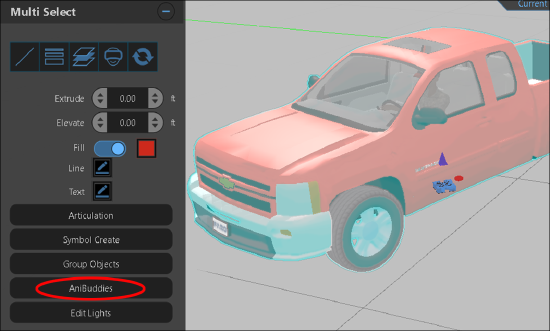
You will now be able to animate both symbols as if they were one symbol.
Separating AniBuddies
- Click the symbol.
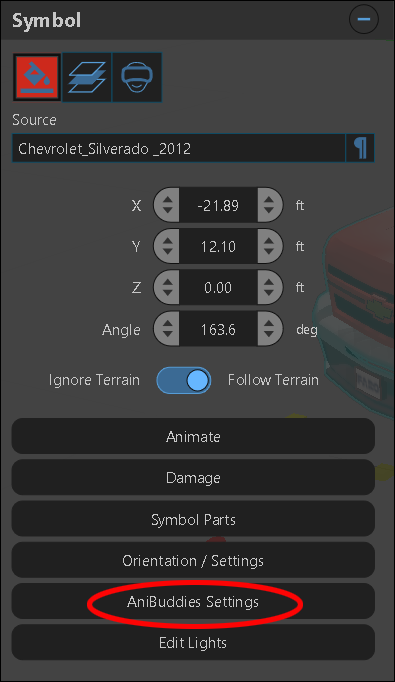
- Click AniBuddies Settings.
- Click Explode AniBuddies.
Note: If you have animated the AniBuddies, you will not be able separate the symbols. You will have to delete the animation path to see the Explode AniBuddies option.
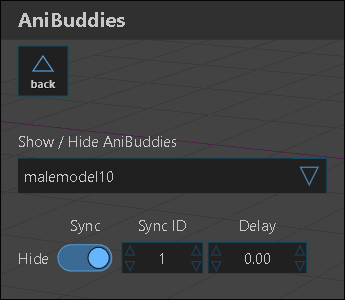
AniBuddies Settings
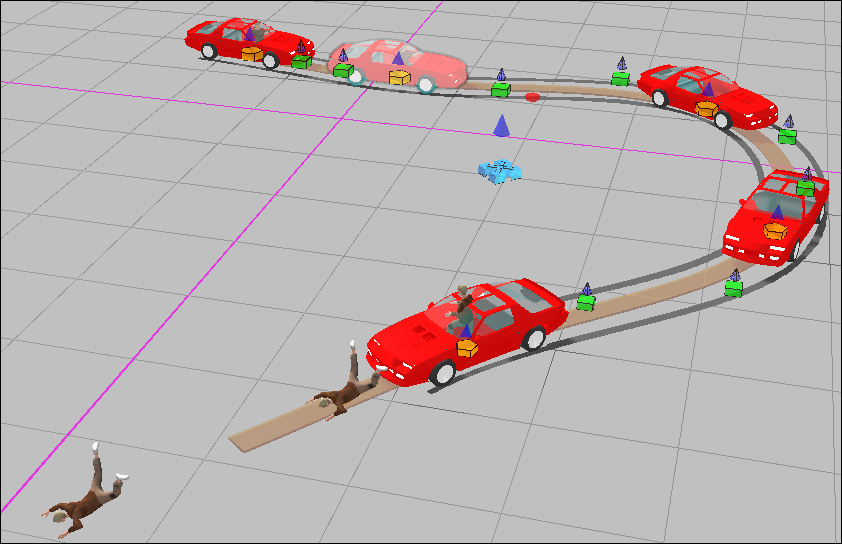
AniBuddies Settings allows you to hide a dependent AniBuddies symbol to create complex animations, such as a driver being thrown from a car.
- Use AniBuddies to create a first animation of a car and driver.
- Add a second animation of the driver at the end of the first animation.
Note: The second animation should have its first two KEPs close together, with the first KEP marked hidden.
- Sync the last KEP of the first animation and the first KEP of the second animation.
- Click the last KEP of the first animation and click AniBuddies Settings.
- Click Hide, and assign the KEP the same Sync ID as the other KEPs.
This should hide the driver in the first animation at the same point the second animation begins playing.
Click here for an example.