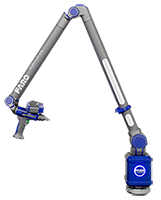
Wireless (Wifi) Connection to the Quantum FaroArm/ScanArm and Gage
Overview
This article provides the procedure on how to connect to the Quantum series FaroArm®/ScanArm or Gage via Wi-Fi.
Windows power settings can contribute to connectivity and performance issues when connecting to the FaroArm via a mobile PC. To ensure a successfully and reliable connection confirm the setting as outlined below.
Laptop Power Settings
Windows power settings can contribute to connectivity and performance issues when connecting to the FaroArm via a mobile PC. To ensure a successfully and reliable connection confirm the setting as outlined below.
- Ensure the laptop is on AC power, not battery.
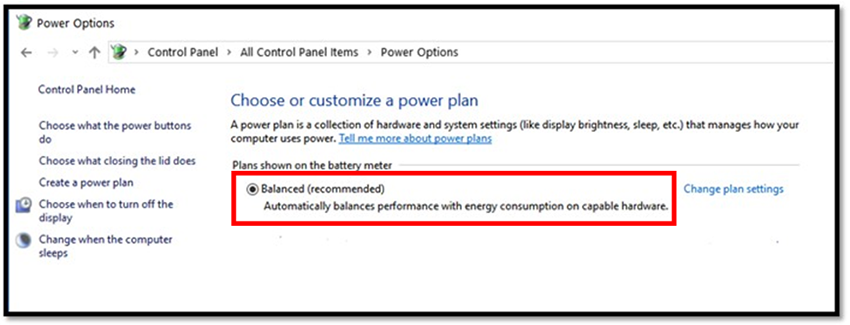
- Ensure the Windows Systems on the laptop is optimized for “Best Performance”
- In Windows 10, go to Control Panel > Power Options or search for “choose a power plan”
- Ensure “Balanced (recommended)” is selected.
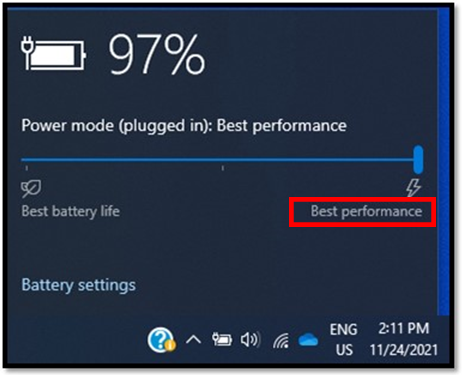
- Go to the taskbar and in the bottom right hand corner, click the battery icon.

- Set the slider bar toggle to “Best performance”
Configuration and Connection
WiFi Configuration
- Connect the FaroArm to the PC via an USB connection.
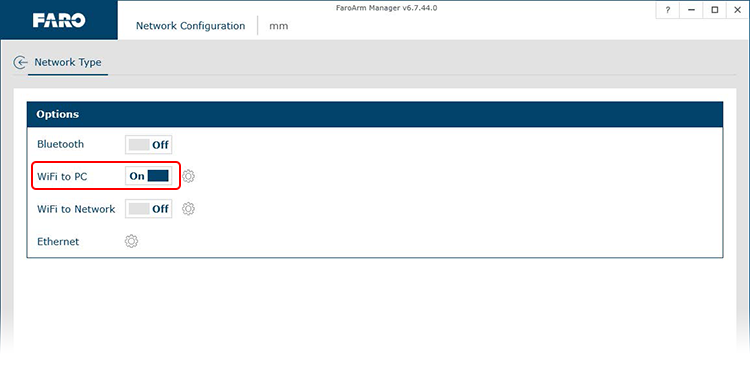
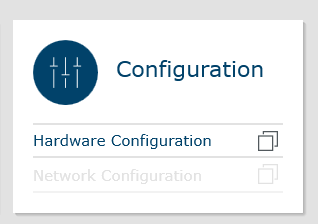
- Open the FaroArm Manger
 , and click on Network Configuration.

- On the Network Configuration screen toggle the On/Off slider to On. Then click the "Gear" icon (next t the WiFi to PC slider).
- Expand the Security Protocol menu and select one of the available WiFi protocols.
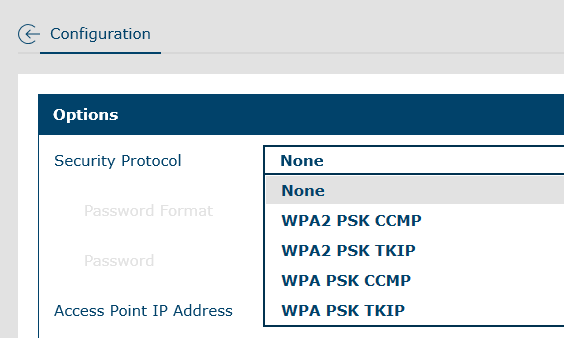
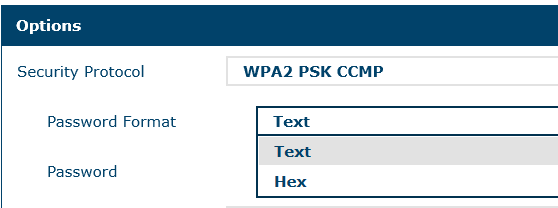
- If a "secured" protocol was selected, choose the Password Format (Text/Hex) and then enter a password.
- Click Save.
- Use the back arrow in upper left hand corner to go back one menu, then click Close to return to main FaroArm Manager screen.
Connecting
- On your computer click the wireless icon typically located on the Windows taskbar
 . Alternatively, this can be accessed via Settings > Network & Internet > Wi-Fi > Show available networks.
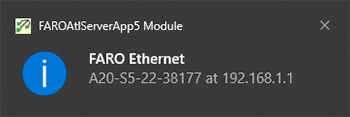
 - Locate the FaroArm on the list of available networks and click Connect. In the example below: A2-S5-22-38177.
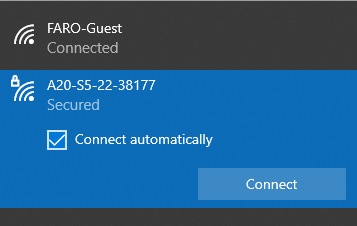
- After you click Connect, if a secured protocol was configured the user will be prompted to enter the password set in the previous section.
- The computer will then connect to the FaroArm network within 2 minutes.
- IMPORTANT: Once WiFi connectivity occurs, disconnect USB cable.
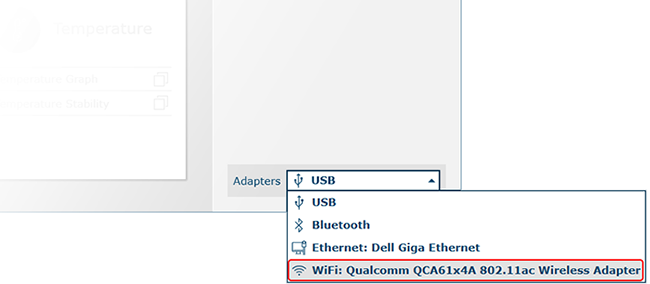
- Go back to FaroArm Manager main screen. At the bottom right, click the “Adapters” dropdown box, and select the Wi-Fi adapter of your computer.
- In the Device list (top right of the screen), click the Refresh button (2 circular arrows).

- Your FaroArm will appear in the Devices list, click the red plug icon (next to the serial number) to initiate the Wi-Fi connection.

- Once connected, the plug icon will turn green
 . You can now close the FaroArm Manager.
Device Status Definitions:
Connected 
Connection is in progress 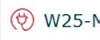
Disconnected, (click the icon to start the connection)
- You may now launch any software designed to communicate with FaroArm. The connection process will initiate automatically. A notification like the one below will be displayed to confirm the connection.
Note: If you are still experiencing Wi-Fi connectivity issues, please consult your IT department to assess your Wi-Fi signal to ensure security software is not interfering with the frequency of the FaroArm.
Enabling/Disabling WiFi
The easiest way to disconnect from the FaroArm is to disconnect from the FaroArm network via Windows.
If you wish to prevent any computers from connecting, depending on your FaroArm model, enabling/disabling Wi-Fi is as follows:
Quantum X/Max /Gage Max
|
Quantum X/Max and Gage Max models are not equipped with external buttons (only indicators) to enable or disable Wi-Fi/Bluetooth. These communications methods can only be set via the FaroArm Manager utility.
|
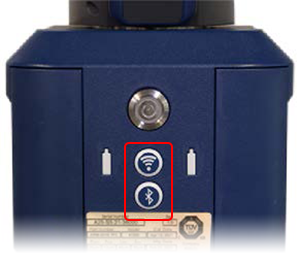 Indicators only |
Quantum / Gage
|
Quantum and Gage models are equipped with buttons on the rear of the unit to enable or disable Wi-Fi/Bluetooth. Simply press the button to toggle the desired communication method on/off. Note: You may also enable or disable Wi-Fi/Bluetooth via the FaroArm Manager, see the Quantum Max /Gage Max section above for this method. |
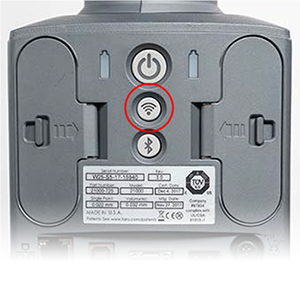 Button/Indicator |
Tips/Notes
- The Network configuration will be grayed out when connected via WiFi. Network settings can ONLY be configured when connected via USB.
- Each time you visit the Network Configuration screen, the current WiFi password will be deleted. You will have to renter a password each time you visit the screen.