Wireless Connection to the Vantage S and E Laser Tracker
Overview
You can connect the FARO® Laser Tracker to your computer using a wireless LAN connection (WLAN) instead of the Ethernet cable. In the factory configuration, the Tracker's wireless transmitter is automatically enabled when you press the Power On/Off button and start the system. When both the wired and wireless connections are correctly connected, the wireless connection takes priority. The Vantage S, E, S6, and E6 models utilize an Infrastructure/DHCP connection, therefore, able to connect wirelessly with all versions of Windows operating systems.
Hardware Setup
Remove the two (2) wireless Antenna from the shipping case, and thread each onto the Wireless Antenna Connector on each side of the Tracker. Thread until finger-tight, do not over tighten the Antenna.
Computer Setup
You must enable the wireless receiver in your computer. The Tracker connects to a wireless network using the Dynamic Host Configuration Protocol (DHCP) and will request a IP address from your computer or network.
NOTE: If you need to set the Tracker to a specific Service Set Identifier (SSID), open the Tracker Utilities application and select Change Network Settings. By default the wireless connection operates as a wireless access point (WAP) without any security.
Computer Configuration
- Ensure the WLAN On/Off button is set to the On position. The illuminated LED ring around the button indicates the wireless transmitter is on.
- Connect the Tracker to your computer’s wireless receiver. In Windows 10, the process is as follows:
- Click Start > Settings.
- Click Network & Internet.
- Click Wi-Fi.
- Click Show Available Networks.
- In the lower right corner of your computer screen, Look for your device serial number in the list of available wireless devices. Choose your Tracker from the list and click Connect.
Adding the Tracker to CAM2
FARO CAM2 automatically searches for any Laser Tracker connected to your computer.
- If you do not see your Tracker, open the Device Control panel and click Add a Device (Plus Sign +):
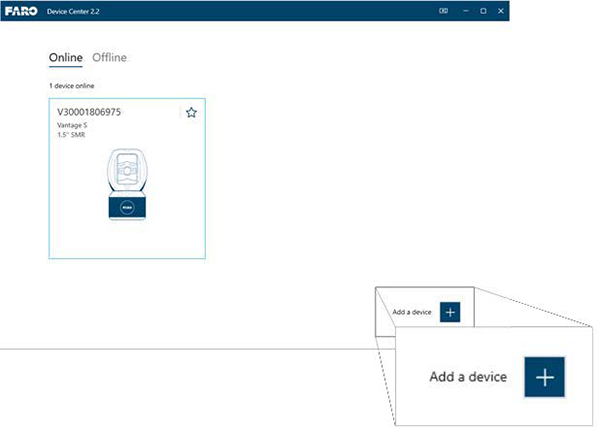
- Enter the Tracker ID number. NOTE: The Tracker ID is the last four digits of the Tracker serial number.
- Click Add.