What's new with BuildIT Projector

Overview
The following article highlights the new features included in each major release of BuildIT Projector. For all change information in the latest version, please refer to the Release Notes.
2022.2
Alignment point moved to projectors' right-click menu
Whereas in previous versions users would edit each point to select projectors they should be assigned to, we've switched it so that instead, users should edit the projectors to select which points they use to align. In order to do so, right-click on the projector of choice, and click Select alignment points...

A pop-up window will appear, where you can check and uncheck the relevant points, and you can even change the order of the alignment points by drag-and-dropping them.

Auto-measure verifications
Depending on your situation, you may want to have verifications auto-measured for convenience, or you may want to require the user to press the measure button. Either way, you can set the behavior in File: Settings: Projection.

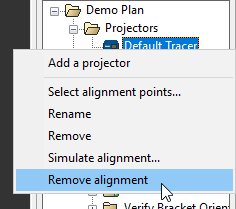
Remove Alignment is applied to the selected projector
If you wish to remove a projector alignment, you can do so by right-clicking on one of the projectors and clicking Remove alignment.
2022.1
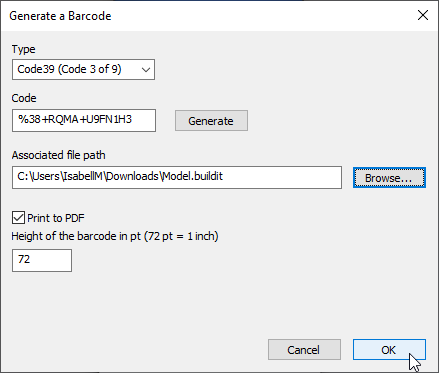
Generate Barcodes
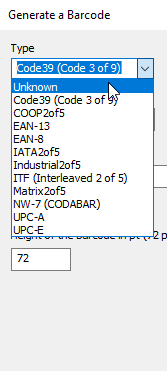
To the File: Barcode menu we added another entry: Barcode - Generate. This allows users to easily create a barcode in a PDF, and associate the barcode to a file. It also lets users input an existing code to associate to a file as well. It supports a wide range of code types, as seen in the dropdown.
Learn more about barcodes here: Barcode Scanning with BuildIT Projector
Units easily accessible
Units are now easily visible via the toolbar, and can be switched on the fly by selecting from the dropdown.

BuildIT Projector 2022
Version 2022 brings a more streamlined workflow to its users, with improvements in projection planning and operation.
Create Crosshairs from a Dedicated Command
While crosshairs have long been supported in BuildIT as an option for projecting a point, in some cases their creation involved multiple commands. Now there is a dedicated command for it, called "Add Crosshair to Plan" which removed the need to create the point in the model. Simply pick the coordinate using the appropriate filter, and it will automatically determine a size and orientation.

Curve Normals No Longer Flare Out by Default
Whereas in previous versions surface edge projections had normal arrows that flared out, they are now parallel by default. This affects users who project with multiple Tracers, or who clip their projections by incidence angle. When arrows flared out, layers tended to be partially projected, or split between projectors. While this is often the desired effect, it was not easily understood by new users.
Now, flaring out is an option which is off by default.

Text Projection Content can be Edited
If the content of a text projection needs to be changed, it does not need to be recreated. This version allows you to modify the text from its projection plan properties.

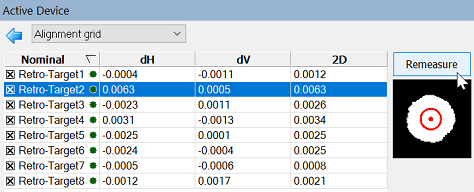
Alignment Grid Allows Remeasuring a Single Point
When auto-aligning, it can happen that a retro-target is automatically accepted when in fact it needed to be cleaned or replaced. In this version, we show a preview of the measurements in the alignment grid, and any problematic scans or deviations can be fixed without restarting the full alignment procedure. Simply select the row in the grid, and click Remeasure.
BuildIT Projector 2021.5
Version 2021.5 offers powerful new features that reduce the alignment workflow of operators down to a single click, empowers planners to create a projection plan the requires minimal testing, as well as other workflow improvements.
100% Automated Alignment using ScanAlign
ScanAlign speeds up the alignment process for operators by eliminating the need to aim the scanbox to the first 4 retro-targets. It automatically finds and measures all retro-targets in a specified area.

To learn more: ScanAlign Alignment Feature with BuildIT Projector
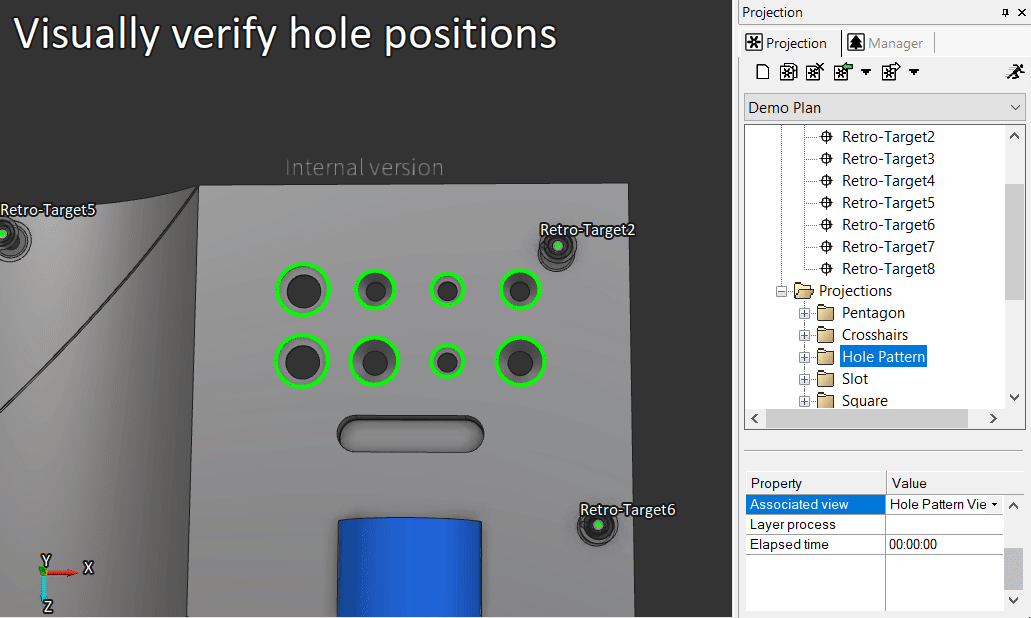
Simulate projections to detect issues early
A planner has various options in their arsenal to optimize projections for accuracy and coverage. The work of finding that optimal projector setup can take a long time if it involves trial and error with a physical setup. Now planners can fully simulate alignments and get visual feedback without requiring a connection to any Tracer.

There are three new line styles:
- Dashed Grey: Disabled projections, whether it is due to being out of FOV, or out of clipping boxes.
- Dashed Grey with arrows: Disabled projections due to exceeding the maximum angle of incidence.
- Dashed Red: Obstructed projections, for when CAD blocks the line of sight.
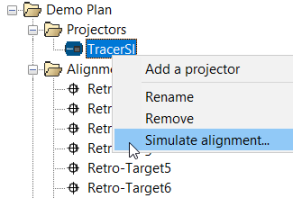
Projection visibility issues can be detected early at the planner's office, rather than on the shop floor where production downtime should be avoided. Simply right-click on the projector and select "Simulate alignment..." to see for yourself.
To learn more: Simulate Projection Plans in BuildIT Projector*INT
Easily create and manage Associated Views
Layers' Associated View are now fully created and managed from the projection plan.
- In the layer properties, click on the Associated View dropdown, and select Create New...

- In the pop-up, select the view name, and if some of the CAD is hidden to show how the part should look at that step of the assembly, check the object visibility checkbox.

- Click OK. The current view will be associated to the current layer.
And if you wish to reuse a view, all previously-saved views are available in the same dropdown.
Control scanbox using arrow keys
While we do offer full-fledged gamepad remotes as well as mobile remotes, sometimes the keyboard arrow keys offer just the 'remote' capabilities needed. This can easily be turned on in File: Settings: Projection and selecting the "Use arrow keys to move scanbox" checkbox.
BuildIT Projector 2021
BuildIT Projector 2021 offers a range of updates to streamline one-off projection workflows, including enhanced automation capabilities and an all-new Instant Projection workbench. Plus, the ability to manage the projector from a phone, tablet or gamepad puts the control of your laser projection workflows into your hands — literally.
Watch the overview video or check out the features breakdown below to learn more.
Instant Projection Workbench
Watch an overview video of the three main features of the new workbench.
Streamlined Interface
The new Instant Projection workbench is tailored for projection in low production environments (one-off workflows). In this case, no planning is needed; it is the fastest way to go from importing the CAD model to projection.
Drag-and-drop your CAD file into BuildIT, which will import it whether it is a 2-dimensional DWG, or a full Solidworks CAD. Then follow these 3 steps:
- Connect Projector(s)
- Align Projector, picking alignment points from the CAD on the fly.
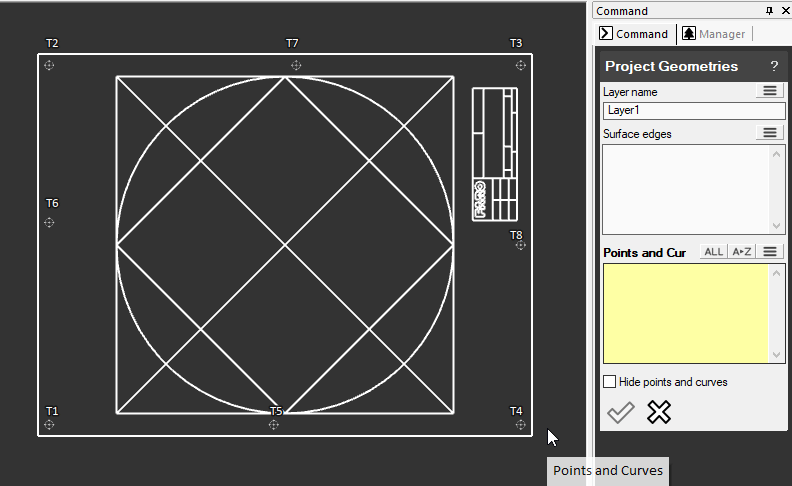
- Project Geometries, which projects your selections in real-time.

Pick Alignment Points on the Fly
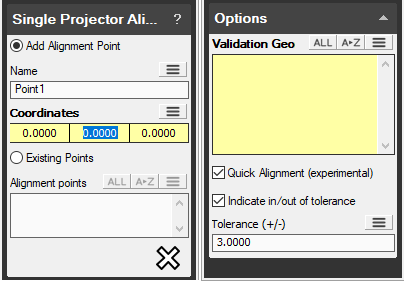
The TracerSI lets you align directly to features on the part. For those workflows, the best way to proceed is as follows:
- Pick an alignment point Coordinate from the CAD.
- Aim the scanbox at it, scan, and accept if the contrast is good enough.
- Repeat steps 1 and 2 until you have an alignment. At this point it will project the selection in Validation Geometries.
- Repeat steps 1 and 2 until the projection is accurate enough.
This new workflow is straightforward and easy to learn — perfect for any user that needs to project as fast as possible.
Project Instantly
Once aligned, the Project Geometry command is all you need. It lets you select surfaces, lines and points, and projects them immediately upon selection. The Apply button is there if you would like to create a layer you can later recall, but that is entirely optional.
Adjust your projection on the fly if you wish to project a subsection. Remember: Use the Shift button for a rectangle selection. Ctrl + Shift to add to the current selection.
Gamepad Remote
In this version, one gamepad remote can control multiple projectors, allowing the operator to spend more time assembling and less time walking back and forth from the computer station.

Mobile Remote
The mobile remote has several new features. Most notably, it contains all the controls needed to run an alignment routine.
Connection to the remote is easy, BuildIT will display a QR code which your phone can read using the camera app. As long as it is on the same network as the computer, it will open the mobile remote via the web browser, whether you are running Android or iOS. No installation required.

Layer-Level Automation
BuildIT’s automation capabilities are virtually unparalleled in the industry.

These capabilities can now be leveraged as part of a projection plan, as layers now have a Layer Process property, which specifies which process should be automatically launched when the operator reaches this layer. Your imagination is the limit, but here are a few to inspire you:
- Turn a light from green to yellow to red as the elapsed time crosses a desired threshold for that layer.
- Send a notification to a supervisor to come do the Visual Inspection.
- Guide the user through a mandrel rotation followed by a realignment.
- Automatically generate a report.
- Launch a supporting file such as a PDF or a video.
FARO® offers an automation training that will enable you to create and edit them at your convenience.
Import LAP Projection Files
We have added another format to our projection importer: LAP Laser Projection, *.LPD. Note that LAP also works with native DWG and DXF, which are formats we already import.
