Body Motion Basics
Overview
FARO Zone 3D body animation tools allow you to pose and animate human symbols within your projects.
Placing a Body
- Click the Bodies symbol
 on the Symbols ribbon.
 - Click a body in the pop-up window.
- Click to place it on the drawing surface, and click the drawing surface again to set a starting direction.
Model Menu
The model property window provides options for posing and animating your body. Click a body to open the window.
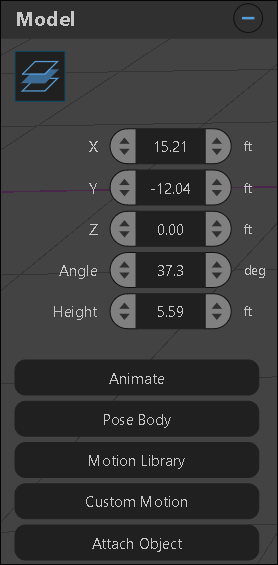
- Animate - Set an animation path for the body to follow.
- Pose Body - Manually define a preset or custom pose at the corresponding KEP.
- Motion Library - Select a pre-existing motion for the body to use on the animation path.
- Custom Motion - Create a custom motion for the body to use on the animation path.
- Attach Object - Connects an existing symbol, such as a gun, in contact with the body as it animates.
Animating a Body
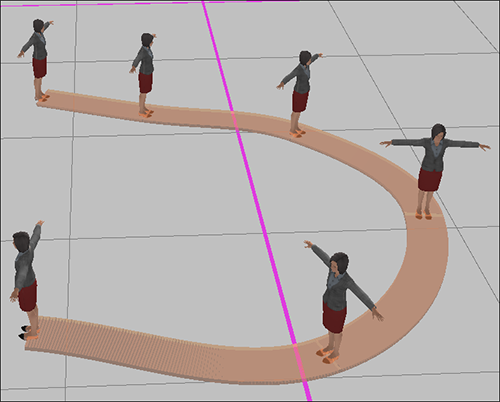
Placing and moving a body works the same as vehicle symbols.
- Click Animate in the Model menu. An animation path appears.
- Click another location to set a Key Event Point (KEP).
- Click additional locations to create additional points.
- Double-click to end or right-click and select Finish Command in the pop-up menu or press Enter.
Posing a Body
Click Pose Body or Pose Body at KEP in the Model menu to open the pose interface. This feature allows you to define the body's position at the associated KEP.
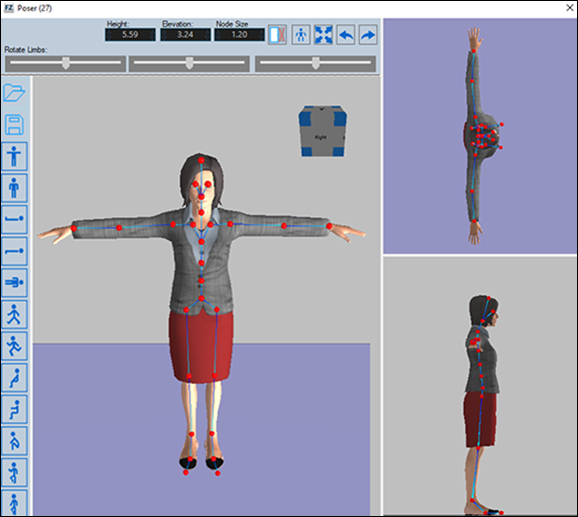
Select a pre-existing post on the left of the screen or create a custom pose by clicking a red dot and using the red,green, and blue Rotate Limbs sliders to move the body parts in different orientations.
- Height - Alter the height of the body.
- Elevation - Raise or lower the body on the drawing space.
- Node Size - Change the size of the articulation nodes.
 Compact - Hide the right side of the Pose window.
 Parts - Open the parts window. Use the parts window to colorize or hide parts of the body.
 Zoom All - Zoom into the body.
 Undo - Undo a command.
 Redo - Redo an undone command.
Motion Library
Use the motion library to assign an existing motion animation to the body as it moves along the animated path.
- Right-click a KEP or animation path segment.
- Click Motion Library in the context menu or choose Motion Library in the property panel.
- Select a pre-existing animation from the menus to assign it.
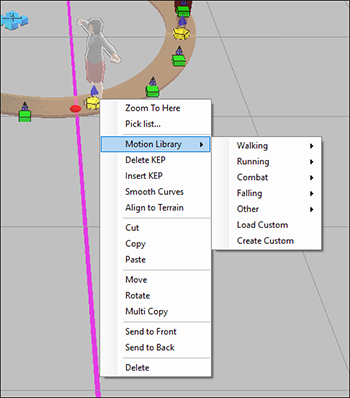
Note: When assigning the first motion to a KEP or path segment, the motion will be assigned to the entire path. It's best to work from start to finish when assigning multiple motions to an animation path.
Custom Motion
You can use the custom motion animation tool to define your own movement animations.
- Right-click an animation segment or KEP.
- Click Motion Library.
- Select Create Custom.
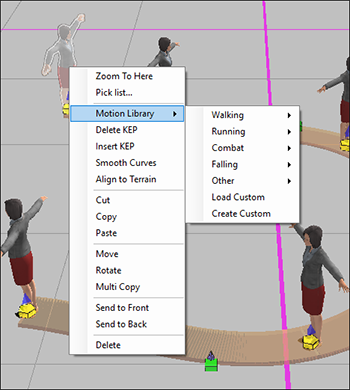
Custom Animation Window
The animation window is almost identical to the pose window, except for the addition of a timeline which sets the amount of time used to play a custom animation.
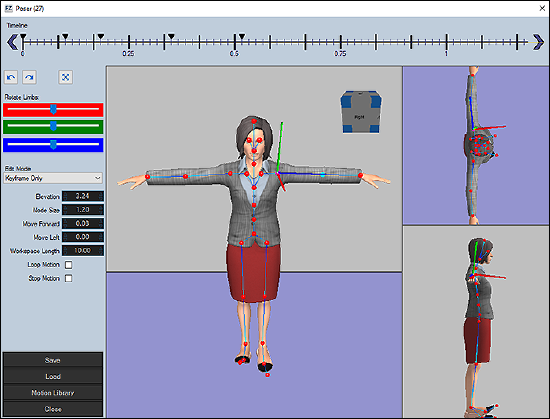
Click the 0 position on the timeline to create a beginning pose for the animation.
Click another spot on the timeline to create a keyframe and pose the body in its next position. Continue creating keyframes to further define the desired motion.
Note: Use CTRL+ mouse scroll wheel to shrink or expand timeline.
When the animation is played, the body will transition between keyframe poses. For example, if you want the body to raise its hand, one keyframe should reflect the hand down position and the next keyframe the hand up position. The body will automatically transition between the two poses.
Note: If you are creating a motion that will be looped, make sure the first and last keyframes match.
Attach Object
Use the Attach Object function to make a posed or animated body appear to hold something.
- Click a KEP in the animation path.
- Click Attach Object in the KEP animation window.
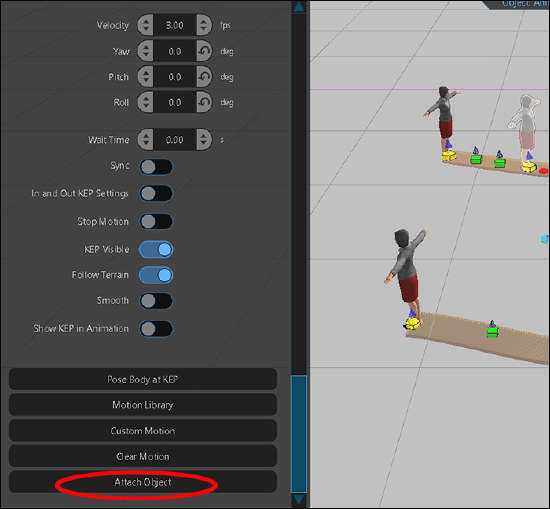
- Search for an object in the search box.
- When the correct item appears, click its picture to attach it.
- Use the Attach Object window to position the object in the correct orientation with the body.
Attach Object Window
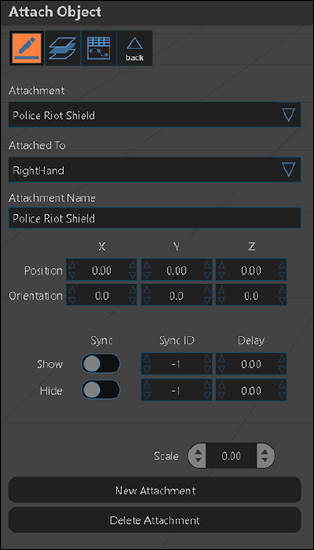
- Attachment - Select the attachment to edit.
- Attached To - Select the body part to which the object will be attached.
- Attachment Name - Rename the attached object.
- Position/Orientation - Use these XYZ coordinates to change object elevation and rotation.
- Show/Hide - Use these settings to sync the appearance/disappearance of an object to other animations.
- Scale - Change the size of an object.
- New Attachment - Add an additional object.
- Delete Attachment - Delete an object.

