Creating a Curb or Sidewalk

Overview
FARO Zone 3D 2019.5 allows you to quickly create a curb and/or sidewalk and customize it to your needs.
Drawing a Basic Curb
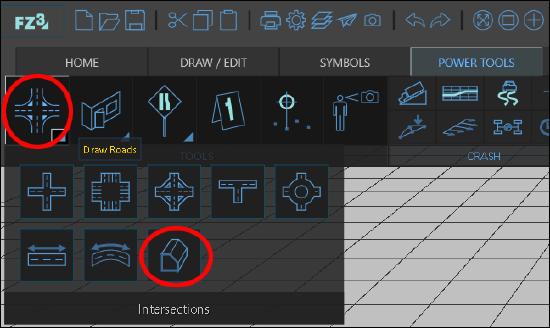
- Click the Power Tools ribbon.
- Click the Draw Roads icon.
- Click the Curb tool.
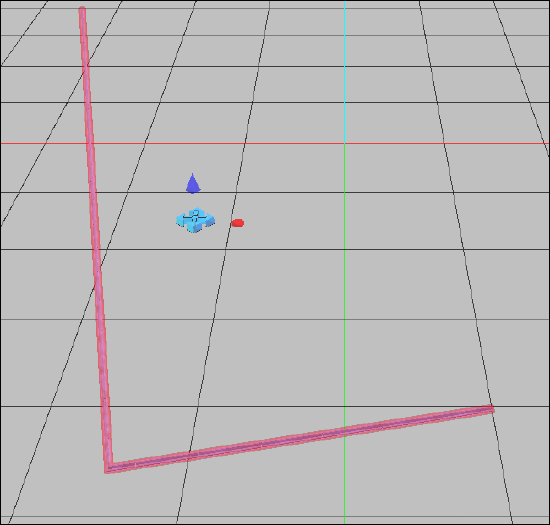
- Click a point to begin drawing.
- Click again to place another point.
- Double-click when you are finished drawing.
Customizing the Curb
Click the curb and use the Curb Window to customize it.
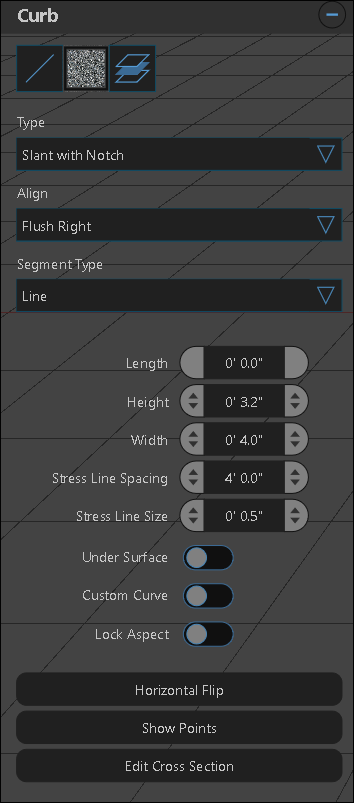
- Line Type - Change the curb to a different type of line.
- Color - Change the curb color or add a texture.
- Layer - Move the curb to a new layer, create a new layer, or open the layer manager.
- Type - Change the physical appearance of the curb.
Note: Use this setting to add a sidewalk to the curb or create a sidewalk without a curb. - Align - Change the curb alignment to the drawn line.
- Segment Type - Make the line straight or curved.
- Length, Height, Width - Alter the physical dimensions of the curb.
- Stress Line Spacing - Change the distance of the breaks in the curb.
- Stress Line Size - Increase the size of the breaks in the curb.
- Under Surface - Moves the curb beneath the Z-axis.
- Custom Curve - Use the white triangles to alter a curved line.
- Lock Aspect - Locks height and width dimensions.
- Horizontal Flip - Flip the sidewalk horizontally. Note: This will also affect a texture applied to the curb.
- Show Points - Show the coordinates of each line node.
- Edit Cross Section - Customize the physical profile of the curb.