Exploring a VR Training Environment in FARO Zone 3D

Overview
VR training environments allow users to explore a prepared 3D VR training scene and practice using evidence and analytical tools.
Opening a Training Environment
To begin exploring a VR training environment:
- Open the project in FZ 3D.
- Click the VR/ENVIRO tab.
- Click the Open VR Viewer icon
 .
.
Exploring the Training Environment
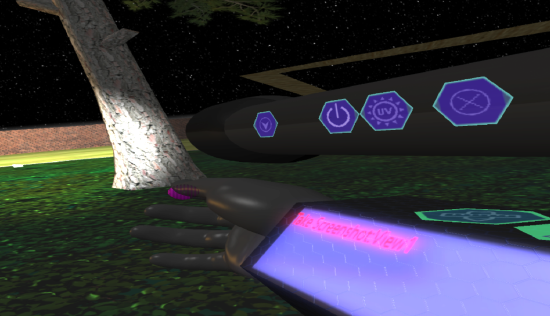
Inside a VR environment, control options are contained on the left and right gauntlets which are visible when you move the VR controllers.
Left Gauntlet - Main Menu Options
Top
 Help: Open help files
 Clear: Clear the current action.
 Compass: Toggle a navigation compass beneath your feet.
 Gravity: Toggle gravity. (Press right thumbstick forward or back to move up or down when gravity is off).
 Crouch: Toggle crouch mode when gravity is present.
  Home: Return to the Home position.
Side 1
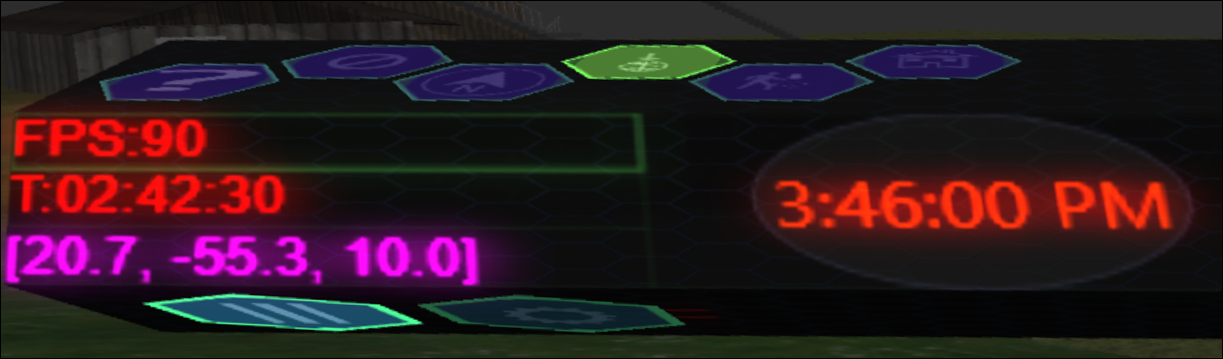
This side of the gauntlet displays the Frames Per Second (FPS) of the system, the time spent in VR, location coordinates, and the system time.
Side 2
 Main Menu: Opens the main file menu, used to save/load files or exit the program.
 Save: Save changes to the project.
 Exit: Exit to desktop.
 Exit and Return to FZ3D: Leave VR and reopen FARO Zone 3D.
 Load New File: Open a new file.
 Load Recent File: Load a recent file.
 Session Log: Name and begin a log of the current session.
 Settings
 Turn Settings: Adjust the turn mode and turn rate options.
 PC Settings: Change point cloud lighting, quality, and point size settings.
 Toggle HDR Light Bloom: Toggle the HDR light bloom effect.
 Toggle Anti Alias: Toggle line smoothing.
Bottom
 Save View/Location: Save the current position and screenshot.
 Saved Views Browser: View saved viewpoints.
 Play Animation: Plays the project animation.
 Stop Animation: Stops playing the project animation.
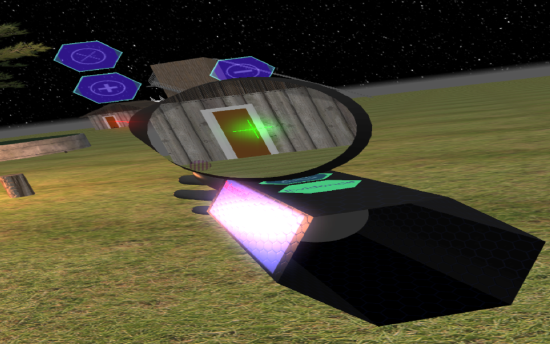
Right Gauntlet - Exploration / Analysis Options
Top
 Snapshot: Capture a screenshot of the current view. Squeeze the Right Trigger to take a snapshot. These image files can be found in "Documents\FARO Zone\VR\Screenshots\CurrentFileName" folder.
 Scope: Tap to open the virtual scope. Use +/- buttons to control magnification. Press
  to exit.
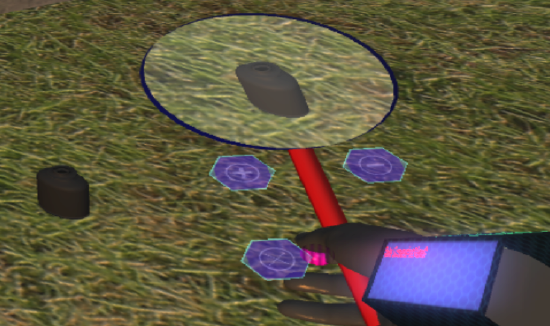
 Magnifying Glass: Tap to open the magnifying glass. Use +/- buttons to control magnification. Press to exit.
 Teleport: Tap to open a list of saved views. Select a view to teleport to it.
 Flashlight: Open a flashlight to illuminate parts of the scene.
 Rotate: Rotate the flashlight around the gauntlet.
 UV Mode: Switch to ultraviolet light mode.
 On/Off: Turn flashlight off.
- Exit: Exit flashlight mode.
- Clear Current Action: End the action in progress.
Side
 Draw/Place Tools: Access tools to add investigative items to the environment or additional analysis tools.
 Placards: Place evidence placards in the scene. Use the A and B buttons to change the distance of the placard. Squeeze the Right Trigger to place the placard. To snap a placard to an object, squeeze the Right Grip to begin selecting a point, and squeeze the Right Trigger to place the placard.
 Label: Label an item. Use the keyboard to enter text for the label. Press ESC to exit label mode. Use the +/- buttons to change label size. Press Enter to begin placement mode.
In placement mode, use the A and B buttons to change the distance of the placard. Squeeze the Right Trigger to place the label. To snap a label to an object, squeeze the Right Grip to begin selecting a point, and squeeze the Right Trigger to place the label.
Tap the black hexagon to open color options and enable/disable the arrow indicator.
Once you place the text label, you will repeat the placement process for the arrow indicator. Police Tape: Draw police tape in the scene. Squeeze the Right Trigger to begin drawing tape. Squeeze the Right Trigger again to start a new tape segment. Press A to stop drawing tape.
 Analysis Tools: Access additional analysis tools.
 Trajectory: Draws a line along a trajectory rod in a point cloud. The trajectory tool operates in two modes: Sphere snap mode and Rod-Cluster snap mode. Press the toggle icon
  to alternate between modes.
Rod/Cluster snap: Freehand selection of point cloud objects. Hold Right Trigger to probe target point of trajectory, release Right Trigger to select. Repeat for next trajectory point.
Sphere snap mode: To be used with established rod/sphere object in point cloud. Squeeze and hold Right Trigger to probe closest target sphere, release Right Trigger to select. Repeat for second target sphere. Use +/- buttons to change sphere snap tolerance/FOV angle.
Note: The trajectory tool requires a point cloud.
 Sphere Detect: Identify spheres within a point cloud. Squeeze and hold the Right Trigger to probe a sphere object. Use the +/- buttons to change sphere snap tolerance/FOV angle. Release the Right Trigger to create a full sphere. Note: The sphere detect tool requires a point cloud.
 Measurement: Make a measurement between two points in the environment.
Squeeze and hold the Right Trigger to being selecting the initial point for your measurement. Release the Right Trigger to select the point. Use the +/- buttons to change font size, and press the black button to display the color palette.
Squeeze and hold the Right Trigger to begin selecting the second point for your measurement. Release the Right Trigger to select the point.
Evidence Tools: Access tools to pick-up and store items.
 Tweezers: Pick up an item with tweezers.
 Tongs: Pick up an item with tongs.
 Grab: Pick up an item.
 DNA: Swab items for DNA material.
 Fingerprint Kit: Dust for fingerprints.
Picking up items
To pick up an item, choose the Tweezers, Tongs, or Grab action. Point at the object, and squeeze the right grip. Note: You can only pick up an item with the corresponding tool.
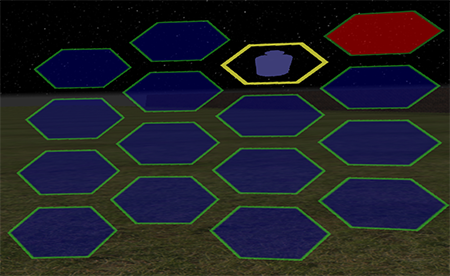
When you are in pick-up mode, a container menu will be visible on the left gauntlet displaying five container types. (Generic, Small Box, Big Box, Single Bag, and Double Bag).
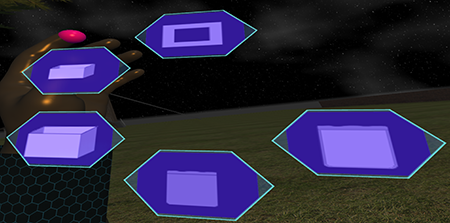
Tap the container icon to place the item in that container. Note: Items can only be place in the corresponding container type.
Tap the container icon to display a floating inventory grid. Tap the container icon again to remove the grid.