Overview
We want to get you set up as quickly as possible. Here you’ll find resources to get the best from your ZEB Revo RT. This system has live feedback on data capture allowing users to visualize their point clouds as they are captured. Follow the steps on this page and you’ll be doing your first scan in minutes.
Unboxing and Getting Started
The ZEB Revo RT has had two versions of dataloggers, please refer to section that matches your datalogger. Not sure which version datalogger you have, click here to check.
|
Unbox and Assemble
Click here to download this video.
|
Standard Operation
Click here to download this video.
|
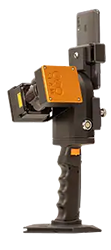
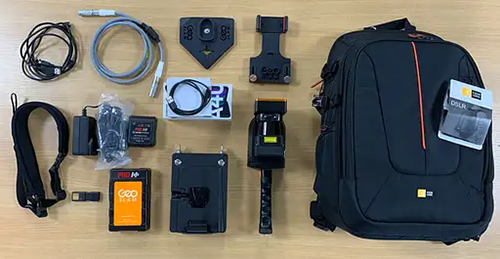
- ZEB scanner
- ZEB datalogger – Gen 1
- Battery
- Battery charger and power supply unit
- Main cable
- GeoSLAM USB stick (includes software downloads and GeoSLAM Care certificate)
- Reference base
- Phone holder
|
- Powering the system
Power on the unit and connect your mini tablet to the processing unit via the Wi-Fi
- Wi-Fi name: geoslam-rt
- Password: zebedee12
- Display
Use a web browser and navigate to IP: 192.168.102.2 Once connected, an interface to the ZEB Revo RT processing unit will appear.
- Starting a scan
To start a scan simply press the new scan icon. This will start the initiation procedure so make sure the scanner is in a stable position.
- Collecting Data
Once the scan has started points will appear on the screen. Press the button on the side of the Revo RT scan head to start the rotation. Now pick the Revo RT up and start scanning.
- Finishing a scan
Scan your environment following best practice. To finish a scan return to the starting point and press STOP. This then begins the global optimization process.
- Downloading Data
Once the scan is finished, download data by clicking the folder icon to navigate to the data page. Here you will see a list of data on the processing unit. Simply click download .geoslam file to bring this into GeoSLAM Hub.
|
|
Unbox and Assemble

|
Standard Operation
Click here to download this video.
|
- ZEB scanner
- ZEB datalogger (with shoulder strap) – Gen 2
- Battery
- Battery charger and power supply unit
- Main cable
- Ethernet cable
- GeoSLAM USB stick (includes software downloads and GeoSLAM Care certificate)
- Reference base
- Phone holder
- Android phone/tablet
|
- Powering the system
Power on the unit and connect your phone/tablet to the datalogger via the Wi-Fi
- Wi-Fi name: gs-datalogger
- Password: zebedee12
- Display
Use a web browser and navigate to IP: 169.254.0.204. Once connected, an interface to the ZEB Revo RT datalogger will appear.
- Starting a scan
To start a scan simply press the new scan icon. This will start the initiation procedure so make sure the scanner is stationary.
- Collecting Data
Once the scan has started, points will appear on the screen. Press the button on the side of the Revo RT scan head to start the rotation. Now pick the Revo RT up and start scanning.
- Finishing a scan
Scan your environment following best practice. To finish a scan, return to the starting point and press STOP. This then begins the global optimization process.
- Downloading Data
Once the scan is finished, download the data by clicking the folder icon to navigate to the data page. Here you will see a list of data on the processing unit. Simply click download .geoslam file to bring this into GeoSLAM Connect.
|
Accessories
If you have purchased any accessories along with your system, learn more by clicking the links below:
- When using your ZEB Revo RT in an environment where there are many Wi-Fi networks, you may experience problems with the connection. Under these circumstances we recommend using the Ethernet cable provided for the duration of the scan.
- You can connect to the ZEB Revo RT with multiple devices using the IP address, although this will slow down the viewer if there are several devices connected.
- Data capture is not interrupted if there are no devices connected (for example, if the battery of a device runs out).
- We recommend using Google Chrome to view the real time visualization.


