As-Built As-Built - Revit As-Built - AutoCAD VirtuSurv - VirtuSurv 2018 As-Built - Modeler VirtuSurv - VirtuSurv 2019          
BuildIT BuildIT - Projector BuildIT - Construction BuildIT - Metrology              
CAM2 CAM2 - SmartInspect CAM2 - 2023 CAM2 - 2018 CAM2 - Measure 10 CAM2 - Measure Q CAM2 - Measure X CAM2 - Measure 3/4 CAM2 - AnthroCAM CAM2 - 2019 CAM2 - 2020
CAM2 CAM2 - 2021                  
Cobalt 3D Imager 3D Imager - Cobalt                  
Cobalt Design Cobalt Design - M Cobalt Design - S Cobalt Design - Dual              
Computers Computers - All Computers                  
FARO Aras 360 & CAD Zone FARO CAD Zone - Fire & Insurance FARO CAD Zone - Crime & Crash FARO CAD Zone - CZ Point Cloud FARO CAD Zone - First Look Pro FARO 360 - Reality FARO 360 - HD FARO 360 - Blitz FARO 360 - Genius    
FARO Connect FARO Connect - Connect                  
FARO Zone present4D - present4D                  
FARO Zone 2D FARO Zone 2D - 2018 FARO Zone 2D - 2019 FARO Zone 2D - 2020 FARO Zone 2D - 2021 FARO Zone 2D - 2022 FARO Zone 2D - 2023        
FARO Zone 3D FARO Zone 3D - 2018 FARO Zone 3D - 2019 FARO Zone 3D - 2020 FARO Zone 3D - 2021 FARO Zone 3D - 2022 FARO Zone 3D - 2023 FARO Zone 3D - 2024      
FARO Zone 3D Advanced FARO Zone 3D Advanced - 2018 FARO Zone 3D Advanced - 2019 FARO Zone 3D Advanced - 2020 FARO Zone 3D Advanced - 2021 FARO Zone 3D Advanced - 2022          
FaroArm/ScanArm FaroArm/ScanArm - Quantum S FaroArm/ScanArm - Quantum M FaroArm/ScanArm - Quantum E FaroArm/ScanArm - Edge FaroArm/ScanArm - Fusion FaroArm/ScanArm - Prime FaroArm/ScanArm - Platinum FaroArm/ScanArm - Legacy Quantum FaroArm/ScanArm - Titanium FaroArm/ScanArm - Advantage
FaroArm/ScanArm FaroArm/ScanArm - Digital Template FaroArm/ScanArm - Gage FaroArm/ScanArm - Quantum S Max FaroArm/ScanArm - Quantum M Max FaroArm/ScanArm - Quantum E Max FaroArm/ScanArm - Gage Max        
GeoSLAM Software GeoSLAM Software - Connect GeoSLAM Software - Draw GeoSLAM Software - Hub GeoSLAM Software - Volumes            
GeoSLAM ZEB GeoSLAM ZEB - Horizon GeoSLAM ZEB - Horizon RT GeoSLAM ZEB - Revo GeoSLAM ZEB - Revo RT GeoSLAM ZEB - Go          
Hand Held Scanner 2D Hand Held Scanner - ScanPlan 3D Hand Held Scanner - Freestyle3D 3D Hand Held Scanner - Freestyle3D X 3D Hand Held Scanner - Freestyle3D Objects 3D Hand Held Scanner - Freestyle 2          
Language Quality HT MT AT NT INT - Internal Sales - Internal Resources Sales - Order and Quote Sales - Product Info Sales - Sales Readiness Sales - Training
Language Quality Sales - Product Launch Sales - Promotions CS - Quote to Invoice CS - Phone System CS - New Hire Training CS - General CS - Product Info CS - Licensing CS - Procedures General CS - Procedures Salesforce
Language Quality CS - Procedures Loaner CS - Procedures SAP                
Languages Language - English Language - Japanese Language - German Language - Chinese Language - Spanish Language - Italian Language - Portuguese Language - French Language - Korean  
Laser Projector RayTracer - RayTracer Laser Projector - Tracer M Laser Projector - Tracer SI              
Laser Radar Imaging Laser Radar - VectorRI                  
Laser Scanner 3D Laser Scanner - Focus S 3D Laser Scanner - Focus M 3D Laser Scanner - Focus3D 3D Laser Scanner - Focus3D X 3D Laser Scanner - Focus3D X HDR 3D Laser Scanner - Focus3D S 3D Laser Scanner - Photon 3D Laser Scanner - Focus S Plus 3D Laser Scanner - Swift 3D Laser Scanner - Focus Premium
Laser Scanner 3D Laser Scanner - Focus Core                  
Laser Tracker Laser Tracker - Vantage Laser Tracker - ION Laser Tracker - Vantage S Laser Tracker - Si Laser Tracker - X Laser Tracker - Xi Laser Tracker - Vantage E Laser Tracker - Vantage S6 Laser Tracker - Vantage E6  
Legacy Gage Legacy Gage - Bluetooth Legacy Gage - Plus Legacy Gage - Standard Legacy Gage - Power            
Legacy Software Legacy Software - CAM2 Gage Legacy Software - Gage Software Legacy Software - Insight              
Mobile Scanner Mobile Scanner - Orbis                  
PointSense PointSense - Basic PointSense - Pro PointSense - Building PointSense - Plant PointSense - Heritage PointSense - Revit CAD Plugin - TachyCAD Building CAD Plugin - TachyCAD Archeology CAD Plugin - TachyCAD Interior CAD Plugin - PhoToPlan Basic
PointSense CAD Plugin - PhoToPlan CAD Plugin - PhoToPlan Pro CAD Plugin - PhoToPlan Ultimate CAD Plugin - DisToPlan CAD Plugin - MonuMap CAD Plugin - hylasFM CAD Plugin - VirtuSurv      
RevEng RevEng - RevEng                  
ScanArm ScanArm - Design ScanArm 2.0 ScanArm - Design ScanArm ScanArm - Forensic ScanArm ScanArm - Design ScanArm 2.5C            
SCENE SCENE - Capture and Process SCENE - WebShare Server and 2Go SCENE - WebShare 2Go App SCENE - 2018 SCENE - 7.x SCENE - 6.x SCENE - 5.x SCENE - 4.x SCENE - LT SCENE - 2019
SCENE SCENE - 2go App SCENE - 2020 SCENE - 2021 SCENE - 2022 SCENE - 2023          
Serial FaroArm Serial FaroArm - Silver Serial FaroArm - Gold Serial FaroArm - Bronze              
Sphere FARO Sphere - Sphere                  
Visual Inspect Visual Inspect - App Visual Inspect - CAD Translator                
WebShare WebShare - Enterprise WebShare - WebShare Cloud                

CAM2

2023

2021

2020

2019

2018

Laser Tracker

Vantage S

Vantage S6

Vantage E

Vantage E6

FARO® Knowledge Base

Connecting the FARO RemoteControls App to CAM2

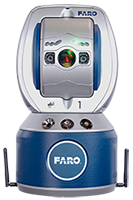
VantageS6_bty.png

Overview

While the FARO® RemoteControls App can control basic Tracker functions alone, using it with CAM2 allows you to initiate measurements via your mobile device and record directly in CAM2.

Download The FARO RemoteControls App from the Google Play store here, or navigate to the Google Play Store and search for FARO RemoteControls. Click the App titled FARO RemoteControls with the FARO logo as the App icon, then click Install.

The following will procedure will step you through the setup of the app, computer, and CAM2.

Computer Setup

  1. Right-Click the Network Icon in the Windows Task Bar to display the available networks. Choose your Laser Tracker from the list and click Connect. Typically, the Laser Tracker is listed as “VantageS-Tracker-WiFi_xxxx” or “VantageE-Tracker-WiFi_xxxx”, where “xxxx” is the last 4 digits of the Tracker’s serial number.
    AvailableNetworks.jpg
    Note: You can also access the available networks via Start>Settings>Network & Internet>Wi-Fi>Show available networks
  2. Once connected, retrieve the IP address assigned to the computer’s wireless card. Click the Windows Start icon and type ‘CMD’. Click on the Command Prompt Desktop app.
    CommandPromptDesktopApp.jpg
  3. At the prompt, type ipconfig and press Enter.
  4. Under the Wireless LAN adapter section, find the IPv4 Address assigned to the computer, normally it is either 169.254.1.10 or 169.254.1.11. (This address may change when you reconnect the Laser Tracker to the computer). Record this IP address, as it will be needed later for configuration of the mobile app.
  5. Computer setup is now complete, continue to CAM2 Setup.

CAM2 Setup

  1. Start CAM2, and open the Device Center. DeviceCenterIcon50x50.jpg
  2. Select the Laser Tracker from the Device Center window.
    DeviceCenterwVantageS.jpg
    If the Laser Tracker is not shown, click the + button to add it.
    DeviceCenterAddTracker.jpg
  3. In the main ribbon of CAM2, click on the File icon CAM2FileMenuIcon.jpg and then click Preferences.
  4. In the next window, click on Measurement and then click the Other tab. Towards the bottom of the page, enable the check box for Remote Server and then click OK.
    CAM2Preferneces-Meas-Other-Remote.jpg
  5. CAM2 setup is now complete, continue to Mobile Device Setup.


Mobile Device Setup

  1. Before launching the app, connect your mobile device via Wi-Fi to the Laser Tracker’s SSID. Typically, this is listed as “VantageS-Tracker-WiFi_xxxx” or “VantageE-Tracker-WiFi_xxxx”, where “xxxx” is the last 4 digits of the Tracker’s serial number.
  2. Now launch the FARO RemoteControls app on your mobile device. Connect to the Laser Tracker by entering the last four digits of the serial number in the field provided and tap Connect.
    TrackerAppSerialNumber.jpg
  3. Tap the Settings Gear icon (top right corner of the screen).
    TrackerAppGear.jpg
  4. Enter any name for the CAM2 server (you can name it CAM2).
  5. Then enter the IP address of your computer as recorded in the Computer Setup section above (Step 4).
  6. Now click Connect and close the settings window. You should now have a successful connection between the mobile device, computer, and CAM2.

Using the FARO RemoteControls App

  1. Within the FARO RemoteControls app, click on the Scale icon at the top of the screen to open the CAM2 connection.
  2. Next, click on the red Scale button towards the bottom of the screen. This will open the different features of CAM2.
    TrackerAppScales.jpg
  3. Tap the Point feature, the Point measurement dialog window will open in CAM2.
    • Use the + icon to a add reading, (equivalent to pressing the “G” key in CAM2)
    • Use the * icon to solve the feature (equivalent to pressing the “H” key in CAM2)
    • Use the "star pattern" icon to open the DRO window.
      Note: The first time you tap the star pattern icon, the app will crash. This is a known issue and will be addressed in the next release. Simply reopen the app and return to the same tab/screen. Any measured points will be still be available. Now tapping the star pattern icon will open the DRO window in the app, (and CAM2) for that point.
  4. Plane or Line measurements can also be taken in a similar manner.