Connecting the FARO RemoteControls App to CAM2
Overview
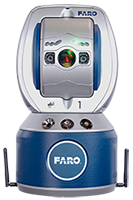
While the FARO® RemoteControls App can control basic Tracker functions alone, using it with CAM2 allows you to initiate measurements via your mobile device and record directly in CAM2.
Download The FARO RemoteControls App from the Google Play store here, or navigate to the Google Play Store and search for FARO RemoteControls. Click the App titled FARO RemoteControls with the FARO logo as the App icon, then click Install.
The following will procedure will step you through the setup of the app, computer, and CAM2.
Computer Setup
- Right-Click the Network Icon in the Windows Task Bar to display the available networks. Choose your Laser Tracker from the list and click Connect. Typically, the Laser Tracker is listed as “VantageS-Tracker-WiFi_xxxx” or “VantageE-Tracker-WiFi_xxxx”, where “xxxx” is the last 4 digits of the Tracker’s serial number.

Note: You can also access the available networks via Start>Settings>Network & Internet>Wi-Fi>Show available networks - Once connected, retrieve the IP address assigned to the computer’s wireless card. Click the Windows Start icon and type ‘CMD’. Click on the Command Prompt Desktop app.

- At the prompt, type ipconfig and press Enter.
- Under the Wireless LAN adapter section, find the IPv4 Address assigned to the computer, normally it is either 169.254.1.10 or 169.254.1.11. (This address may change when you reconnect the Laser Tracker to the computer). Record this IP address, as it will be needed later for configuration of the mobile app.
- Computer setup is now complete, continue to CAM2 Setup.
CAM2 Setup
- Start CAM2, and open the Device Center.

- Select the Laser Tracker from the Device Center window.

If the Laser Tracker is not shown, click the + button to add it.

- In the main ribbon of CAM2, click on the File icon
 and then click Preferences.
 - In the next window, click on Measurement and then click the Other tab. Towards the bottom of the page, enable the check box for Remote Server and then click OK.

- CAM2 setup is now complete, continue to Mobile Device Setup.
Mobile Device Setup
- Before launching the app, connect your mobile device via Wi-Fi to the Laser Tracker’s SSID. Typically, this is listed as “VantageS-Tracker-WiFi_xxxx” or “VantageE-Tracker-WiFi_xxxx”, where “xxxx” is the last 4 digits of the Tracker’s serial number.
- Now launch the FARO RemoteControls app on your mobile device. Connect to the Laser Tracker by entering the last four digits of the serial number in the field provided and tap Connect.

- Tap the Settings Gear icon (top right corner of the screen).

- Enter any name for the CAM2 server (you can name it CAM2).
- Then enter the IP address of your computer as recorded in the Computer Setup section above (Step 4).
- Now click Connect and close the settings window. You should now have a successful connection between the mobile device, computer, and CAM2.
Using the FARO RemoteControls App
- Within the FARO RemoteControls app, click on the Scale icon at the top of the screen to open the CAM2 connection.
- Next, click on the red Scale button towards the bottom of the screen. This will open the different features of CAM2.

- Tap the Point feature, the Point measurement dialog window will open in CAM2.
- Use the + icon to a add reading, (equivalent to pressing the “G” key in CAM2)
- Use the * icon to solve the feature (equivalent to pressing the “H” key in CAM2)
- Use the "star pattern" icon to open the DRO window.
Note: The first time you tap the star pattern icon, the app will crash. This is a known issue and will be addressed in the next release. Simply reopen the app and return to the same tab/screen. Any measured points will be still be available. Now tapping the star pattern icon will open the DRO window in the app, (and CAM2) for that point.
- Plane or Line measurements can also be taken in a similar manner.

