Getting Started with ActiveSeek Find Me, Follow Me for the FARO Vantage S or Vantage E Laser Tracker
Overview
ActiveSeek™ Find Me, Follow Me, the newest FARO® ease-of-use feature, makes your VantageS or VantageE Laser Tracker easier to use when your workspace has obstructions, you break the Tracker’s laser beams focus on the spherically mounted retroreflector (SMR), or you are using multiple targets in the same measuring session. This feature is included with VantageS or VantageE firmware version 1.2.0.5 and later. Click here to download the latest firmware.
Note: If working on an application where camera acquisition speed is critical, consider completing a camera compensation before using the Active seek Find Me, Follow Me feature. A camera compensation should improve camera acquisition speed by approximately 2 seconds.
Using Follow Me you can …
- Easily move with the SMR from one measurement position to another, past obstacles without the encumbrance of trying to keep the beam continuously centered within the SMR.
- Automatically reacquire the beam within the SMR if you have accidentally broken the beam while moving in the workspace.
Using Find Me you can …
- Reacquire a beam that has been locked onto another SMR.
- Move the beam from one SMR to another.
Please take a few minutes to view this training video and see for yourself how much faster it is to take measurements using Find Me, Follow Me. Cannot view the video? Download Here
Movements, Lights, and Modes
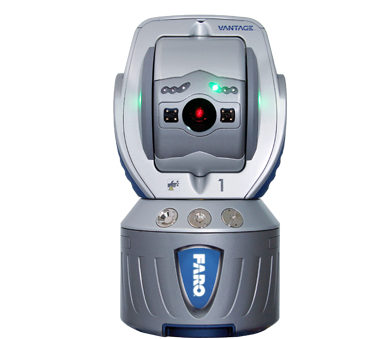
Find Me, Follow Me works with a coordinated set of movements, colored lights, and modes. Movements tell the Tracker where the SMR is within the workspace. Colored lights appear above the Tracker’s aperture to indicate the different modes used with Find Me, Follow Me. Modes tell the Tracker what to do. When you watch the training video, notice these sequences of movements, lights, and modes.
- Tracking mode, indicated by solid green lights, enables you to take measurements.
In this mode, the beam is locked within the center of the SMR. You can move the SMR within the workspace as long as you point its face toward the Tracker, keep the SMR within the Tracker’s 50° field of view, and maintain the solid green light. - Follow Me mode, indicated by solid amber lights, enables you to move more freely around the workspace, passing behind obstacles that break the beam, and automatically reacquire the beam as you emerge.
In this mode, the beam is not locked within the center of the SMR, allowing the Tracker to follow the SMR. You can move the SMR within the workspace, even behind obstacles, as long as you point the SMR face toward the Tracker, keep the SMR within the Tracker’s 50° field of view even as you emerge from behind obstacles, and maintain the solid amber light. If you see flashing amber lights, the SMR is not within the Tracker’s field of view so the Tracker cannot follow. If this happens, return the SMR to a location within the Tracker’s field of view and point the SMR face toward the Tracker. When you do this, solid amber lights appear, indicating the Tracker has identified the SMR and is ready to follow. - Find Me mode, indicated by flashing blue lights, notifies you that the Tracker is focusing the beam within the center of the SMR you are moving up and down or from side to side.
To trigger this mode, point the SMR face toward the Tracker, keeping the SMR within the Tracker’s 50° field of view. Then, move the SMR up and down or from side to side to get the Tracker’s attention. Flashing blue lights appear when the Tracker sees the SMR and is switching to Follow Me mode.
See Follow Me in Action
The fastest way to become familiar with Follow Me is to use the Tracker in a workspace that has obstacles in the path you travel while in Tracking mode. If your next inspection does not have obstacles that can cause multiple beam breaks, you can simulate this by using a support column, work cart, or the calibration tripod that comes with the Tracker.
These steps show you how Follow Me works. You can see most of these steps demonstrated in the training video.
- Position the Tracker so there is an obstacle, such as a column, a few meters in front it.
- Start with the SMR in the home position with solid green lights.
- Gently remove the SMR from the home position. While maintaining the solid green lights and in Tracking mode, move the SMR in front of the column to one side without breaking the beam. Continue moving in Tracking mode until you are past the column.
- With solid green lights, move the SMR to a position behind the column and pause briefly. Notice that the green lights turn off, indicating that the beam broke because the column obstructed the Tracker’s 50° field of view.
- Now emerge from behind the column, pointing the SMR face toward the Tracker. As you clear the column, solid amber lights appear on the Tracker. Continue to move with the SMR and the Tracker will follow. Similarly, the Tracker follows the SMR as you pass behind other obstacles in the workspace.
- Move to a measurement location, hold the SMR stable, and when solid green lights appear, take your measurements.
See Find Me in Action
If you use multiple SMRs in your measurement project, Find Me quickly enables you to change which SMR the Tracker follows.
NOTE: In a workspace that has many bright or reflective objects, the Tracker may treat one of these objects as if it was an SMR, focusing the laser beam at that that location. If this occurs, Find Me is an efficient way to reacquire the beam and move it to an SMR in your project.
These steps help you become familiar with the Find Me feature and switching from one SMR to another. You can see these steps demonstrated in the training video.
- In Tracking mode, put an SMR in a stable nest a few meters from the Tracker. You should see solid green lights.
- Hold a second SMR in your hand a short distance away from the SMR in the nest. Point the second SMR so it faces the Tracker.
- Move the second SMR side to side or up and down until the solid green lights turn off and the blinking blue lights appear.
- Stop moving the second SMR. The blinking blue lights turn off and solid amber lights appear.
- Use the Follow Me steps described above to move the second SMR to a measurement location.
- Hold the SMR stable, and when solid green lights appear, take your measurements.
Find Me, Follow Me Settings
To disable Find Me or Follow Me, change settings, or set the Follow Me search range, use the Device Control Panel in CAM 2 Measure 10.
- Open CAM2 Measure 10, click the Devices tab > Device Control Panel > TrackerPad. The TrackerPad panel appears.
- To turn off Find Me, on the Tracker Pad panel, click Turn Find Me Off.
- To turn off Follow me, from the Tracker Pad panel, click Follow Me Settings. In the Follow Me Settings panel, click Follow Me > Off and click OK.
- To set the Follow Me search range, from the Tracker Pad panel, click Follow Me Settings. In the Search Radius field, enter the distance in meters within which you want the Follow Me search to function. The maximum range of Follow Me is similar to that of the Tracker’s camera. Depending on the environment and lighting in your workspace, you may have a larger or smaller maximum search range. To learn about the range of the camera, review the VantageS and VantageE Technical Specifications Sheet.
See Also
- Firmware Download and Installation Instructions for the Vantage S and E Laser Trackers
- User Manual for the Vantage S and E Laser Tracker
- Update Driver for Freestyle by Updating SCENE Capture
Keywords
reacquire the laser beam, acquire the laser beam, track out