SDK Server Software and Installation Instructions for the Cobalt 3D Imager

Quick Steps
- Click the link in this table to download the latest SDK Server software on the computer you use with your FARO
® Cobalt 3D Imager. - Download and save the software
- Check the network connection type
- Connect the Cobalt and computer
- Verify the current SDK server version number
- Install the server software
- Confirm the results
What is New
Who Needs This Upgrade
If your Cobalt was serviced by FARO after 6 Dec 2018, the latest SDK Server software was installed by the service technician. Check the SDK Server version number to be sure you have the latest.
Overview
Your Cobalt works best when it uses the latest SDK Server software. This upgraded software includes enhancements and features that make it easier to get your job done quickly. After you run the software installation file, the SDK Server software resides on the Cobalt.
When FARO factory technicians service your Cobalt, they provide all the most recent hardware improvements. They also install the latest SDK Server softwre to support these improvements.
Prepare
Please review this table before you begin to ensure your success.
| Time to Complete | 30 minutes |
| Skills Needed |
|
| Prerequisites |
|
| Supported Metrology Software |
Download and Save the SDK Server Software
- Click here to download the latest server software. fsv file to the computer you use with the Cobalt.
- It may take a few minutes to complete the download. Do not close your browser or shut off your computer while the download is in progress.
When the download is complete, you should see the *Cobalt SDK Server Software 2.0.2.2000.fsv file in your browser's download folder. - Copy the .fsv file to your storage media for safe keeping.
Check the Network Connection Type
The network connection type on the computer should be Local Area Connection > Internet Protocol Version 4 (TCP/IPv4) > Obtain an IP address automatically.
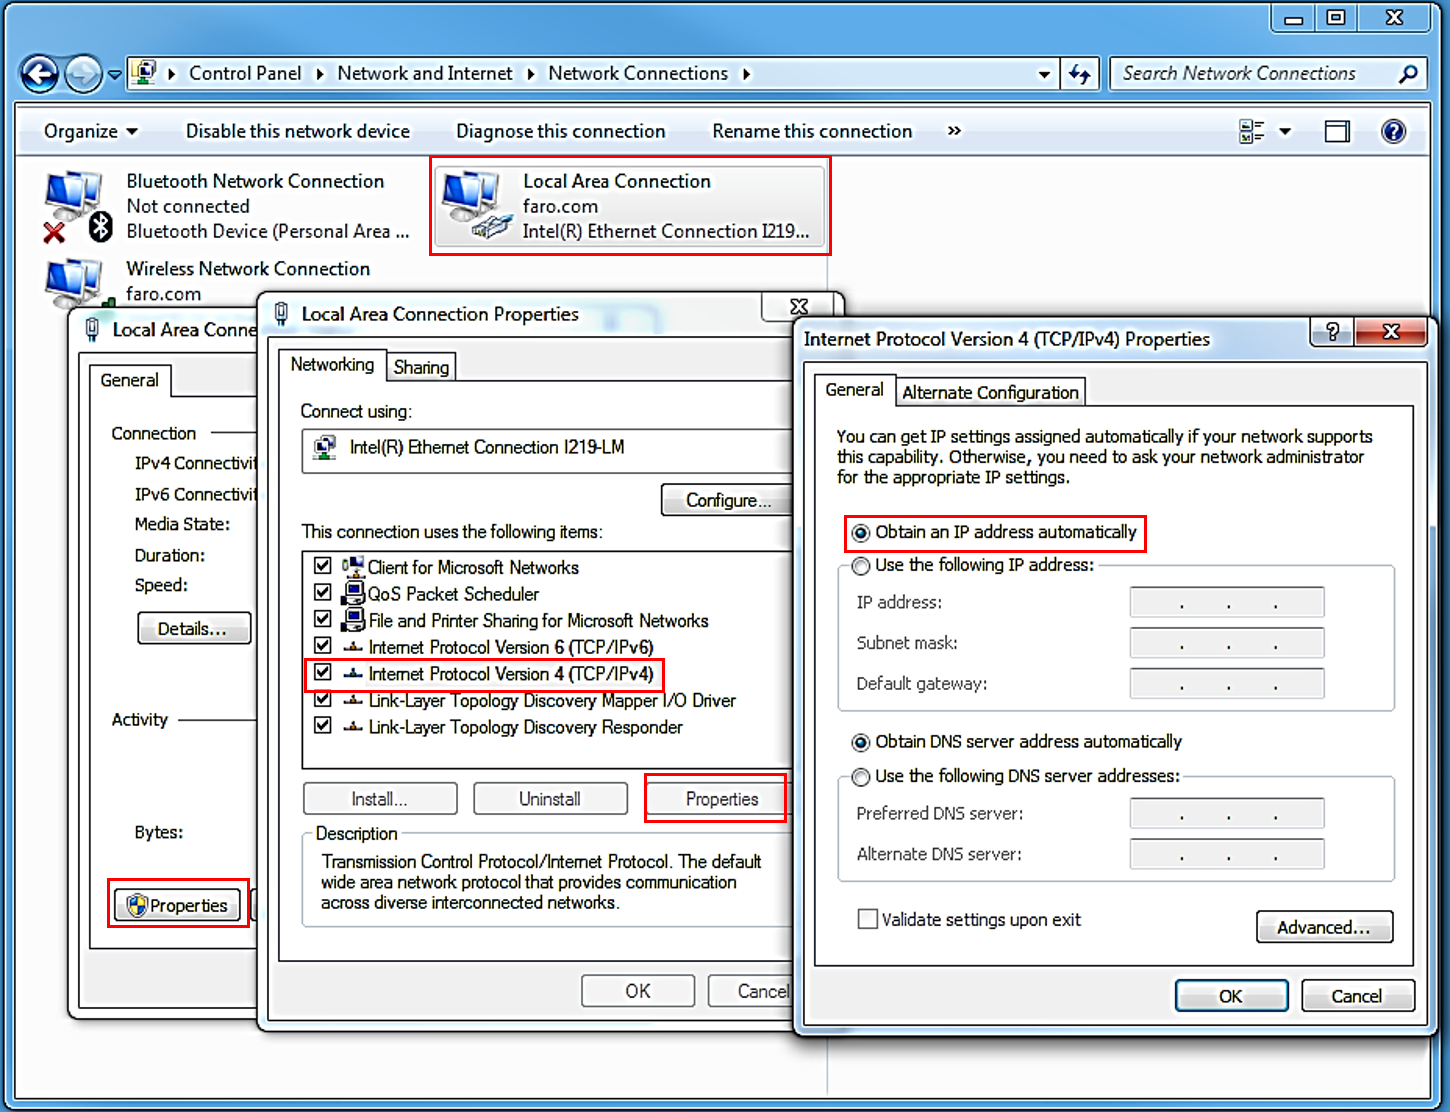
- From the Windows Start menu, in the Search field type Network Sharing Center.
- In the left panel, click Change adapter settings and in the window double-click Local Area Connection.
- Click Properties and click Internet Protocol Version 4 (TCP/IPv4).
- Click Properties and confirm that Obtain an IP address automatically is selected. If not, select it and click OK.
- Close all other windows.
Connect the Cobalt and Computer
- Attach the Cobalt to the computer where you have metrology software with a Cross Over Ethernet cable.
- Turn on the Cobalt using the toggle switch on the power brick next to the power plug.
- The steps to connect the Cobalt to the computer are different depending on which metrology software you are using: BuildIT, CAM2, or Measure 10.
- Click here to download the latest Cobalt Interface Utility to the computer where you use BuildIT.
- Close all running applications.
- Once the driver is downloaded, locate the CobaltInterface-ml-1.4.0.22-Full.exe file in your browser's download folder, double-click the .exe open it, and click Run.
- Follow the prompts until the installation is complete and you see a message asking you to restart your computer. Click Restart.
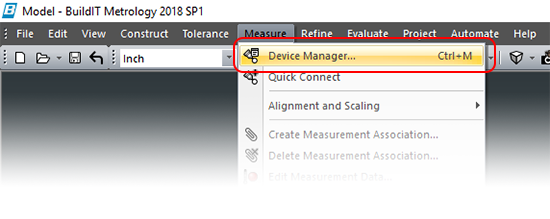
- When your computer has restarted, open BuildIT Metrology, and from the menu click Measure > Device Manager.
- In the Device Manager, select the Cobalt from the list of devices, and then click Open Device.
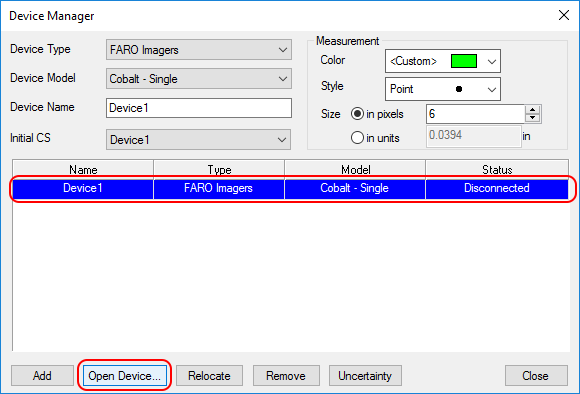
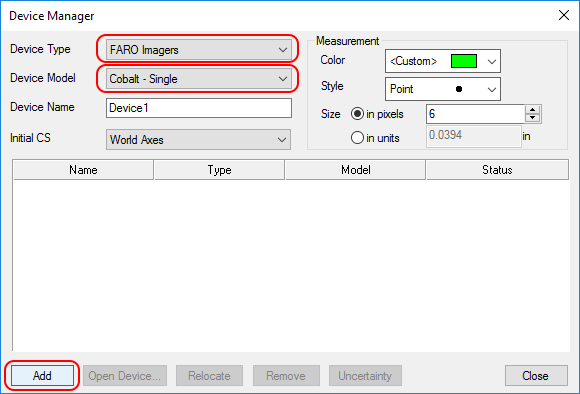
- If the Cobalt is not listed. Follow these steps.
- From the Device Type dropdown menu select: FARO Imagers
- From the Device Model dropdown menu select: Cobalt – Single
- You may also set the Device Name and Initial CS for the device.
- Click Add.
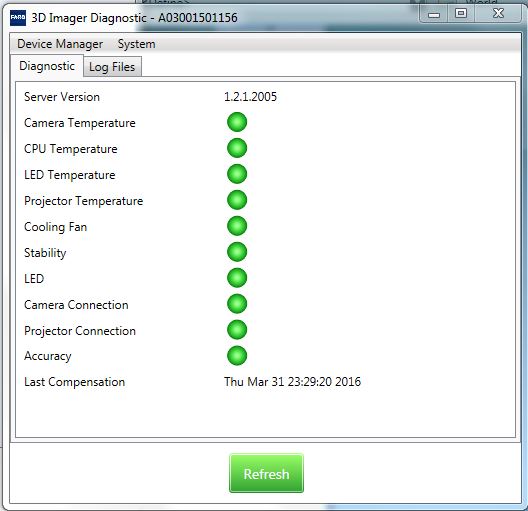
- In the Device window, mark the Checkbox next to device to update and then click Diagnostic.
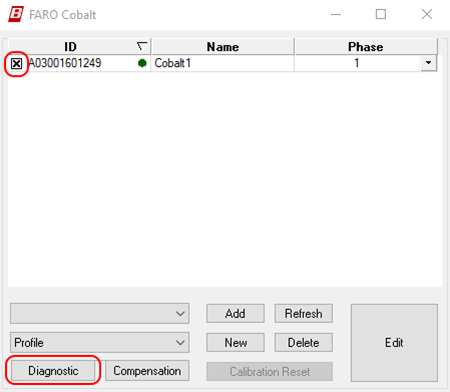
- The 3D Imager Diagnostic window appears. Continue by going to Verify the Current SDK Server Version Number.
- Open CAM2 and click Devices tab > Device Center.
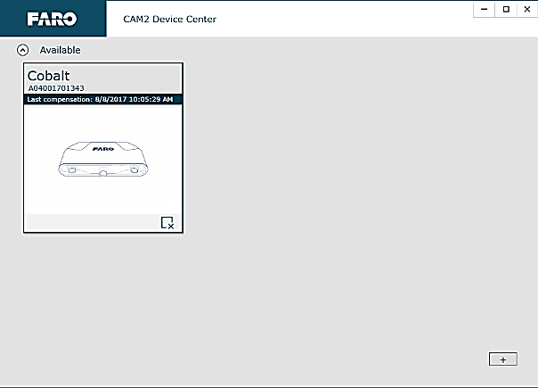
- In the Device Center window, make sure that the Cobalt is correctly connected to the computer.
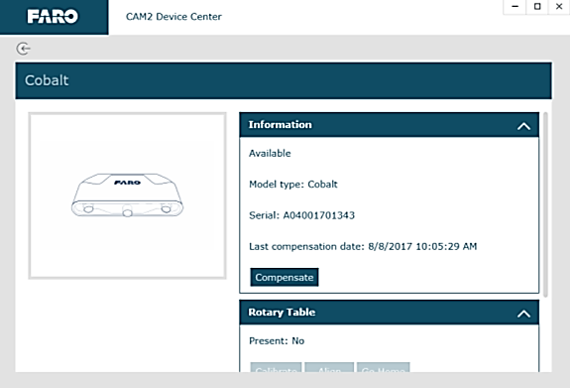
If an image of the Cobalt appears and Available appears above the image, the Cobalt is correctly connected. Click the image to display the Information panel. The Cobalt serial number appears in the Serial field. Confirm the serial number.
If an image of the Cobalt does not appear or Unavailable appears above the image, it is not connected. Follow these steps.- Click + to add a device. The software searches to detect connected devices. Serial numbers of available Cobalt imagers appear in a list. Click the serial number of the imager you want to use.
- An image of the Cobalt appears with Available above it. Click the image to display the Information panel. The Cobalt serial number appears in the Serial field. Confirm the serial number.
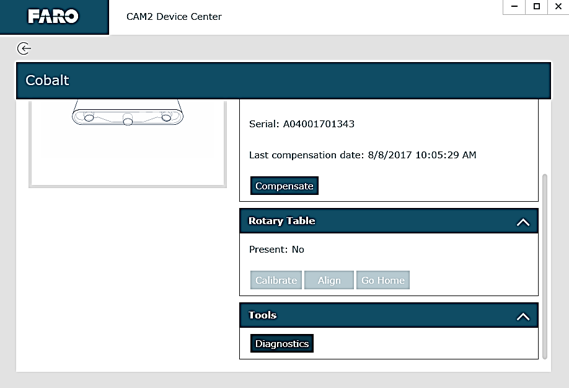
- Click Diagnostics in the Tools section in the bottom-right panel. The 3D Imager Diagnostic window appears. Continue by going to Verify the Current SDK Server Version Number.
- Open Measure 10 and click Devices tab > Device Control Panel.
- In the Device Control Panel window make sure that the Cobalt is correctly connected to the computer.
If an image of the Cobalt appears with the serial number in the list on the left, the Cobalt is correctly connected. Select the serial number so that the serial number appears in the Selected Device field. Confirm the serial number and continue by going to Verify the Current Server Version Number.
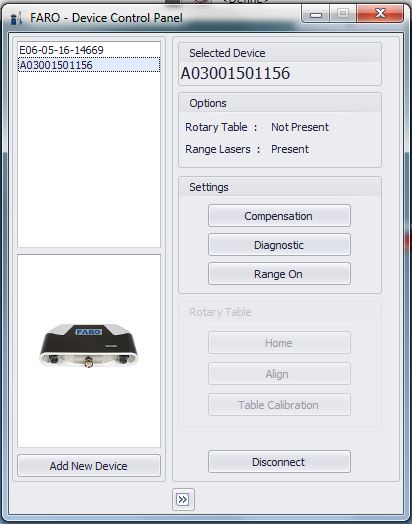
If an image of the Cobalt does not appear, it is not connected. Follow these steps to connect the Cobalt.- Click Add New Device > FARO 3D Imager. The software searches to detect connected devices. An image of the Cobalt should appear in the list on the left. If not, click Search to detect available devices, then click Add or enter the serial number and click OK.
- Click Connect and Close.
- An image of the Cobalt appears with its serial number. Select the serial number so that it appears in the Selected Device field. Confirm the serial number.
- Click Diagnostic. The 3D Imager Diagnostic window appears.
- Continue by going to Verify the Current SDK Server Version Number.
Verify the Current SDK Server Version Number
- In the 3D Imager Diagnostic window under Server Version, write down the current version number.

Install the SDK Server Software
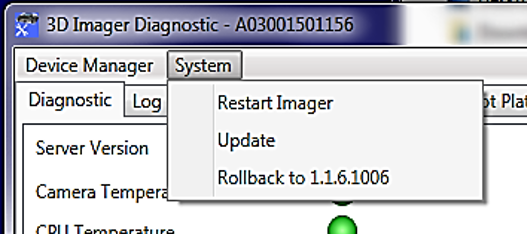
- In the 3D Imager Diagnostic window, on the menu, click System > Update.
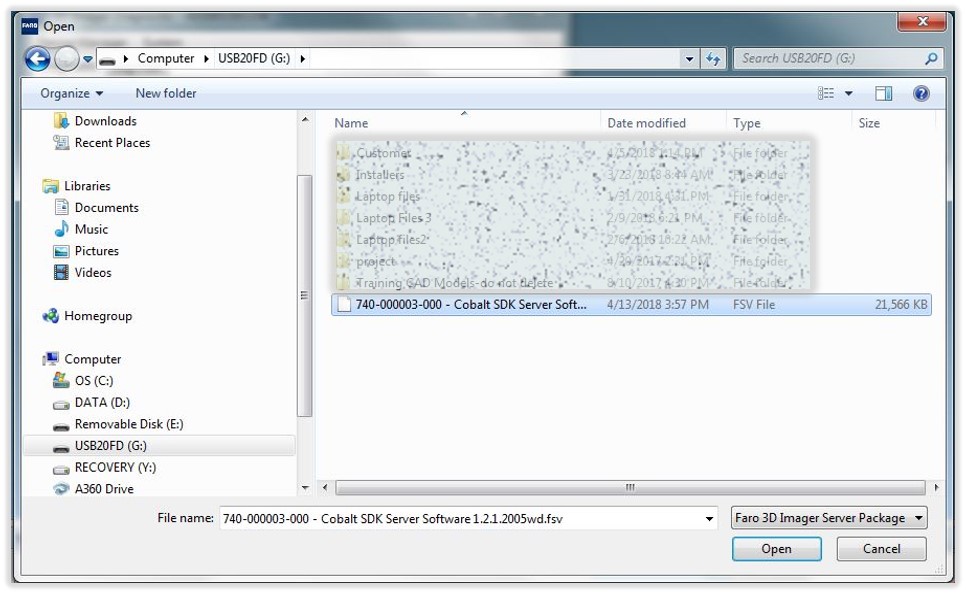
- Navigate to where you stored the .fsv file, and select it. The name of the .fsv file should appear in the File Name field. Click Open.
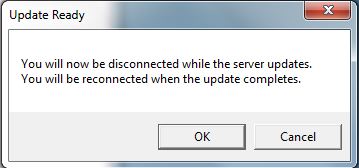
- A window appears to tell you that the Cobalt will disconnect while the server updates.
Note: During the update, the 3D Imager Diagnostic window may go blank while the . You may not see any feedback while the update processes.
- Wait about 3 minutes for the Cobalt to automatically reconnect.
If it does not reconnect, follow the instructions in Connect the Cobalt and Computer.
Confirm the Results
- Follow the steps for CAM 2 or Measure 10 to go to the Device Center for CAM2 or the Device Control panel for Measure 10 and click Diagnostics. The 3D Imager Diagnostic window appears,
- In the 3D Imager Diagnostic window, under Server Version, compare the version number you wrote down to the number in the Server Version field.
You should see that the version number has changed.
The Cobalt is now ready to be used.
See Also
- User Manual for the Cobalt 3D Imager
- Interface Utility for Cobalt 3D Imager
- General: Warranty-Training-Corporate
Keywords
reinstalling, reinstall, re-install, updating, update, download, latest firmware, current firmware, newest firmware, new firmware