Creating a Clipping Box in SCENE

Overview
Clipping boxes hide portions of a 3D scan project without eliminating scan point data. These boxes can be resized, rotated, and manipulated to hide any portion of a scan.
Workflow Interface
There are several ways to create clipping boxes in 3D view. On the Explore ribbon, click the Auto Clipping submenu and click one of the three options.

- Auto Clipping Box - Clicking Auto Clipping Box creates a clipping box close to the center of the current 3D view. The box will cover roughly two-thirds of the screen by default.

- One Click Clipping Box - This method creates a clipping box centered around a selected point and coplanar to the surface of the point.
- Three Clicks Clipping Box - This method creates a clipping box exactly enclosing three chosen points and coplanar to the surface defined by the points.
Aligning a Clipping Box to a Plane
A clipping box can also be created using a plane object for reference. In the 3D view, right-click the desired plane in the project Structure view and click New > Aligned Clipping Box.

- If the plane is unlimited, the clipping box will be created as a unit cube centered on the reference point of the plane. The box's faces will be parallel to the selected plane.
- If the plane is limited, the clipping box will tightly enclose the boundary polygon of the plane.
Classic Interface
Click the Create a new Clipping Box icon  in the 3D Toolbar to create an automatic clipping box. Use the clipping box submenu to create one-click or three-click clipping boxes.
Manipulating a Clipping Box
Once the clipping box has been created, use the clipping box toolbar to control the box and its visibility options. The toolbar's label indicates which clipping box it controls.

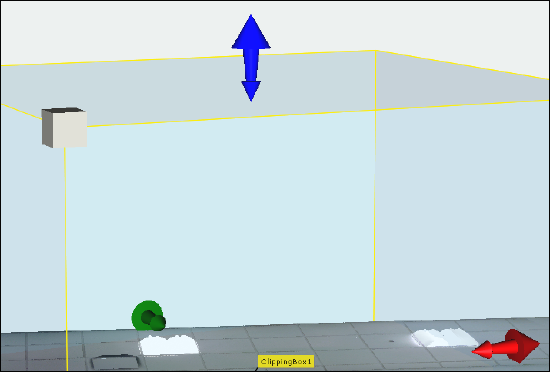
 Scale manipulators – Click and move a colored arrow to resize the box in the arrow's direction. Click and move the gray corner cube to resize the entire cube.
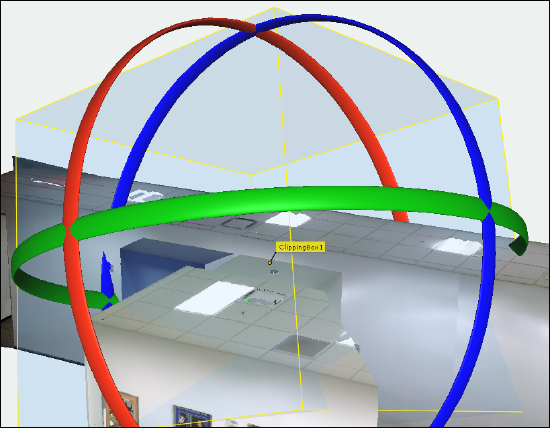
 Rotation manipulators – Click a colored band to rotate the box on that axis.
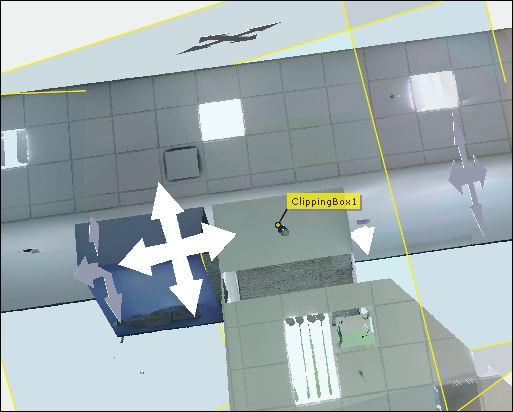
 Translation manipulators – Click and move the intersecting arrows to move the box.
 Restore previous transformation – Undo last change
 Re-apply transformation change – Redo last change
 Restore initial transformation – Undo all changes
 Clipping Box visibility – Hide/Unhide clipping box
 Hide points – Designate whether points inside or outside of the box should be hidden
 Enable/Disable clipping – Toggles clipping for the selected box
SCENE 5.3 and Earlier
There are three ways to create a clipping box SCENE 5.3:
- Automatically (default) – Click the Create a new clipping box button in the 3D view toolbar. A clipping box will be created close to the center of the current 3D view. The box will be scaled so that it covers roughly two-thirds of the screen.
- Attached to a selected surface – Click this option from the Create a new clipping box drop down menu in the 3D view toolbar
 . Click three points in the view in order to determine a surface. A clipping box will then be created with one of its faces being coplanar to the surface defined by the three picked points. The clipping box will be scaled in such a way as it exactly encloses the picked points.
- Aligned to a limited or unlimited plane object – Select New > Aligned Clipping Box in the context menu of a plane object to align a clipping box to the object:
- Unlimited plane: The new clipping box will be created as a unit cube centered on the reference point of the plane. The box's faces will be parallel to the selected plane.
- Limited plane: The new clipping box will tightly enclose the boundary polygon of the limited plane.
Manipulating a Clipping Box
Once the clipping box has been created, use the clipping box toolbar to control the box and its visibility options. The toolbar's label indicates which clipping box it controls.
- Scale manipulators – Click and move a colored arrow to resize the box in the arrow's direction. Click and move the gray corner cube to resize the entire cube.
- Rotation manipulators – Click a colored band to rotate the box on that axis.
- Translation manipulators – Click and move the intersecting arrows to move the box.
- Restore previous transformation – Undo last change
- Re-apply transformation change – Redo last change
- Restore initial transformation – Undo all changes
- Clipping Box visibility – Hide/Unhide clipping box
- Hide points – Designate whether points inside or outside of the box should be hidden
- Enable/Disable clipping – Toggles clipping for the selected box
See Also
Keywords
Hide scan, hide points, remove complexity, cleanup view, hide, remove, erase, delete