Defining a Clipping Plane Offset in RevEng

Overview
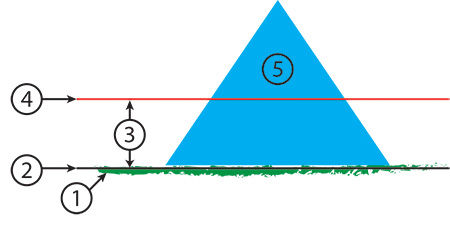
Before starting a scan, defining a base clipping plane and offset provides cleaner scans with less editing of the point cloud to remove erroneous scan points. The Offset value, creates an clipping plane above the scanned surface at the distance specified. This prevents any point cloud data from being collected below the specified plane.
|
 |
Procedure
- Connect the FARO® ScanArm to the computer and start FARO RevEng.
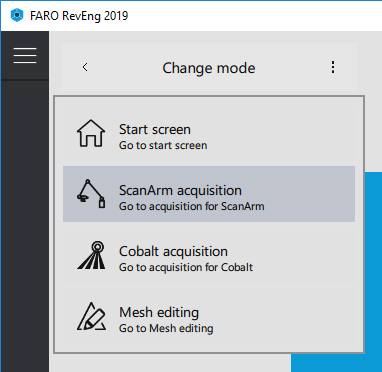
- From the Quick Menu dropdown, click ScanArm acquisition.
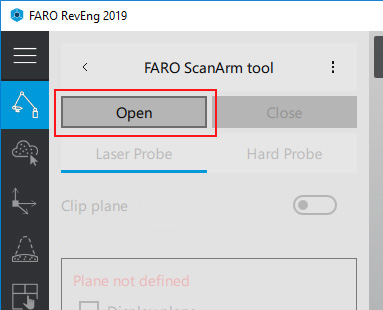
- Click on the Open button to enable the ScanArm.
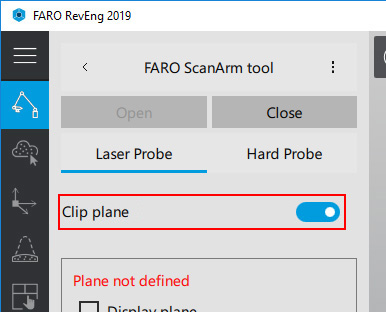
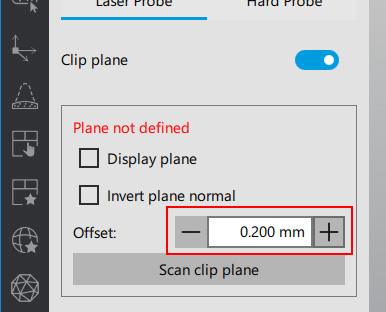
- Slide the Clip Plane button to the right.
- Set the Offset value. This value will vary depending of the flatness of your scan surface and how much of the object you are scanning you are willing to clip.
It is important to note that the Offset value must be set before scanning the clipping plane.
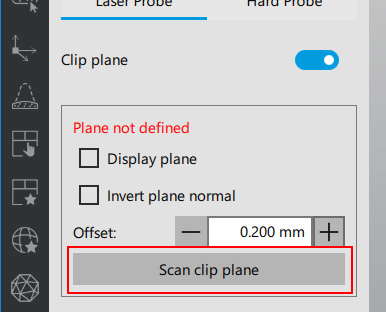
Other options:- Display plane: if checked, the clipping plane will be shown in the 3D Viewer
- Invert plane normal: if checked, the normal of the plane will be inverted
- Click the Scan clip plane button and begin a scan of your surface by pressing the green button on the ScanArm. Scan an area that it is a least equal to the footprint of the object you are scanning. Once scanning is complete, press the red button on the ScanArm to accept the scan.
- Once complete, the Plane defined message should be displayed.
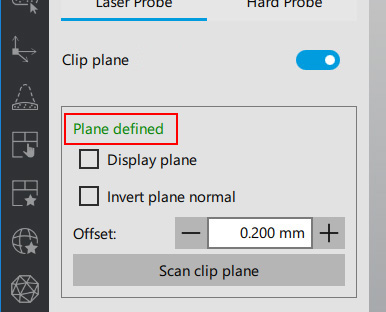
- You are now ready to position your object and begin scanning using the Start measurement button.