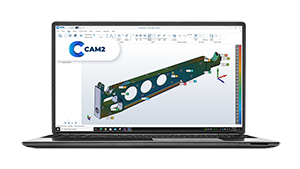
TrackArm Wizard - Super 6DoF Combined with the 6Probe in CAM2
Overview
In CAM2® 2018.4 and later, you can connect a Laser Tracker, 6Probe™ and FaroArm® via the TrackArm Wizard, and measure independently with each device using the auto recognize mode.
To perform a TrackArm, the Tracker and 6Probe can be paired, but not while in 6DoF mode, (i.e. beam cannot be locked onto the 6Probe). When the tracker is in 6DoF mode, the Locate TrackArm icon in CAM2 is disabled (greyed out). This prevents the user from accidently selecting it, which would cause the Tracker to home to the 7/8” Spherically Mounted Retroreflector (SMR), interrupting the 6DoF mode.
Quick Steps
- Connect the Tracker and FaroArm to CAM2
- Run the Locate TrackArm Wizard
- Pair and Connect the 6Probe
- Activate the “Auto Recognize Features” Setting for Both Devices
Connect the Tracker and FaroArm to CAM2
- Connect the Laser Tracker to the PC, and start CAM2.
- Allow the Laser Tracker to complete the Start-up checks.
- Position Laser Tracker, and perform the normal CompIT checks
- Position 7/8” SMR on Home position.
- Once CAM2 is open, connect the FaroArm, and click Yes when prompted to add the FaroArm.
- Ensure the TrackArm kit / SMR probe is installed (do not locate the SMR).
- Position the 7/8” tooling ball and nest so it can be used for calibration.

- Once both the Laser Tracker and FaroArm are connected, proceed to Run the Locate TrackArm Wizard.
Run the Locate TrackArm Wizard
- Once the Tracker and FaroArm are connected, CAM2 will prompt to run the Locate TrackArm Wizard, select Yes.

Note: The TrackArm wizard can also be started via Devices > Locate TrackArm

- The Locate TrackArm Wizard guides the user through the FARO Super 6DoF set up process to align a FaroArm® or FARO ScanArm® to a FARO Laser Tracker, so that both systems are measuring within the same coordinate system. For a detailed description of this procedure see: Super 6DoF TrackArm Set-up with CAM2.
- Once complete, proceed to Pair and Connect 6Probe.
Pair and Connect the 6Probe
For a video outlining this procedure see: Pairing the 6Probe with the Vantage S6 and E6 Laser Tracker
- Turn the 6Probe power on.
- Using ActiveSeek™ lock the Tracker on to the SMR located in the center of the 6Probe. Verify the probe is between 2.5m and 15m from the Tracker. The Tracker must be locked onto the 6Probe retro-reflector and the LED’s on its front face during the entire pairing process.
- Press any of the 6Probe’s four buttons to start the pairing process. All three status LEDs will flash blue during the pairing process. Once complete, the center LED will turn solid blue and tone will sound to indicate a successful pairing. The outer LEDs will flash green until a probe is activated from the Probe Management Screen.
- Once paired, select the probe tip to activate and proceed to Activate the “Auto Recognize Features” Setting for Both Devices
Activate the “Auto Recognize Features” Setting for Both Devices
- Within CAM2 select the Devices Tab. Click on the first device in the list to select it.

- Switch to the Home Tab and click on the "Auto-recognize features" icon to enable it.

- Now return to the Devices Tab and click on the second device in the list to select it.
- Again, switch to the Home Tab and click on the "Auto-recognize features" icon to enable it.
You may now measure freely with the TrackArm or 6Probe independently or in tandem.
See Also
- Super 6DoF TrackArm Set-up with CAM2
- Pairing the 6Probe with the Vantage S6 and Vantage E6 Laser Tracker
- Getting Started with ActiveSeek Find Me, Follow Me for the FARO Vantage S or Vantage E Laser Tracker
Keywords:
6dof, 6 dof, 6probe, trackarm

