On-Site Registration in SCENE

Overview
On-Site Registration enables the 3D scan data, whether it be from a single scan or multiple scans in process simultaneously, to be wirelessly transmitted directly to an on-site computer. Additionally, the scans are automatically aligned in real time.
Connecting the Scanner to the PC
To connect to the scanner directly, follow this procedure.
- Power on the scanner.
- Navigate to Manage > General Settings > WLAN.
- Toggle the Status button to the ON position.
- Set the Mode to Access Point.
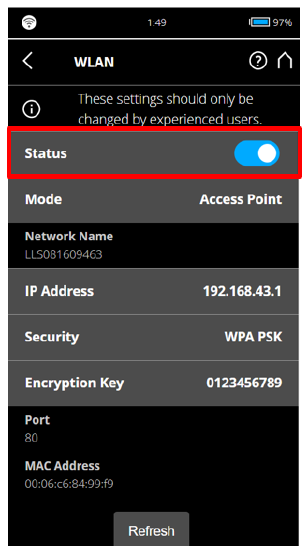
- Write down your scanner's IP Address and make note of the Network Name.
- On the PC, find the scanner network in the list of available networks.
- Connect using the scanner's WiFi password.
Note: The scanner's network is limited to a data transfer rate of 54 Mbit/s. For a faster connection, you can connect to the scanner over a local network by setting the Mode to WLAN instead of Access Point. This allows for transfer speeds up to 150Mbit/s in 5GHz networks.
Check Network Security Status
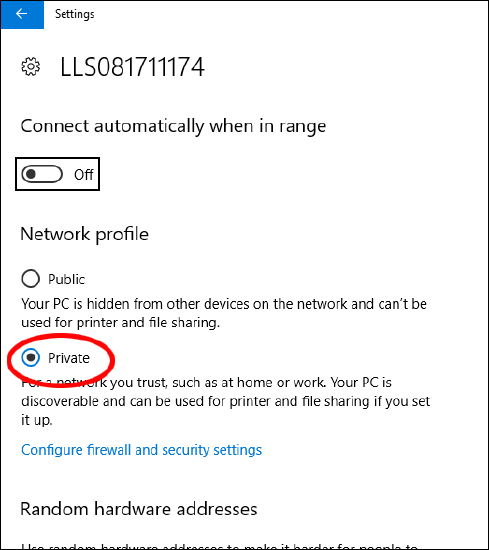
- Open your network list.
- Click Properties for the scanner network.

- Make sure Private is checked.
If you are experiencing connection issues, your firewall or Windows Group Policy may be blocking the data transfer. Click here for setup/troubleshooting information. For additional connection information, download the Focus scanner manual.
Connecting SCENE to the Scanner
- Once you have connected the PC to the scanner, open SCENE.
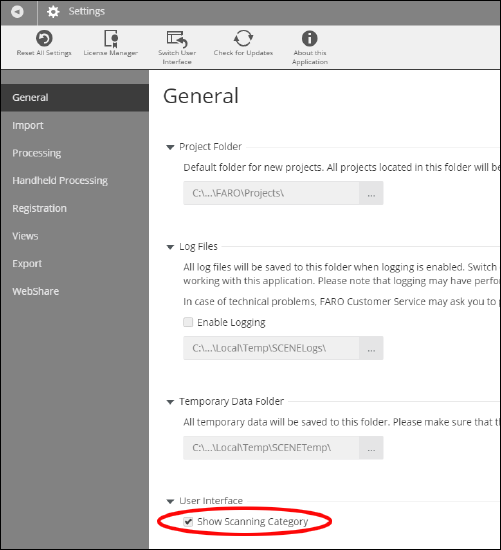
- Navigate to Settings > General.
- Make sure Show Scanning Category is checked under the User Interface menu.
- Click the Back arrow
 .
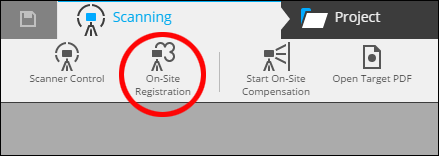
. - On the Scanning ribbon, click On-Site Registration.
- On the connect screen, enter the scanner's IP address and click Connect.
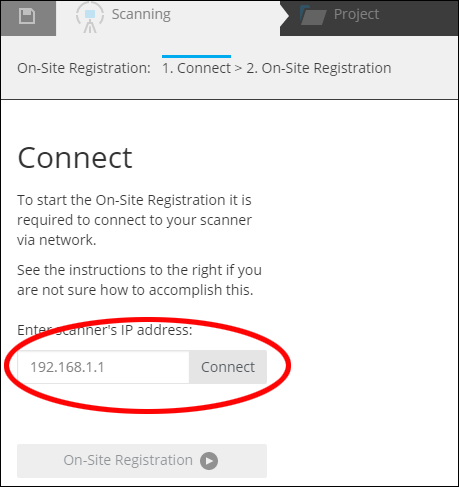
- Click On-Site Registration to begin.
On-Site Registration
- On the scanner, navigate to Manage > Registration Settings.
- Make sure the On-Site Registration option is toggled to the ON position.
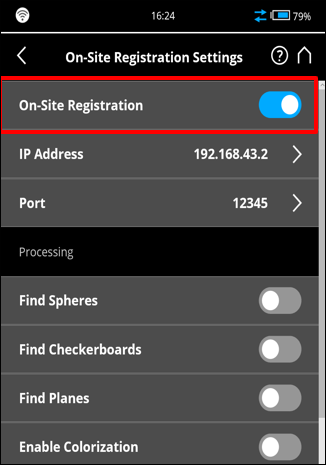
- Set the processing and registration options.
- Set-up the scanning project as desired.
- On the PC, click Home to double-check the project settings.
- Click Map.
- Click Start Scan to begin scanning.
Troubleshooting
Scan Failed to Register
If a scan fails to register, you will see a warning icon, and the scan's status will be Failed.
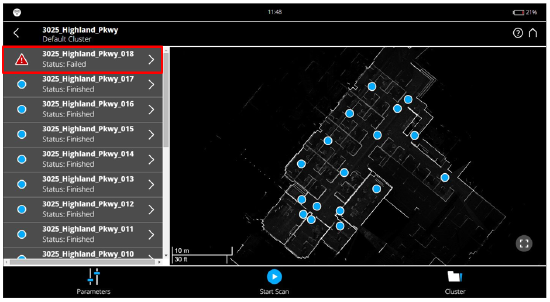
The most likely cause of a registration failure is not having enough overlap between scans.
- Move the scanner closer to the last scan position.
- Scan again, and the new scan should register.
- Select the previous failed scan.
- Click Register Again.

- The failed scan should register correctly.
Error Message: "No Connection to SCENE. Trying to connect..."
If you see this message when trying to scan, even after connecting to the scanner through SCENE, your firewall may be blocking the data transfer.
Adding Port Exception in Windows 10
If the connection problem persists, you will need to add an input port exception for the scanner.
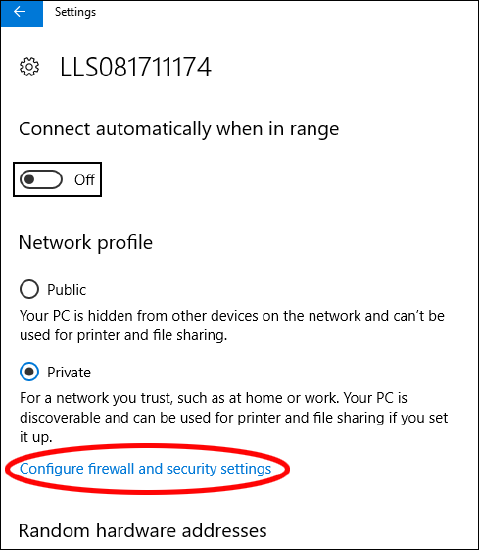
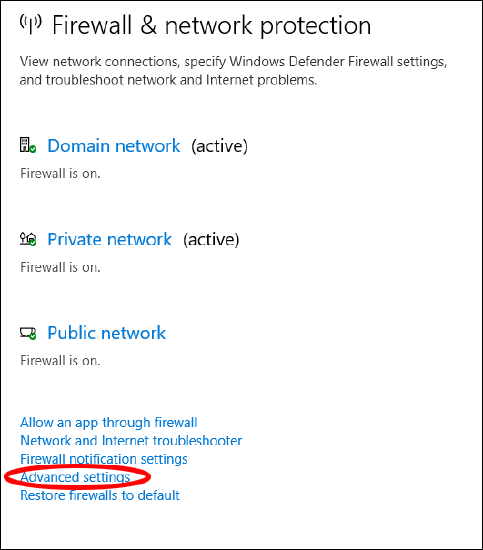
- From the network Settings window, click Configure firewall and security settings.
- Click Advanced Settings in the Firewall & network protection window.
- In the Windows Defender Firewall with Advanced Security window, click Inbound Rules, and click New Rule...

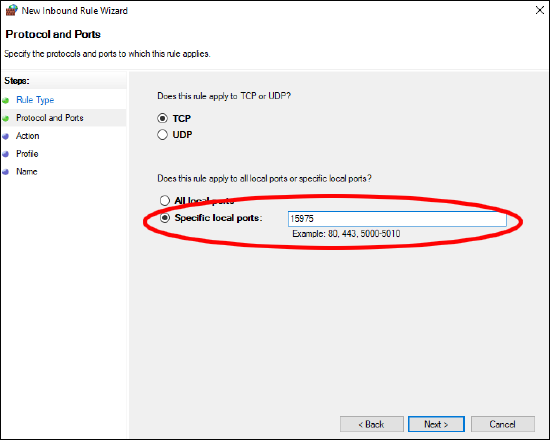
- The New Inbound Rule Wizard appears. Click Port. Click Next.

- Click Specific local ports and enter the scanner port in the field. Note: The scanner port is listed in the On-Site Registration menu on the scanner. Click Next.
- Click Allow the Connection. Click Next.
- Make sure the Domain, Public, and Private buttons are checked. Click Next.
- Name the rule and add a description if necessary. Click Next.
Editing Group Policy
If connection problems persist, you may need to enable insecure guest logins in the Windows 10 group policy.
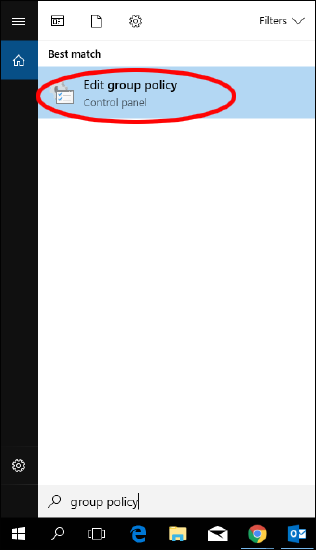
- Search "Group Policy" in the Windows 10 search bar.
- Click Edit Group Policy.
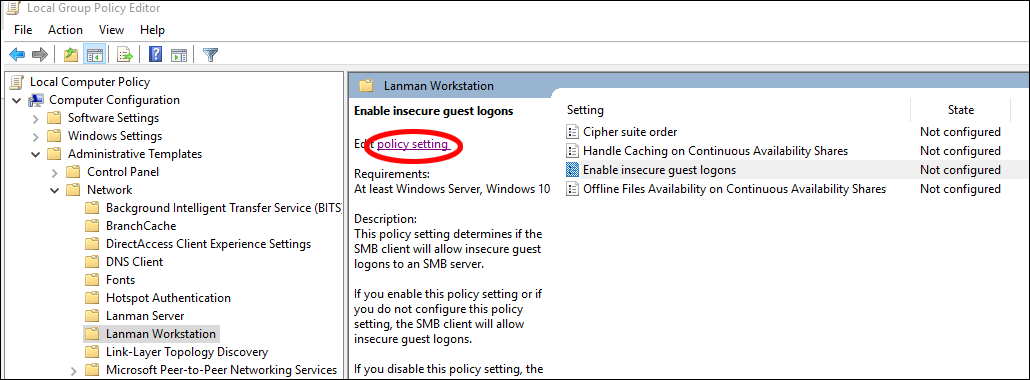
- In the Local Group Policy Editor window, go to Computer Configuration > Administrative Templates > Network > Lanman Workstation > Enable insecure guest logons.
- Click the Edit policy setting link.
- Check Enabled.
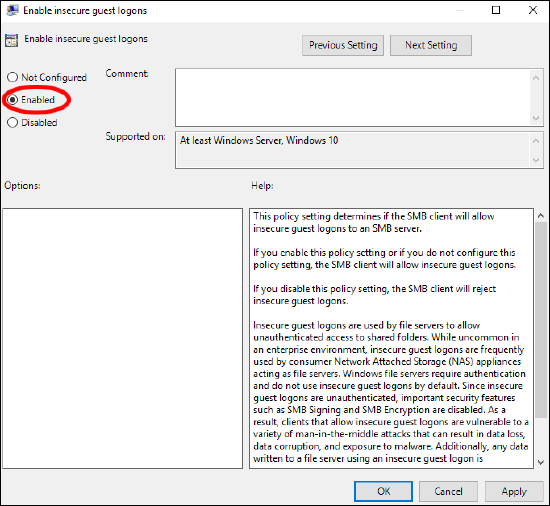
- Click OK.
- Restart the PC.