Video/Graphic Card-Setting the Primary Graphics Card
- Last updated
- Save as PDF
Overview
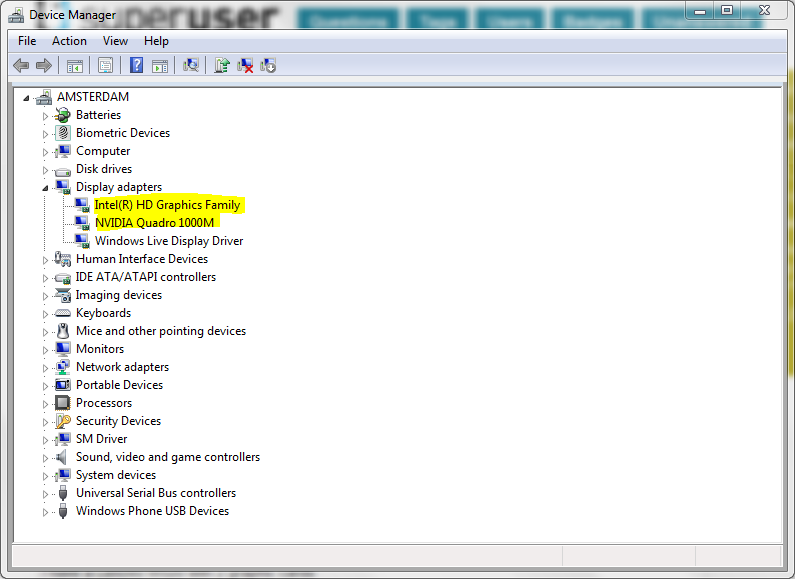
Many computers have two graphics cards: one integrated and one dedicated. Graphics display problems can occur in FARO® software if the integrated card is not enabled/disabled as listed below.
For Cam2 2018.1 and later versions, both graphics cards should be enabled.
For all other FARO software, disable the integrated Intel card and enable the NVIDIA graphics card.
Procedure
Each card is listed in the Microsoft Windows Device Manager.

Windows 11
In Windows 11 you can access the Device Manager by right clicking on the Windows Icon, and then click on Device Manager.

There are two ways to specify that your computer should use a particular graphics card.

- Specify the graphics card at the BIOS level, so the correct card can be accessed when the computer boots.
OR - Set the the preferred graphics card in the graphics card control panel.
Windows 10
In Windows 10 you can access the Device Manager by opening the Control Panel, clicking System and Security > System, and clicking Device Manager on the left side of the window.

There are two ways to specify that your computer should use a particular graphics card.
- Specify the graphics card at the BIOS level, so the correct card can be accessed when the computer boots.
OR - Set the the preferred graphics card in the graphics card control panel.
Set the Graphics Card in the System BIOS
CAM2 Users: Disabling the integrated graphics card may cause issues with CAM2 2018.1 and later.
HP Laptops
Some HP laptops have different BIOS menus. Use the relevant method below to change the graphic card settings.
Disable Hybrid Graphics (G4 and G5)
- Restart the computer and hold the Escape key. (Note: The "entering startup" menu will be displayed at the bottom left of the screen)
- From the Startup Menu, press the F10 key to enter the BIOS setup utility.
- Click Advanced.
- Select Built-In Device Options.
- Select Graphics, and then select Discrete Graphics.
- Click Save, and, when prompted, click Save changes and exit BIOS.
Dell Laptops:
- Restart the computer.
- As the system logo is loading, press the F12 key to get to the system BIOS.
- Select BIOS Setup.
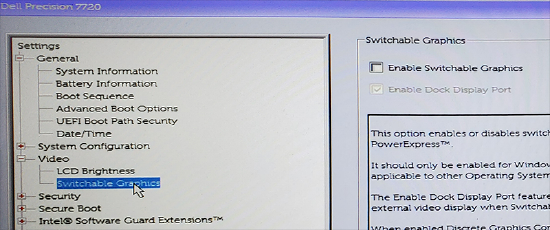
- From the BIOS screen, expand the Video group.
- Select Switchable Graphics.
- Un-check the Enable Switchable Graphics box on the right side of the screen.

- Select Apply at the bottom right.
- Select Exit at the bottom right.
Boot to Bios from Windows 10/11
If you are having problems accessing the BIOS while starting the PC, you can use this method to access BIOS settings from Windows 10.
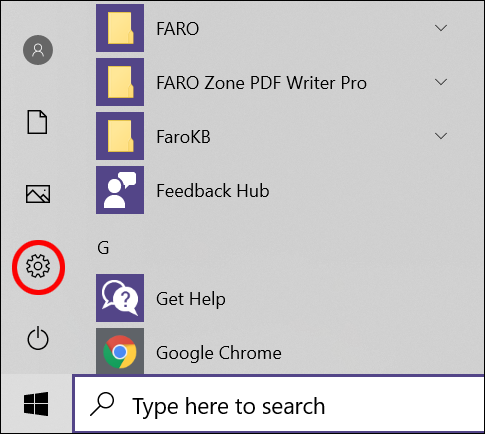
- Click the Start Menu.
- Click Settings.

- Click Update and Security.
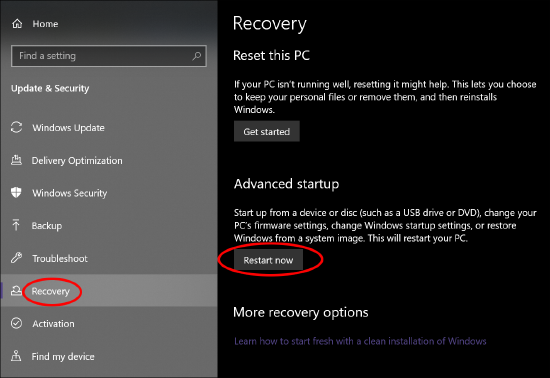
- Click Recovery.
- Under Advanced Startup, click Restart Now.

- Click Troubleshoot.
- Click Advanced Options.
- Click UEFI Firmware Settings.
- Click Restart.
Set the Graphics Card in the Graphics Card Control Panel
For the purposes of example, we use the NVIDIA graphics card. Substitute your graphics card name instead if you are using a different graphics card. You may have to look up instructions for your specific graphics cards online. Contact your computer vendor for more information about how to deactivate the integrated graphic card if you are not using a NVIDIA graphics card.
- Right-click on the desktop and choose NVIDIA Control Panel.
- On the left hand side, select 3D Settings > Manage 3D Settings (Drop-down menu only available if you use a Workstation Quadro Nvidia card, Gaming GeForce Nvidia card do not have this feature).
- In the Global presets drop-down menu, select 3D App - Game Development.
- In the Preferred graphic processor drop-down menu, select High-performance NVIDIA processor.

- On the left hand side, select 3D Settings > Set PhysX Configuration.
- In the Select a PhysX processor drop-down menu, select your graphics card (it should not be set to “Auto-select” or “CPU”).

- In the Select a PhysX processor drop-down menu, select your graphics card (it should not be set to “Auto-select” or “CPU”).
See Also
- Video/Graphic Card or Microsoft DirectX Issues With Measure Software
- Optimal Graphics Settings in Measure Q
- Video/Graphic Card Issues with 3rd Party or High End Graphics Card Using SCENE
Keywords:
invisible geometries, display, graphic card problems, video card problems, no features, cad display, nvidia, dual video cards, dual graphics cards, multiple graphics cards, multiple video cards, 2 graphics cards, 2 video cards, 10, direct x, d3dx9_41.dll, dll error


