Creating a Correspondence in SCENE

Overview
Correspondences between scans help align or register scans for use in FARO® SCENE. These objects can be manually designated in both interfaces.
Creating Correspondences in the Workflow Interface
- In the Registration ribbon, click Manual Registration.

- Click the desired cluster of scans to register, and click Select Scans on the top-right of the screen.
- In the next screen, SCENE displays a screenshot from the selected scans in two columns. Click a scan in the left column.

Note: SCENE will automatically move a recommended scan to the top of the right column. - Click a scan in the right column, and click Mark Targets on the top right.
- The scans are displayed in split view. In the left menu, click the type of target you will use to find correspondences between scans, then click each corresponding instance of that type of target in both scans.

Note: When SCENE detects a correspondence between two marked targets, the targets' labels display a green C. These target names will appear in the Structure window.

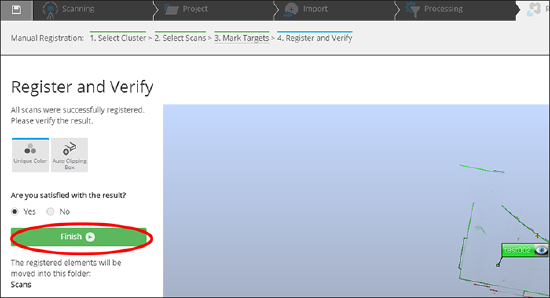
- Once you have marked enough valid correspondences, the Register and Verify option will turn green in the top right. Click Register and Verify to continue.

- Verify the scan registration in the correspondence view. If the registration is correct, click Yes and Finish. If it is not correct, click No and Other Pair. Clicking Other Pair will return you to the Select Scans screen to find correspondences between two more scans.

Forcing Correspondences
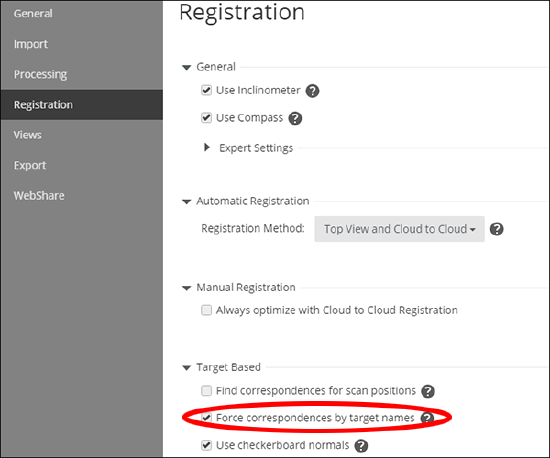
- Click the Settings Icon.
.png?revision=2)
- Click Registration on the left, and check the Force correspondences by target names option under Target Based.
- Follow the instructions for Manual Registration above through Step 5.
- After selecting corresponding targets in the scans, right-click a target and click Properties.

- Click the General tab and type the new target name in the Name field. Click Apply and OK.

- Find the corresponding target in the second scan and give it the same name.
Note: This option only works for targets detected by SCENE. - Once you have marked enough valid correspondences, the Register and Verify option will turn green in the top right. Click Register and Verify to continue.
- Verify the scan registration in the correspondence view. If the registration is correct, click Yes and Finish. If it is not correct, click No and Other Pair. Clicking Other Pair will return you to the Select Scans screen to find correspondences between two more scans.
Creating Correspondences in the Classic Interface
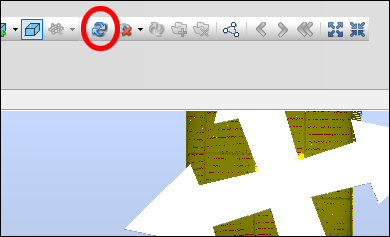
- Click the Correspondence Split View icon
 in the top toolbar.

- Drag a scan from the Structure view into each column of the split-screen view.
- Click the desired icon in the Correspondence Split View toolbar.

 Mark circular flat target – Mark a circular flat target
 Mark checkerboard target – Mark a checkerboard target
 Mark sphere – Mark a target sphere
 Mark plane – Mark a plane
 Mark slab – Mark a slab
 Mark a scan point – Mark a scan point
 Find correspondences between shown scans – Automatically finds and labels correspondences
 Clear correspondences between shown scans – Clears existing correspondences
 Force correspondences between shown scans – Forces the existing correspondences
  Force Correspondence – Manually designate correspondences by clicking this icon and then one point in each scan
 Open Correspondence View – Opens a top-down correspondence view of scan project
- Use the mark objects tools to designate corresponding targets and objects in each scan.
- After marking the objects, right-click the Scan Manager in the Structure view and click Update Scans.
- Make sure Placement Mode is set to Target Based in the Place Scans window.
Forcing Correspondences
- Click the Correspondence Split View icon in the top toolbar.
- Drag a scan from the Structure view into each column of the split-screen view.
- Use the mark objects tools to designate corresponding targets and objects in each scan.
- Right-click a target and click Properties.
- Click the General tab and type the new target name in the Name field. Click Apply and OK.
- Find the corresponding target in the second scan and give it the same name.
Note: This option only works for targets detected by SCENE. - After marking the objects, right-click the Scan Manager in the Structure view and click Update Scans.
- Make sure Placement Mode is set to Target Based in the Place Scans window.
- Check the Force correspondences by manual target names box and click OK.
Creating Correspondences in SCENE 5.5 and Earlier
In this 7-minute video tutorial, FARO Application Engineer Si Horton demonstrates how to work the split correspondence view feature to find common targets between scans
 in the toolbar. This will create correspondences between the neighboring references.