Viewing a VR Project in SCENE
Overview
You can view a scan project with the Oculus Rift headset directly from SCENE. You will also need to create a project point cloud for the project.
For more information about creating a project point cloud click here. (When creating the project point cloud, use the Close Surfaces and Full Color Detail settings to generate a higher quality cloud.)
Details
- Open a registered project which contains a project point cloud.
- From the Explore ribbon, click on VR View.

Navigation Controls
Fly Mode - Press the left thumbstick up to move up and down to move down. Press the left trigger to fly in the direction of the controller. Press harder to move faster.
Walk Mode - Use the left thumbstick to move at a consistent height.
Note: Use the Settings menu to switch between Fly and Walk mode.
Teleport - If you are prone to motion sickness, you can teleport within the scan to ease transitions. Click and hold the A button and use the right controller to highlight a spot within the scan with a blue circle. Release the A button to teleport to that location.

Control Window
When viewing a scan project, the left controller will display the control window. To select an item in the control window, use the right controller to point at an icon and press the right trigger to click it.
 - Save allows you to save current changes in the project.
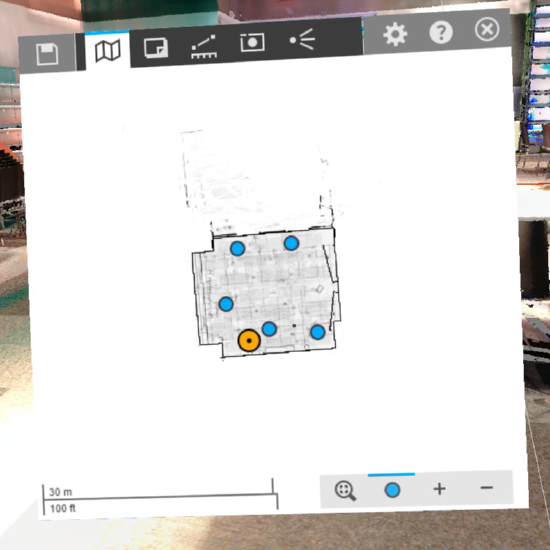
 - Map displays an overhead map of the scan project with a yellow indicator marking your position within the scan.

 - Annotation displays any annotations attached to the scan project. Annotations must be added from the SCENE interface.
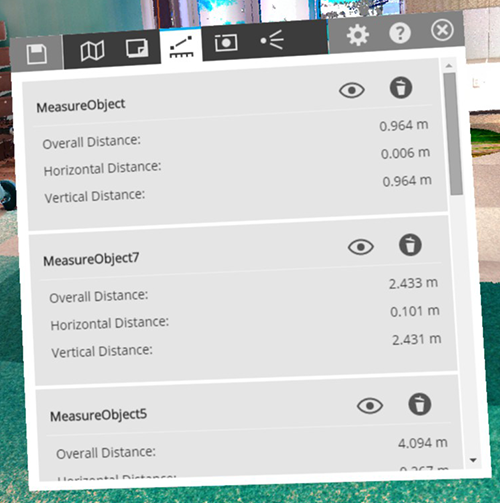
 - Measurement displays a list of measurements taken in the project.

 - View the corresponding measurement.
 - Delete a measurement.
Note: To make a measurement, use the right controller to point to a start point within the scan project. Click the right trigger to begin measuring and click it again to stop.
 - Screenshot displays screenshots created within the scan project.
 - View a screenshot location.
 - Delete a screenshot.
Note: Press the right grip button to take a screenshot.
 - Camera Path displays the pre-existing camera path points in the project.
 - Jump to a camera path point location.
 - Delete a camera path point.
 - Settings displays basic settings for navigating the project.
- Performance and point size - Adjust speed and quality to ease navigation.
- Navigation Mode - Alternate between Fly and Walk modes.
- Model visibility - Turn models on or off.
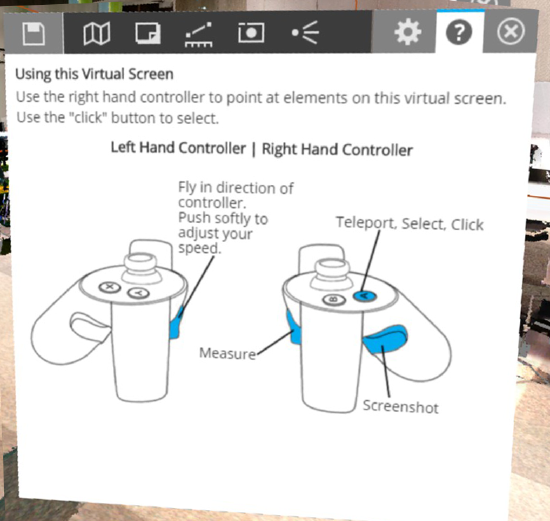
 - Help displays controller bindings.

 - Close hides the project menu. Click the Menu button
  to view the menu again.

