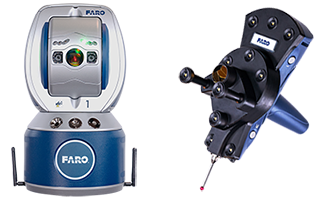
6Probe Best Practices for Accuracy, Usage, and Battery Life
Accuracy
The following are tips to maintain the highest accuracy possible with the 6Probe™.
- Always allow the Tracker to properly complete the Startup Checks and do not skip Thermal Stabilization.
- Ensure that standard 3DoF / SMR measurements are accurate by confirming the environment is stable, running Angular Accuracy Checks, and Quick Compensation / Pointing Compensation. Accurate SMR measurements are perquisite for accurate 6Probe measurements.
- Make sure the 6Probe compensation nest is securely mounted prior to attempting the probe compensation. While this nest has a single hole in it allowing it to be fastened to a surface, if the surface is not absolutely flat, it may still move, rock, or pivot during the compensation. Using hot glue to mount the nest may be needed to assure no movement is possible.
- Use the largest probe tip diameter with the shortest possible shaft that will accomplish the task. This being the 6mm diameter x 50 mm long probe tip. This is also the tip used to calculate the published accuracy specifications.
- Do not push the probe tip onto the surface being measured. Use just enough pressure to keep the probe tip on the surface during the measurement. Too much force can bend the stylus and reduce accuracy. This is especially true when using the handle, long probe tips or extensions.
- While doing the probe compensation, make sure the tip is secure in the compensation nest and minimize pitch and yaw for the first compensation point. Hold the probe as close to 0° (in all directions) as possible.
- After completing the required points in the probe compensation, collect additional points at the orientations required for your measurements to confirm they are accurate.
- Activate the proper probe and perform a new probe compensation every time you put a new probe tip on. Even if it is one that was previously used.
- Try to keep the orientation of the 6Probe as consistent as possible while taking measurements.
- Be cautious of accidentally acquiring a traditional SMR while using the 6Probe.
- This can happen accidentally when using SMR’s and the 6Probe are in close proximity.
- If an SMR is accidentally acquired, the probe buttons can still be used to take measurements. Although they will be 3DoF measurements.
- Best practice is to pay attention to the indicator lights on the 6Probe to ensure the 6Probe is active. Keep SMR targets not in use facing away from the Tracker.
- Perform a new probe compensation every time you attach new probe tip. Even if it is one that was previously used.
- While taking measurements with the 6Probe, try to keep the orientation of the probe as consistent as possible.
- Always make sure the matching diameter tip and length is selected in the Probe Management window. Measurements can still be taken with an incorrect probe tip selected, producing false measurement data.
Usage
While the 6Probe allows great positioning flexibility it is important to keep the following guidelines in mind to ensure accurate and successful measurements.
Maximum Acceptance Angles:
- Pitch: +/-18°
- Yaw: +/-18°
- Pitch & Yaw combined: +/-18°
- Roll: 360° (Unlimited roll is allowed, the 6Probe can be used to measure upright as well as upside down.)
| Pitch is the angle of the probe relative to the laser beam entering the center retro-reflector. |  |
| Yaw is rotation around the axis of a straight probe shaft. |  |
| Roll is rotation of the probe about the face of the probe or the incoming laser beam. |  |
While pure pitch and yaw can be 18°, when the probe is used with a combination of Pitch & Yaw, the total angle must not exceed 18°. Specifically:

This means that if the pitch is +/- 8°, the yaw must be between +/-16.1°. The maximum angle is approximately 12.7° in both pitch and yaw directions. When you are getting close to the acceptance angle limits, the Probe Status indicator on the back of the probe will change from green to yellow.
Troubleshooting
These guidelines will help you deal with common issues that you many experience during measurement projects.
Pairing Problems:
For successful pairing, the following items are required:
For the complete pairing procedure see: Pairing the 6Probe with the Vantage S6 and Vantage E6 Laser Tracker
- Verify the 6DoF probe checkbox is enabled in Probe Management window. This is disabled by default and this step will need to be done at least once.
- The 6Probe must be in its proper working range in order to pair, 2.5 to 15 meters.
- The Tracker must be locked onto the 6Probe retro-reflector and the LED’s on its front face during the entire pairing process.
- Use of the Tracker's ActiveSeek™ Follow Me function makes acquiring the 6Probe retro-reflector easier.
- Some users find it easier to place the 6Probe down on a stable surface during the pairing process.
Accidental Measurements off an SMR Instead of the 6Probe:
A great feature of the 6Probe is that it can be used as a remote to initiate measurements off an SMR.
- When using the 6Probe while SMR’s are nearby, it is possible for the Tracker to lock onto the SMR if the beam is broken to the 6Probe.
- If the 6Probe buttons are used to initiate measurements, and the Tracker is locked on to a SMR, the measurements taken will be the SMR location.
- Pay close attention to the indicator LED’s on the back of the probe for its status. If they are not on, you may be locked onto an SMR and not the 6Probe.
- If the blue paired light is not on, you have lost pair and are not measuring with the 6Probe.
Different Button Programming in Probe Compensation / Probe Check and CAM2, BuildIT, etc.
CAM2, BuildIT, and other measurement applications allow the user to program the functionality of the 4 buttons on the 6Probe.
- The programming for these are stored on the computer that is being used. Other computers/measurement applications can have different programming.
- Probe Compensation / Probe Check in the Probe Management screen always use buttons 1 & 2. It will not use the programming assigned to the buttons via CAM2, BuildIT, or other measurement applications.
Battery Life
Battery life of the 6Probe depends greatly on the distance of the probe to the Tracker.
- When the 6Probe is less than 5.5 meters from the Tracker, it uses 6 of its LEDs for the Tracker to recognize.
- When the 6Probe reaches 5.5 meters from the Tracker, it uses 8 of its LEDs for the Tracker to recognize.
- As the 6Probe is moved further away from the Tracker, more power is used to increase the brightness of the 8 LEDs.
- The further you are from the Tracker, the shorter the battery life.
- When you remove the 6Probe from the Tracker's line of sight, even at 15 meters, the LEDs will turn off to save power. The probe will still be paired and can easily be reacquired while ActiveSeek is turned on.