Image Creator for QuickTools in CAM2
Overview
Image Creator allows the user to add pictures to a QuickTools program step to enhance the automated measurement process, which will be displayed in the Measurement panel when the program is playing.
Download a PDF of this procedure:
Preparation
- Create a QuickTool; refer to QT001 Creating QuickTools
Method
- Create the images or photos to be used, and save them onto the PC
- Open and pin the QT panel into place

- Open the Image Creator Workspace

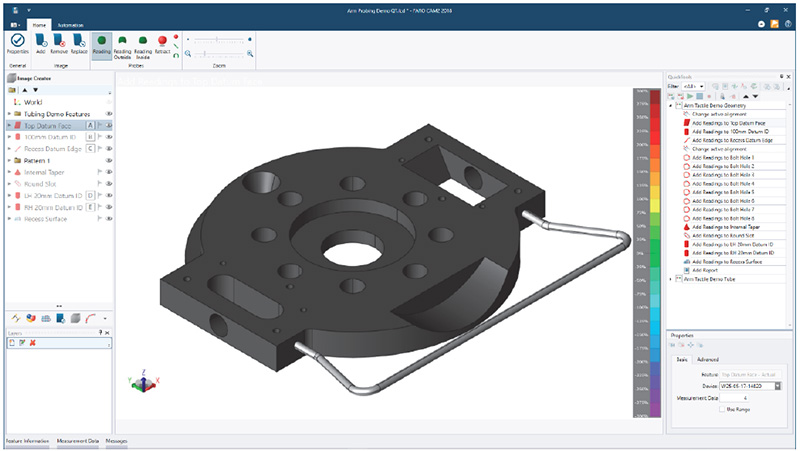
The Image Create workspace is shown:

The ribbon contains all the available options:

- Image – allows the user to Add, remove or Replace an image
- Probes – allows the users to add probing icons to the image
- Zoom – options for probing icon size, and image size
To add an image to a step, first in the QuickTools panel:
- Select an ‘Add Readings’ line

- From the ribbon select Add

|
|
 |
- The image will now be shown in the CAD view window:

In the QuickTool panel feature Properties:
- Set the number of readings to be taken for that feature

This will be the number of green ball icons we need to place onto the image.
From the ribbon:
- Select the required probing icon from the ribbon
- Using the cursor to position, click on the image to determine the position where a reading (green ball) or compensation point (red ball) should be taken

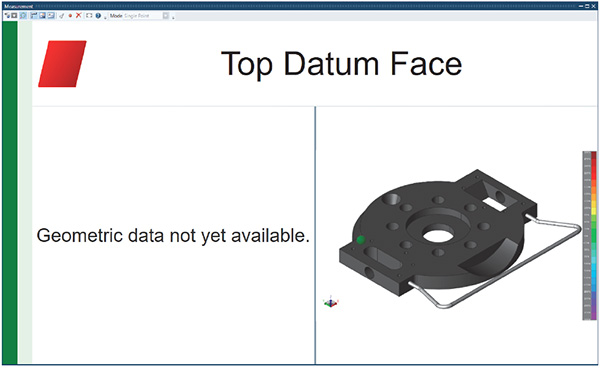
Each point will be numbered, however during playback, only one point is shown, to determine where the next reading should be taken.
- Use the zoom options to resize the image or probing icons

- Repeat the steps for each Add Reading line of the Quicktool
- Once all images have been added, and edited for the QuickTools program, remember to save the file
Now when running a QuickTool, the image will be displayed in the measurement window, and the green and red balls will be animated, to guide the user through the feature measurement.

See Also
Keywords:
Help Sheet, IC001

