Using ScanAssist
Overview
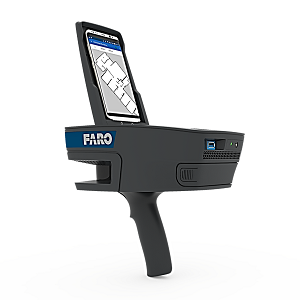
ScanAssist automatically calculates the best positions to place a laser scanner based on a recorded 2D map. ScanAssist provides an overview of the situation, including the size of the building (how many square feet) and the needed number and position of single scans for a complete coverage of the existing situation.
Before You Begin
Firmware
Before beginning, make sure your ScanPlan and laser scanner have the latest firmware installed.
- From the Home screen click Manage.
- Click General Settings.
- Click Scanner Details. This page will display the installed firmware version.
- To upgrade, see Firmware Download and Installation Instructions for the ScanPlan.
Configure the Focus WLAN
- From the Home screen click Manage.
- Toggle the Remote Access to Scans button to On.
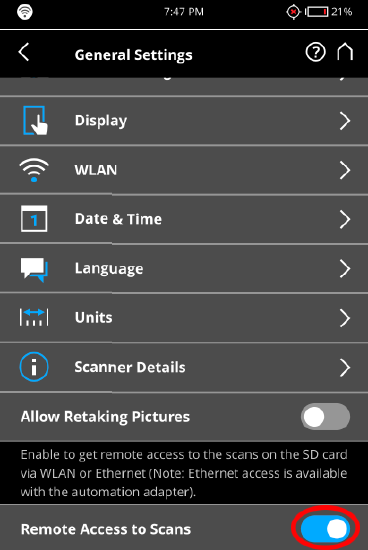
- Tap WLAN.
- Toggle the WLAN Status to Off.
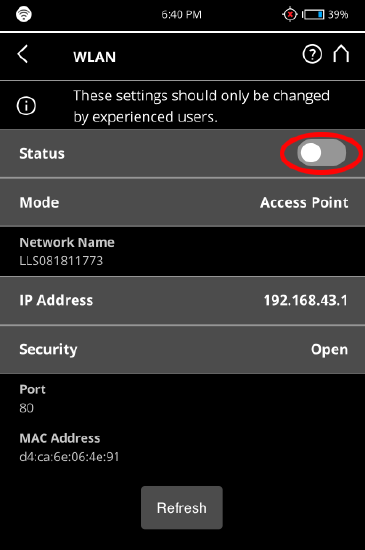
- Set the Mode to Access Point.
- Click WLAN, and tap < to return to the previous page.
- Make note of the encryption key. You will need it to connect the ScanPlan to the Focus WLAN.
- Toggle the WLAN Status to the On position.
Using ScanAssist
- When you have finished mapping a desired location, click the ScanAssist icon.
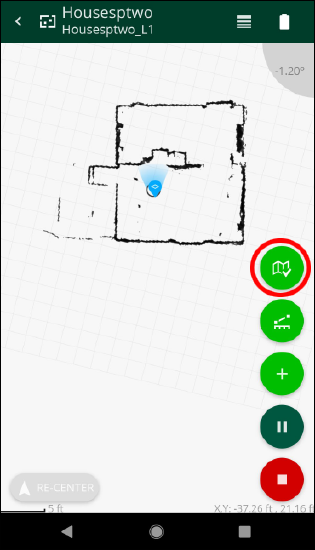
- Tap Generate a Set of Positions in the ScanAssist menu.
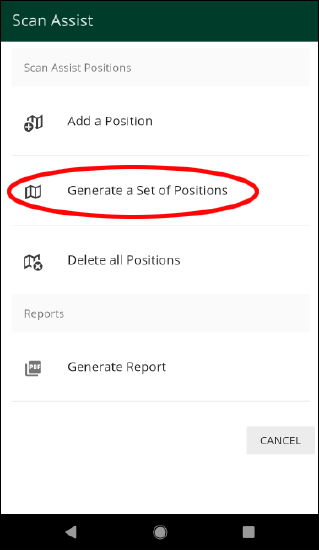
- Click Next, and then choose your FARO scanner model. Click Next again.
- Set the desired Point Distance, and click Next.
- Set the scan resolution, and tap Next.
- Choose your quality setting, and click Next.
- Choose your color settings, and click Next to begin calculating scan positions.
- Review the ScanAssist summary, and press DONE to continue or BACK to revise your desired settings.
Deleting/Adding Scan Positions
Deleting a Scan Point
- Tap the Scan Point icon.
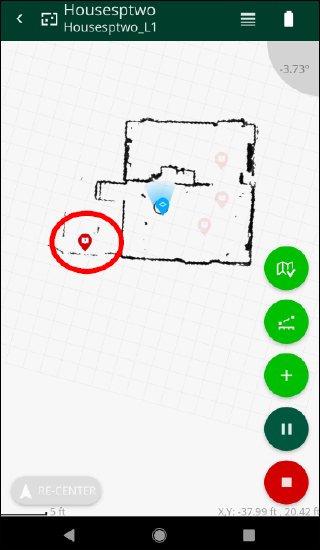
- Click the Delete icon.
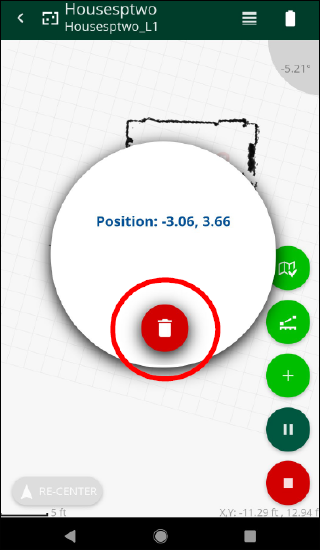
- Click OK to remove the point.
Adding a Point
- Move to the desired location.
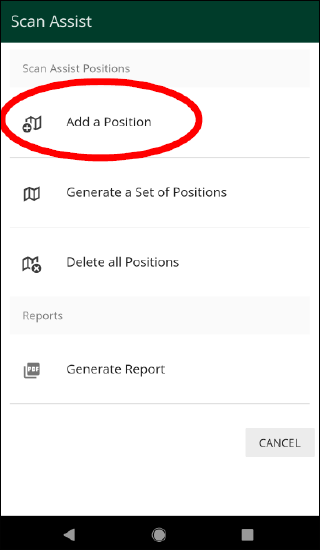
- Press the ScanAssist icon.

- Tap Add a Position.
Triggering a Scan
- Move your ScanPlan close to a recommended location.
Note: The icon will turn red when the ScanPlan is in the right spot. - Place the laser scanner in the same position.
- Press the TRIGGER SCAN button.
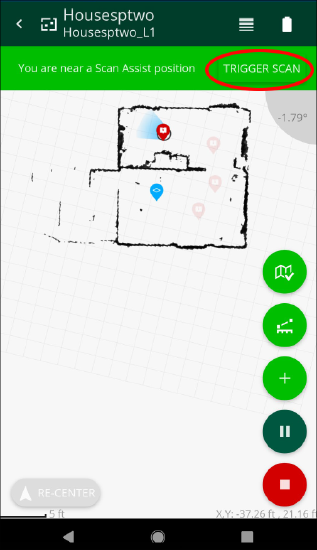
- Press CONFIRM to confirm the object position.
- Press CONFIRM to trigger the scan.
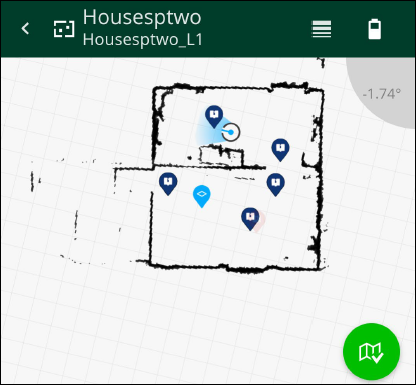
- Scan locations will turn blue if a scan has been completed.
Global Scan Assist
Global Scan Assist is a shortcut to use the Scan Assist feature without the need to open the plan in the ScanPlan. Scan Assist functions can now accessed from the main view of a project.
- Open the project.
- Tap the Global Scan Assist icon
 .
. - If you have multiple plans in the project, you will choose which plan you want to use.
- The Scan Assist dialog will appear, and you can use all the functions.
Note: Global Scan Assist requires version 2019.1 of the ScanPlan app and the latest firmware update.

