As-Built As-Built - Revit As-Built - AutoCAD VirtuSurv - VirtuSurv 2018 As-Built - Modeler VirtuSurv - VirtuSurv 2019          
BuildIT BuildIT - Projector BuildIT - Construction BuildIT - Metrology              
CAM2 CAM2 - SmartInspect CAM2 - 2024 CAM2 - 2023 CAM2 - 2018 CAM2 - Measure 10 CAM2 - Measure Q CAM2 - Measure X CAM2 - Measure 3/4 CAM2 - AnthroCAM CAM2 - 2019
CAM2 CAM2 - 2020 CAM2 - 2021                
Cobalt 3D Imager 3D Imager - Cobalt                  
Cobalt Design Cobalt Design - M Cobalt Design - S Cobalt Design - Dual              
Computers Computers - All Computers                  
FARO Aras 360 & CAD Zone FARO CAD Zone - Fire & Insurance FARO CAD Zone - Crime & Crash FARO CAD Zone - CZ Point Cloud FARO CAD Zone - First Look Pro FARO 360 - Reality FARO 360 - HD FARO 360 - Blitz FARO 360 - Genius    
FARO Connect FARO Connect - Connect                  
FARO Zone present4D - present4D                  
FARO Zone 2D FARO Zone 2D - 2018 FARO Zone 2D - 2019 FARO Zone 2D - 2020 FARO Zone 2D - 2021 FARO Zone 2D - 2022 FARO Zone 2D - 2023 FARO Zone 2D - 2024      
FARO Zone 3D FARO Zone 3D - 2018 FARO Zone 3D - 2019 FARO Zone 3D - 2020 FARO Zone 3D - 2021 FARO Zone 3D - 2022 FARO Zone 3D - 2023 FARO Zone 3D - 2024      
FARO Zone 3D Advanced FARO Zone 3D Advanced - 2018 FARO Zone 3D Advanced - 2019 FARO Zone 3D Advanced - 2020 FARO Zone 3D Advanced - 2021 FARO Zone 3D Advanced - 2022          
FaroArm/ScanArm FaroArm/ScanArm - Quantum S FaroArm/ScanArm - Quantum M FaroArm/ScanArm - Quantum E FaroArm/ScanArm - Edge FaroArm/ScanArm - Fusion FaroArm/ScanArm - Prime FaroArm/ScanArm - Platinum FaroArm/ScanArm - Legacy Quantum FaroArm/ScanArm - Titanium FaroArm/ScanArm - Advantage
FaroArm/ScanArm FaroArm/ScanArm - Digital Template FaroArm/ScanArm - Gage FaroArm/ScanArm - Quantum S Max FaroArm/ScanArm - Quantum M Max FaroArm/ScanArm - Quantum E Max FaroArm/ScanArm - Gage Max        
GeoSLAM Software GeoSLAM Software - Connect GeoSLAM Software - Draw GeoSLAM Software - Hub GeoSLAM Software - Volumes            
GeoSLAM ZEB GeoSLAM ZEB - Horizon GeoSLAM ZEB - Horizon RT GeoSLAM ZEB - Revo GeoSLAM ZEB - Revo RT GeoSLAM ZEB - Go          
Hand Held Scanner 2D Hand Held Scanner - ScanPlan 3D Hand Held Scanner - Freestyle3D 3D Hand Held Scanner - Freestyle3D X 3D Hand Held Scanner - Freestyle3D Objects 3D Hand Held Scanner - Freestyle 2          
Language Quality HT MT AT NT INT - Internal Sales - Internal Resources Sales - Order and Quote Sales - Product Info Sales - Sales Readiness Sales - Training
Language Quality Sales - Product Launch Sales - Promotions CS - Quote to Invoice CS - Phone System CS - New Hire Training CS - General CS - Product Info CS - Licensing CS - Onboarding CS - Procedures General
Language Quality CS - Procedures Salesforce CS - Procedures Loaner CS - Procedures SAP              
Languages Language - English Language - Japanese Language - German Language - Chinese Language - Spanish Language - Italian Language - Portuguese Language - French Language - Korean  
Laser Projector RayTracer - RayTracer Laser Projector - Tracer M Laser Projector - Tracer SI              
Laser Radar Imaging Laser Radar - VectorRI                  
Laser Scanner 3D Laser Scanner - Focus S 3D Laser Scanner - Focus M 3D Laser Scanner - Focus3D 3D Laser Scanner - Focus3D X 3D Laser Scanner - Focus3D X HDR 3D Laser Scanner - Focus3D S 3D Laser Scanner - Photon 3D Laser Scanner - Focus S Plus 3D Laser Scanner - Swift 3D Laser Scanner - Focus Premium
Laser Scanner 3D Laser Scanner - Focus Core 3D Laser Scanner - Focus Premium Max                
Laser Tracker Laser Tracker - Vantage Laser Tracker - ION Laser Tracker - Vantage S Laser Tracker - Si Laser Tracker - X Laser Tracker - Xi Laser Tracker - Vantage E Laser Tracker - Vantage S6 Laser Tracker - Vantage E6  
Legacy Gage Legacy Gage - Bluetooth Legacy Gage - Plus Legacy Gage - Standard Legacy Gage - Power            
Legacy Software Legacy Software - CAM2 Gage Legacy Software - Gage Software Legacy Software - Insight              
Mobile Scanner Mobile Scanner - Orbis                  
PointSense PointSense - Basic PointSense - Pro PointSense - Building PointSense - Plant PointSense - Heritage PointSense - Revit CAD Plugin - TachyCAD Building CAD Plugin - TachyCAD Archeology CAD Plugin - TachyCAD Interior CAD Plugin - PhoToPlan Basic
PointSense CAD Plugin - PhoToPlan CAD Plugin - PhoToPlan Pro CAD Plugin - PhoToPlan Ultimate CAD Plugin - DisToPlan CAD Plugin - MonuMap CAD Plugin - hylasFM CAD Plugin - VirtuSurv      
RevEng RevEng - RevEng                  
ScanArm ScanArm - Design ScanArm 2.0 ScanArm - Design ScanArm ScanArm - Forensic ScanArm ScanArm - Design ScanArm 2.5C            
SCENE SCENE - Capture and Process SCENE - WebShare Server and 2Go SCENE - WebShare 2Go App SCENE - 2018 SCENE - 7.x SCENE - 6.x SCENE - 5.x SCENE - 4.x SCENE - LT SCENE - 2019
SCENE SCENE - 2go App SCENE - 2020 SCENE - 2021 SCENE - 2022 SCENE - 2023          
Serial FaroArm Serial FaroArm - Silver Serial FaroArm - Gold Serial FaroArm - Bronze              
Sphere FARO Sphere - Sphere                  
Visual Inspect Visual Inspect - App Visual Inspect - CAD Translator                
WebShare WebShare - Enterprise WebShare - WebShare Cloud                
FARO® Knowledge Base

Download, Installation, and Troubleshooting for FARO InTouch

Overview

FARO® InTouch is a software distribution and management application which streamlines the downloading, installation, updating and execution of FARO software. With the auto-update option is enable, users can now benefit from always having the latest version installed, without the hassle of manually downloading and installing every time a new version is released. To reduce icon clutter on the desktop, InTouch allows individual FARO software applications to be launched directly from the InTouch UI.

Before downloading and installing InTouch, make sure you comply with the following System Requirements:

  • FARO InTouch is only compatible with Microsoft Windows 10/11.
  • Verify you have Windows administrator privileges.
  • Apply any pending Windows updates before installing.
  • Verify available disk space. During the installation at least three times the installer size (~350MB) is required.
  • After downloading the InTouch installer, run the installer only from a local drive.
  • Verify your computer can access the required InTouch remote URLs.

Required InTouch Remote URLs:

In order for InTouch to function properly, access to the following URL’s is required. If you are having issues installing or updating InTouch, ensure all hardware and software firewalls are allowing traffic to these locations.


Download FARO InTouch  Release Notes


Installing and Running InTouch

  1. Run the downloaded InTouch installer.
  2. Follow the onscreen prompts to install.
  3. The installation process will begin. The time taken will depend upon network speed and prerequisites that require installing.
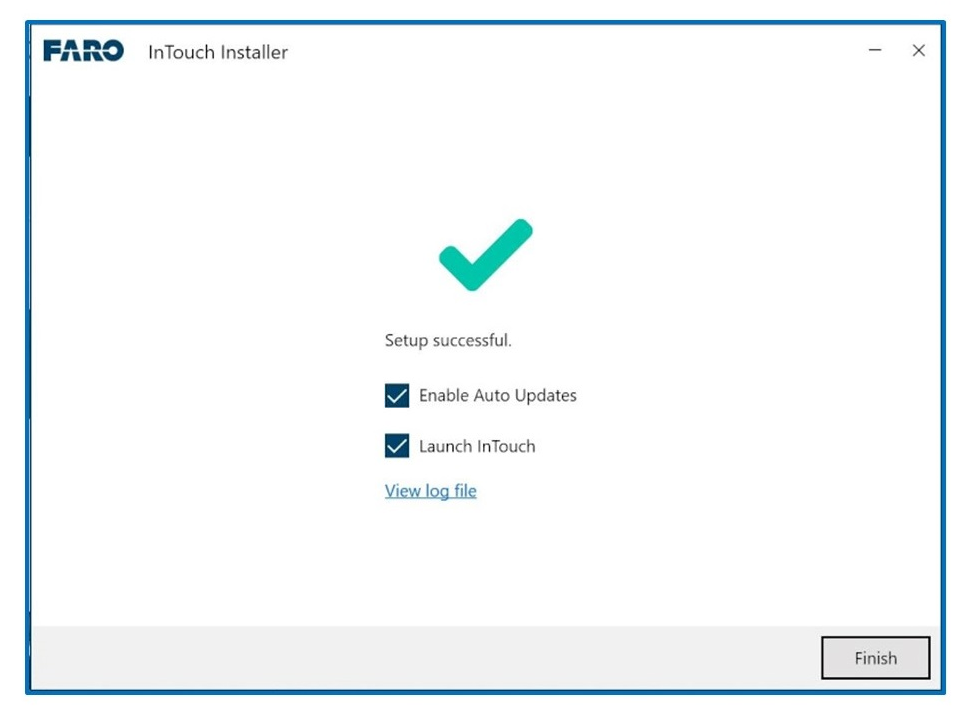
  4. Once complete the user can choose to enable:
    • Auto Updates (recommended). With Auto Updates enabled, InTouch will manage the update process, and provide notifications when an application has been updated without any intervention from the user.
    • Launch InTouch
  5. Click Finish.
    InTouchComplete.png
  6. InTouch will display both installed and available applications. To install an application simply click Install from the tile drop-down. It is possible to install several apps at the same time.
    InTouchInstallApps.png
  7. Once installed, applications can be launched from within InTouch by clicking Run from the tile drop-down.
  8. Via the drop-down of each app there is also the option to repair the application. This will perform a reinstallation of the app, making sure it is properly installed.

Other Controls

Intouch1-23_SearchApps.png Search for an App by name.


Intouch1-23_ManualSync.png Manually synchronize licensing information. This button may be used if you are expecting to see a new version for a given FARO product.


Intouch1-23_SettingsIcon.png Settings - Disable/Enable the Auto-Updates of apps and Update Notifications.

Intouch1-23_SettingsScreen.png


Intouch1-23_HelpIcon.png Help - Provides the Service Status, Help Information, and the InTouch Version

Intouch1-23_Service Status.png

Repairing InTouch

To repair the InTouch installation, download and run the latest InTouch installer and choose the option to Repair.

intouch_repair.png

Closing and Uninstalling InTouch

Closing the InTouch application window only minimizes it, the application will remain running in the background. The InTouch application can only be shut down via the Windows taskbar. Right-click on the InTouch icon and choose Quit.

intouch_quit.png

To Uninstall InTouch, run the InTouch installer and choose the option to Uninstall. This will uninstall InTouch and all the FARO applications that were installed through it.

intouch_uninstall.png

Troubleshooting

If the information provided in this section does not correct the issue, please contact FARO Support.

Troubleshooting InTouch Setup

  • Make sure you are using the latest version of the InTouch installer. You can update to the latest version by running the latest installer and choosing the option “Update”.
  • Confirm that your computer complies with the system requirements listed at the top of this article.

Troubleshooting the InTouch App

  • Confirm that your computer complies with the system requirements listed at the top of this article.
  • Verify you are using the latest version of InTouch. You can update to the latest version by clicking on the Update button on the InTouch tile or by running the latest installer and choosing the option to Update.
    • InTouch version 1.2.24 or earlier cannot be updated using the InTouch app. To update these older versions, download the latest InTouch installer from the link provided above. Once downloaded, run the installer and choose the Update option.
  • If the latest version is already installed, please repair the InTouch installation by running the latest InTouch installer and choosing the option to Repair.

The Help Panel of InTouch can help identify if a problem has been detected, as highlighted by the Help Panel iconIntouch1-23_HelpIconWDot.png

A summary of the common causes and solutions related to InTouch Service Status are listed below:

Problem Cause Solution
Remote Server Unavailable:

intouch_troubleshooting-server.png
  • Unstable/No internet connection
  • The remote service is unreachable


  1. Make sure there’s a stable Internet connection.
  2. Try again in a couple of minutes to check if the remote service is available.
  3. Restart the InTouch service via Windows Services.


Local InTouch Service Unavailable:

intouch_troubleshooting-service.png
 
  • InTouch service is not running
  • Mosquitto MQTT service is not running
  1. Ensure the InTouch service is running via Windows Services.
  2. Ensure the Mosquitto MQTT service is running via Windows Services.
  3. Reboot the PC and try again.
Mosquitto MQTT Service is Unavailable:

intouch_troubleshooting-mosquitto.png
  • Mosquitto MQTT service is not running;
  • If the Mosquitto MQTT service stops, the InTouch service will stop as well.
  • If the Mosquitto MQTT service stops, the InTouch Service will attempt to restart the Mosquitto MQTT after a few seconds
  • If the Mosquitto MQTT was uninstalled from the PC (after the service was stopped), then the Repair option of the InTouch setup will reinstall the Mosquitto MQTT. With that, it will be correctly installed and InTouch should start successfully.
  • If the Mosquitto MQTT was uninstalled from the PC (before the service was stopped), please contact FARO Support.

InTouch Errors

  1. InTouch cannot load any apps

Some people occasionally reported that InTouch cannot load any apps, even though all the services are running:

intouch_errors.png

In this situation please follow these steps:

  • Go to the hidden icons in the tray-bar, right click on the InTouch icon, and choose the option to Quit Intouch.
  • Run the latest InTouch installer (can be downloaded from here), and choose the option to "Repair".
  • If that doesn’t work, quit the “Repair”, run the installer again and choose the option to uninstall. 
  • After that, run the installer again to do a fresh installation