Processing and Registration Settings in SCENE

Overview
Understanding FARO® SCENE Processing and Registration settings will help ensure scans can be quickly and efficiently processed and registered. Some settings may differ depending on your version of SCENE.
General Settings
- Click Settings
 on the far right of the window.
.png?revision=2)
- Click General on the left.

Language
SCENE can display eight languages: Chinese, English, French, German, Italian, Japanese, Portuguese, and Spanish.
Units
Distance and angle measurement units can be changed as required. However, these setting should match the measurement system setting (Metric or Imperial) of the scanner used to make the scans.
Project Folder
This setting designates the default folder for storing project information. SCENE displays the projects in this folder in the Project Selector.
Log Files
In general, it is a good idea to check the Enable Logging box. In the event of technical problems, this log file will help customer service agents quickly diagnose and fix any issues.
Temporary Data Folder
This setting designates the default folder SCENE uses to store temporary data. In general, this should not need to be modified, but it can be changed if hard drive space is an issue or to comply with company workflow, etc.
User Interface
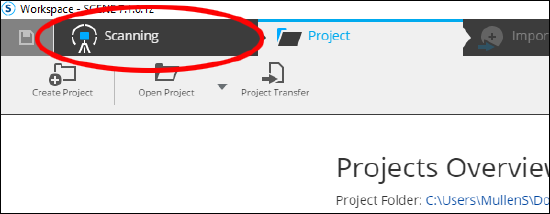
This contains the Show Scanning Category toggle. Clicking this box displays the Scanning tab in the workflow interface. This tab is used to perform on-site registration and compensation.
Updates
Checking this option allows the software to automatically check for updates when you start SCENE.
FARO Customer Experience Improvement Program
This option sends anonymous SCENE usage data to FARO to improve the customer experience. The data collected includes software version, performance, usage, errors, hardware components, etc. All information transmitted is strictly confidential and is transmitted securely for limited access by FARO employees only.
Processing Settings
- Click Settings on the far right of the window.
- Click Processing on the left.
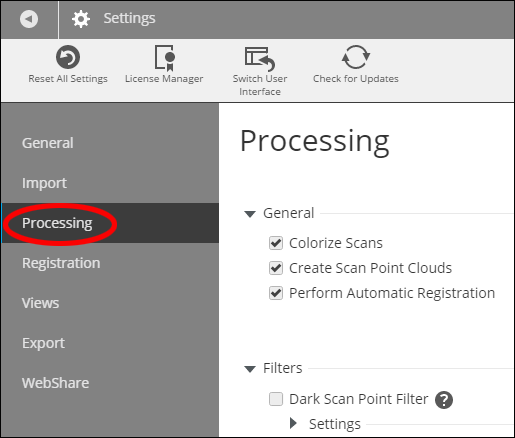
General
Create Scan Point Clouds
This option creates a scan point cloud for each scan during the final phase of scan processing.
Perform Automatic Registration
This option allows SCENE to automatically register scans after processing.
Colorization
No Colorization - Scans are processed without color information. These scans will have to be reprocessed to retrieve color information.
Colorize Scans - This option applies the color information the laser scanner captured to the scan. A scan processed with color information can be switched to grey scale in SCENE. Simply double-click the specific scan in the Structure view and click Color Mode  in the top menu.

Laser Illuminated HDR - Merges photographs taken at different exposures to create a Laser Illuminated HDR image.
Filters
Dark Scan Point Filter - This filter removes scan points below a certain reflectance value. Dark surfaces absorb light and little light is returned to the scanner. If there is not enough light, scan points become less accurate. The Reflectance Threshold can be altered as needed.
Distance Filter - This filter deletes points outside of a specified distance range set by the user. This can be especially helpful for outdoor scanning or when overlapping scans provide more accurate scan data. Note: SCENE tools can be used to delete unwanted scan points after processing.
Stray Point Filter - This filter compares each point's distance to the points around it to determine if the point should be included in scan data.
- Grid Size - This is the size of the surrounding area used for distance comparison.
- Distance Threshold - This value indicates the distance a scan can vary from surrounding points and still be included in scan data.
- Allocation Threshold - This is the percentage of scan points in the comparison grid that must also be within the same threshold for the scan point to remain.
Edge Artifact Filter
This filter removes artifacts at the edges of objects and eliminates edge noise. It is especially useful on curved objects, such as piping. In outdoor areas, with trees and vegetation it might remove too much data.
Find Targets
This setting designates what type of artificial targets were used to aid registration. Check the boxes corresponding to the type of targets used.
Active Sphere Radii - This setting helps SCENE identify target spheres in a scan based on their radius.
Note: Target spheres are often described by their diameter. A sphere's radius is half of its diameter.
Inactive Sphere Radii - Enter common target sphere values here, and drag them to the Active Sphere Radii box when that size is used for registration.
Registration Settings
- Click Settings on the far right of the window.
- Click Registration on the left.
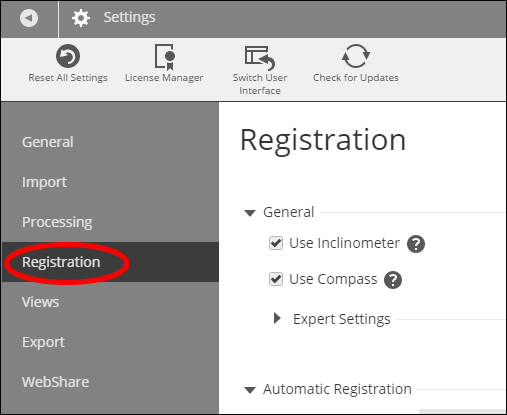
General
Use Inclinometer - This setting designates if inclinometer data should be used in the registration process. In general, this should be checked. If the scan area required the scanner to be tilted or otherwise unreliable, this sensor data should not be used.
Use Compass - This setting determines if compass data should be used in the registration process. If environmental factors have made compass data unreliable, this sensor data should be excluded.
Expert Settings
Move cluster to the center of its scans is helpful when using Correspondence view to align scans and clusters. If scans are located far off from the origin of a cluster, it can become difficult to manipulate the cluster with its handles. This setting adjusts the cluster's origin so that its scans are equally distributed around it, with the handles drawn in the middle of the scans.
Automatic Registration
This setting lets you choose the method SCENE uses to register scans.
- Target Based - This setting causes SCENE to look for artificial targets in scans. It will look for the targets designated in the Processing settings above.
- Top View Based - This method aligns scans based on the top view. It is best used for fast, targetless registration, primarily in indoor locations.
- Cloud to Cloud - This method aligns scans based on point clouds and is best for aligning scans which are already roughly in position.
- Top View and Cloud to Cloud - This method is the preferred registration method for automatic registration without artificial targets. It combines Top View and Cloud to Cloud registrations.
Manual Registration
When using Manual Registration, the Always optimize with Cloud to Cloud registration setting uses Cloud to Cloud registration to optimize two manually registered scans before moving on to another pair.
Target Based
- Find correspondences for scan positions - Use this setting if the position of a scan is known, for example by a surveyed reference point, or by a reference sphere representing the position of the scanner in other scans.
- Force correspondences by target names - Use this setting if you want to force correspondences by giving targets the same name in each scan. This feature requires that targets were already detected by SCENE.
- Use Checkerboard Normals - With this setting, SCENE uses the normals of checkerboards for a correspondence search. Uncheck this option, if the direction of checkerboards has changed from one scan to another.
- Calculate scan point based statistics - These statistics can be viewed under the Project ribbon by clicking Show Report in the Registration block.

- Target Distribution Threshold slider - This slider sets the limit for registration. If targets are too near to one another, registration will be refused. In this case, lowering the limits allows registration of targets that are closer together.
Top View
- Subsampling - This value defines the size of the grid in which scan point homogenization is performed. Use smaller values for indoor scan areas and higher values for outdoor areas.
- Reliability - This value determines the amount of additional checks during a registration. It filters out results that could be contested. Higher values allow for more certainty, but could lengthen registration time.
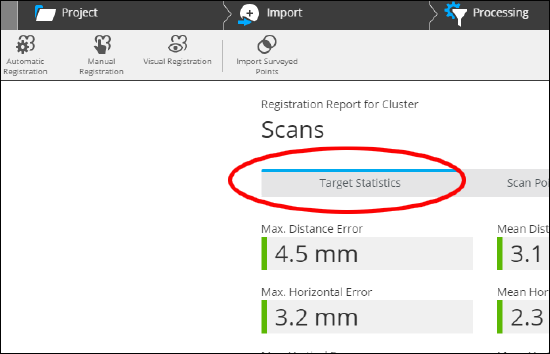
- Calculate target based statistics - If targets were used during the scanning process and correspondences established, this box can be used to populate the target statistics portion of the Registration Report to compare registration accuracy.
Cloud to Cloud
- Subsampling - This value defines the size of the grid in which scan point homogenization is performed. Use smaller values for indoor scan areas and higher values for outdoor areas.
- Calculate target based statistics - If targets were used during the scanning process and correspondences established, this box can be used to populate the target statistics portion of the Registration Report to compare registration accuracy.
- Expert Settings
- Maximum number of iterations determines how many times SCENE will look for the best registration solution. Increasing this number will increase quality and registration time.
- Maximum search distance determines how far SCENE will search for corresponding points to register scans. This value must be larger than the initial misplacement.
Registration Report
These values control how SCENE reports registration results. For each setting, a value below the initial setting will return a green report. A value above the second number will return a red value. A value within the range of the two numbers will be returned as yellow. These settings can be adjusted according to workplace standards or project needs as necessary.