Maximizing SCENE Performance

Overview
FARO® SCENE is used to manipulate high-quality laser scan files and can require significant system resources. PCs that fall below the recommended system requirements can be optimized with the following tips to help improve performance.
| SCENE Hardware Guide | ||||||
| Process | Benefits primarily from | Recommendation | ||||
| SSD I/O | CPU Cores | CPU Speed | RAM | GPU | ||
| Scan Import |  |
|
I/O and limited number of parallel tasks. | |||
| Processing |  |
|
|
I/O and lots of parallel tasks, HDR and big scans can require a lot of RAM. | ||
| Registration TB | |
For target based registration CPU speed is the limiting factor during optimization. | ||||
| Registration TVB+C2C | |
|
|
|
Point cloud based registrations: Memory to hold loaded scans (if not possible scans are loaded multiple times I/O) Fairly well parallelized so CPU cores and speed are both good I/O for loading scans (at least once per scan). |
|
| Interactive Exploration: Measurement, etc. | |
|
If Stereo-Rendering: Mid-range Nvidia Quadro If VR-Rendering: Top-range Nvidia GeForce else: Mid-range Nvidia GeForce. | |||
| Point Cloud Rendering | |
|
|
Does not require fast GPUs Fast SSDs provide a much better loading and rendering speeds; More memory means more points in the rendering cache and less loading from disk Very big numbers of CPU cores will give no additional advantage. |
||
| Meshing | |
Limited number of parallel tasks and required RAM is always below 16GB. | ||||
| Exporting | |
|
I/O and limited number of parallel tasks. | |||
| Saving | |
|
I/O and limited number of parallel tasks. | |||
A solid-state drive (SSD) can greatly improve the performance of a PC. These drives are, in general, much faster than the standard hard-disk drive (HDD). When using SCENE with a SSD, most operations will work faster, especially for projects with a large number of scans.
HDDs are cheaper and can hold more information making them great for storage of finished projects, but an SSD can provide better performance as a system drive and storage for active projects.
SCENE 2019 makes efficient use of multiple processing cores. Consider getting enough SSD space to hold all of your project and temporary data to take full advantage of SCENE 2019's power.
Clearing Hard Drive Space
When the system drive (usually the C: drive) is low on space, the usage bar will turn red. Clean off the system drive until the usage bar is blue by deleting unnecessary files or moving them to another storage device.

It is also a good practice to keep the system drive as clear as possible. The Windows Disk Cleanup Tool is an easy way to clear drive space.
Disk Cleanup
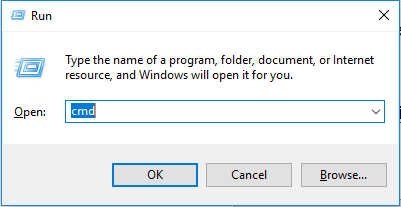
Press Windows Key + R to open the Run Window. Type in cleanmgr in the Open field.

Select the Windows system drive in the pop-up window.

Click the files to clean in the Disk Cleanup Window and click OK.

Disable Hibernate in Windows 7/10
Windows 7 and later features a Hibernate mode which uses a portion of the PC's memory to enable a faster startup. This file can take up a significant amount of space. To disable this feature, open the Run Window by pressing Windows Key + R. Type CMD in the Open field.
At the Command Prompt type in powercfg.exe /hibernate off and press the Enter. To restore this feature, follow the same instructions to open the Command Prompt. Type in powercfg.exe /hibernate on to restore the hibernate option. Caution: Be sure to consult with an IT professional before making any changes.
Processing Cores
SCENE 2019 is designed to make efficient use of multiple processing cores. Increasing your PC's number of physical cores to 16 will provide a substantial boost to processing speed. If you have to process projects with more than 100 scans regularly, consider using 32 physical cores.
If you regularly use projects of more than 500 scans and want to expand beyond 32 physical cores, increase your system's RAM using the formula: RAM = Cores x 2GB. (i.e. 32 cores = 64GB RAM).
For optimal results, your PC should have at least 64GB of RAM.
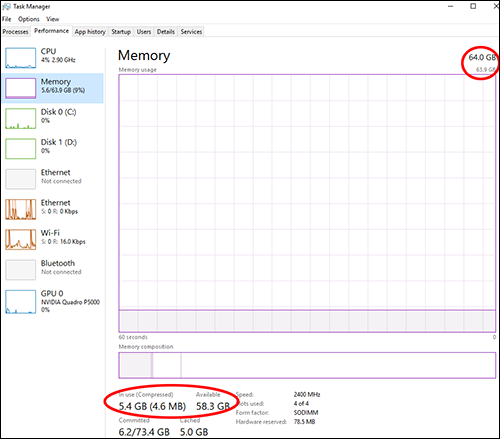
To verify that the system PC meets SCENE's recommended RAM requirements, open the Task Manager by pressing CTRL-ALT-DEL and clicking Task Manager, or press Windows Key + R to open the Run Window. Type Taskmgr in the Run Window and press OK. In the pop-up window press the Performance tab.
The amount of RAM installed in the system is displayed on the top right of the Performance Window. The information below the memory usage graph details how much RAM is available, its speed, how many memory slots are used, and more. Increasing the amount of RAM in the PC system will help with many performance issues.
Windows Paging File
The Windows Paging File is hard drive space allocated for Windows to use like RAM. Make sure it is enabled and properly setup for your PC.
- Access the System window in Control Panel. Through one of the following methods:
- Open the Control Panel and click System and Security/System.
- Right-click the This PC
 icon (Windows 10) or the Computer
  icon (Windows 7) in File Manager and click Properties.
- Press Windows Key + Pause/Break.
- In the System window, click Advanced system settings.

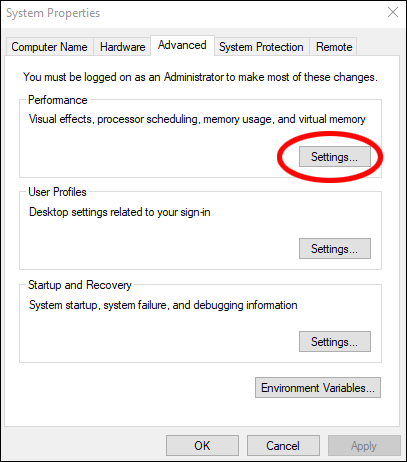
- In the System Properties pop-up window, click the Advanced tab. Click the Settings option under Performance.
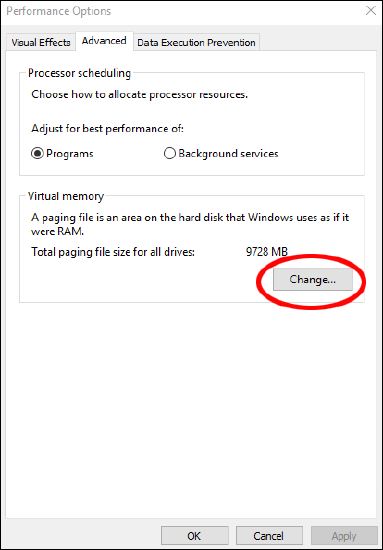
- In the Performance Options window, click the Advanced tab. Click Change, located under Virtual Memory.
- The next screen displays the system's Paging File settings.

Make sure the No paging file option is not checked and make sure the Currently allocated memory size is more than the Recommended memory size.
Display
Graphics Card
| Recommended Graphics Card | |
| Purpose | Card |
| Light - Medium Use | NVIDIA GTX 1060 or equivalent |
| SCENE VR | NVIDIA GTX 1080 or equivalent |
| Stereo Rendering | NVIDIA Quadro or equivalent |
Your graphics card directly affects the performance of SCENE. The following resources will help ensure that the system PC's graphics card is working as intended.
- Make sure the installed graphics card meets the minimum system requirements.
- Download the latest drivers for the graphics card.
- Use the card's utility program to make sure system resources are being used optimally.
- Make sure the installed graphics card is the primary graphics card for the system.
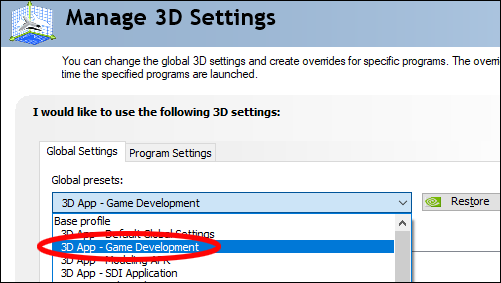
- If you are using a Workstation Quadro Nvidia card and not a Gaming GeForce Nvidia card, make sure the 3D Settings are set to 3D App – Game Development using these steps:
- Right-click an empty area of your desk top, and click Nvidia Control Panel.

- Click Manage 3D Settings under the 3D Settings menu.

- In the Global Settings tab, select 3D App – Game Development in the Global presets drop-down menu.
- Click Apply.
Screen Resolution
Ultra high-resolution or 4K monitors require additional resources and can have a negative impact on rendering performance in 3D view. Setting your monitor resolution to 2K (1920x1080) or under can improve rendering performance.
Closing Competing Programs
It is a good idea to close any programs that may use competing system resources. Some programs known to compete include, but are not limited to:
- Adobe products
- Autodesk products
- Microsoft Outlook
- Internet Browsers
- To see all of the programs running on your system, open the Task Manager by one of the following methods:
- Press CTRL-ALT-DEL and selec Task Manager, or
- Press Windows Key + R to open the Run Window. Type Taskmgr in the Run Window and press OK.
- In the pop-up window, press the Processes tab.

- Right-click a program and click End Task to close it. Caution: Always check with an IT professional before stopping a program.
Uninstalling Unnecessary Programs
- Open the Control Panel.
- Click Uninstall a Program.

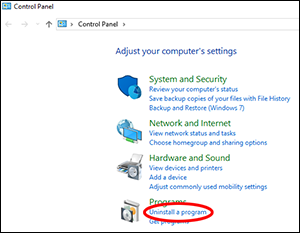
- Uninstall any unnecessary programs to help free up system resources. Caution: Make sure to consult an IT professional before making changes.
Disabling Startup Programs
Some software is preloaded by the Windows System Configuration Startup application (msconfig.exe) in order to reduce their load time after the system is booted. Disabling startup items that are neither needed for proper system function nor on a continuous basis (ex. Adobe Acrobat), can boost performance.
For Windows 10:
- Open the Task Manager. There are several ways to do this
- Press CTRL-ALT-DEL and click Task Manager or
- Press Windows Key + R to open the Run Window. Type Taskmgr in the Open field, and press OK.
- Click Startup in the Task Manager window.

- Click a program to remove from the startup list.
- Click Disable. (The Status of the program should change to Disabled) Caution: Always check with an IT professional before removing Startup programs.
- Restart the computer.
For previous version of Windows:
- Press Windows Key + R to open the Run Window. Type in msconfig in the Open field and click OK.

- Click the Startup tab in the System Configuration window.

- Uncheck the box next to each program to be removed from the startup list. Caution: Always check with an IT professional before removing Startup programs.
- Click Apply.
- Restart the computer.
Saving After Major Tasks
Information related to certain major tasks is held in the system memory until the project is saved. Saving after the following tasks will help keep memory free for system use.
- Create/Delete Scan Point Clouds
- Unsaved modifications to multiple scans (i.e. cropping, filtering, or applying color)
- Updating target-less registration
Certain tasks do not require more frequent saves such as:
- Creating objects manually (i.e. checkerboards, spheres, planes, points, or viewpoints)
- Updating target-based registration
Using Scan Point Clouds and Unloading Scans
Viewing a scan is important for verifying registration and cropping data, but scans can be rather large files. Scan point clouds are a memory efficient and fast way of viewing and manipulating scans.
Point clouds can be created from a scan or cluster by right-clicking the item in the Structure tree and clicking Point Cloud > Create Scan Point Cloud. For more information about point clouds click here.
Scan point clouds can only be created from existing scans and will not affect these scans. They require additional hard drive space and additional time to create.
Unloading Scans
SCENE will load scans as needed and will typically unload them when finished. Some functions such as the creation of Quick or Planar views result in loaded scan states that SCENE will NOT unload automatically.
Scans can be manually unloaded from the scan tree. Loaded scans are identified by a half filled  or fully filled
  green box icon by the scan name. Right-click a scan name and uncheck Loaded. To unload scans, globally, right-click a cluster and choose Unload All Scans and Pictures. If the option is grey, no loaded scans exist in the cluster chosen.