HASP Driver Installation, Update and Repair

Overview
The HASP driver is the central component of FARO® software licensing and it's automatically installed when you install FARO software. Always make sure you use the latest version of the HASP driver, it is backward compatible and using the latest version avoids old licensing issues.
Procedure
HASP Driver Install/Update
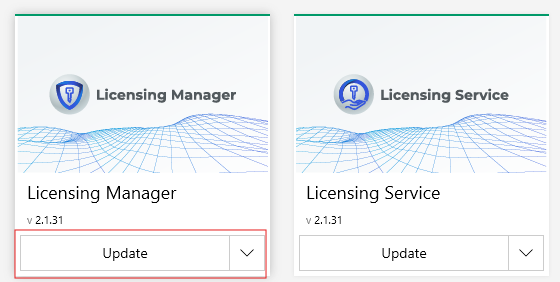
The FARO Licensing Manager is the main tool to manage your FARO licenses.
When the License Manager is installed or updated, the HASP driver is also automatically installed or updated to one of the latest versions available.
- To install the Licensing manager please follow the instructions detailed here.
- To update the Licensing Manager, simply open InTouch and select the option to update. It will update the Licensing Manager, the Licensing Service, and the HASP driver if needed.
HASP Driver Repair
If the need arises to repair or reinstall the HASP Driver, this should be done via FARO InTouch, by selecting the Repair option from the Licensing Service tile dropdown.

Legacy HASP License Driver and RUS Installation/Update
If you do not use an internet connection with your FARO software or are not able to use the Licensing Manger application (preferred method above) you may need to manually install the latest versions of the HASP driver.
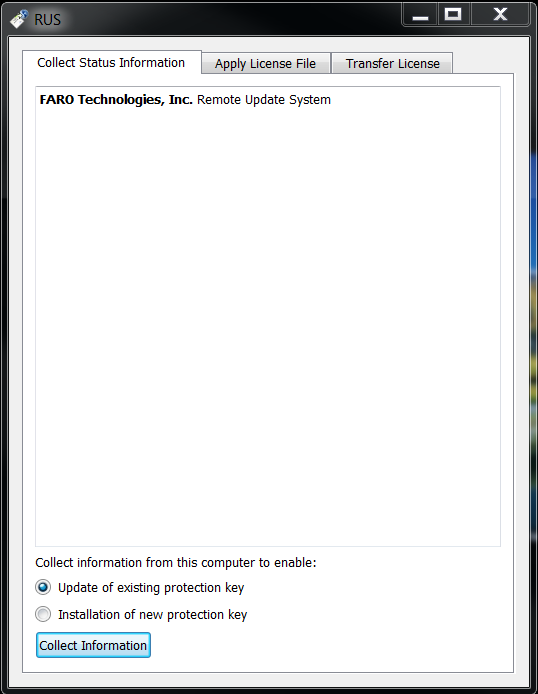
The RUS tool enables you to manually activate, update, or transfer FARO software licenses on a stand-alone installation as well as on a network license server and its client computers.
Download HASP/RUS Files
Use the links below to download the latest versions of the HASP driver and RUS.
Note: BuildIT products use a different HASP driver and RUS than other FARO products.
- FARO - Sentinel HASP License Driver
Version number: 10.12 - FARO RUS
Version number: 8.3
- BuildIT - Sentinel HASP License Driver (FARO BuildIT products only)
Version number: 10.12 - BuildIT RUS (FARO BuildIT products only)
Version number: 8.3
Verify the HASP Version Number
- On the FARO software PC, open an Internet browser and go to http://localhost:1947. The Sentinel Admin Control Center appears.
- Click Diagnostics.
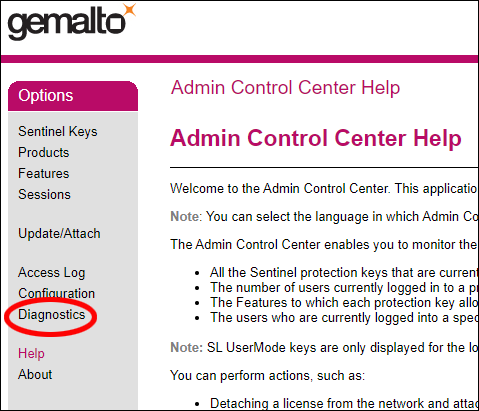
- At the bottom in the Run-time section, note the number next to Run-time Installer. This is the HASP license driver version number.

- The latest HASP version number is 10.12.
- The latest HASP version number for BUILD IT users is 10.12.
Verify the RUS Version Number
- Locate and right-click FaroRUS.exe.
- Click Properties. The FaroRUS.exe Properties window appears.
- Click the Details tab.
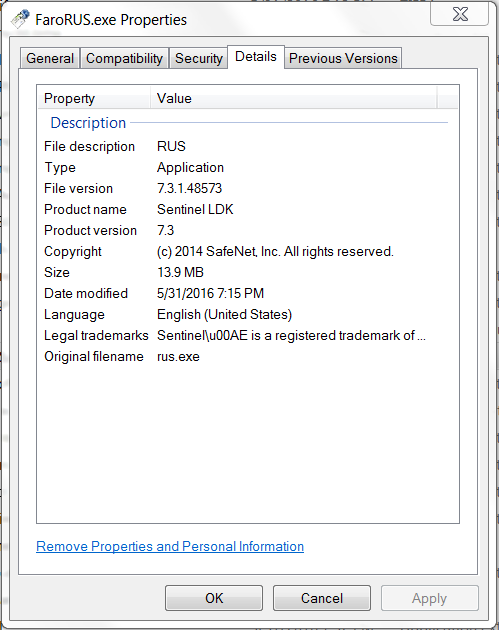
- Note the File version number.
- The latest RUS version number is 7.9.23583.60000.
Uninstall the Old HASP Driver
- Extract the haspdinst<VerNum-Date>.zip file you downloaded to the root of your C:\ drive. Do not put it in a sub-folder.
- Exit FARO software and remove any dongles or portlocks connected to your PC.

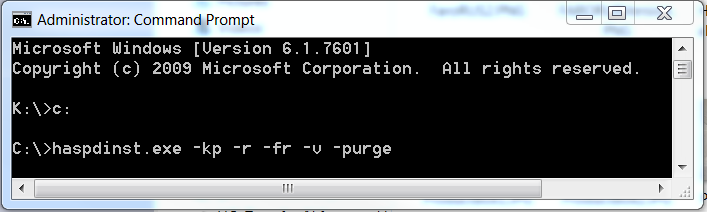
- Click the Windows Start menu. In the search field type cmd and press Enter. The Command Prompt window appears.
- If the command prompt is pointing to C:\>, skip this step. If not, at the prompt type one of these commands and press Enter.
- If your prompt is pointing to a drive other than C, type c: and press Enter.
- If your prompt is pointing to C but is not at the root, type cd\ and press Enter.
- At the C:\> prompt, type haspdinst.exe -kp -r -fr -v -purge to uninstall the current HASP driver.
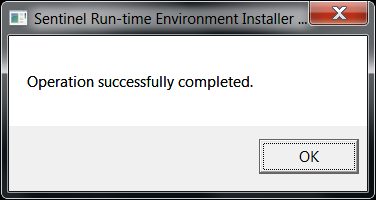
A status window appears while this operation runs. When it is done, the Operation successfully completed windows appears.

- Reboot your computer.
Install the New HASP Driver
- Ensure you have administrator privileges on your computer. If you do not, contact your IT department.
- Turn off all anti-virus and firewall software, or contact your IT department and ask that an exception be created for .dll files located at C:\Program Files (x86)\Common Files\Aladdin Shared\HASP.
- Repeat steps 3 and 4 above to get the Command Prompt window and the C:\> prompt.
- A t the C:\> prompt, type haspdinst.exe -i -fi -kp -fss to install the latest driver.
- A status window appears while this operation runs. When it is done, the Operation successfully completed windows appears.
- Open an Internet browser and go to http://localhost:1947, if you see the Sentinel Admin Control Center, installation was successful. Verify that your version is now current.

Uninstall the Old RUS
To uninstall RUS, find FaroRUS.exe and delete or rename it. The file's location is different depending on the type of computer you are using: Stand-alone computer, client computer, or license server.
For a stand-alone computer or client computer
The RUS file is stored in the root of the folder where the FARO Software you are running is stored. If you accepted the file storage defaults when you installed your FARO software, the RUS file is in one of these folders.
- C:\Program Files\FARO\<FAROSoftwareName>
- C:\Program Files (x86)\FARO\<FAROSoftwareName>
For a license server
The RUS file could be stored anywhere. If you have followed the instructions for creating a license server, the file is stored in the C:\FaroRUS folder. If not, you can search for it.
Install the New RUS
- Copy the new FaroRUS<VersionNumber>-<date>.zip file you downloaded at the top of this article to the folder where you found the old RUS.
- Extract FaroRUS.exe to the same location as the old RUS file.
- Test that you can access the RUS.
- On a standalone computer or client computer--From the Windows Start menu click All Programs > FARO > <FAROSoftwareName> > FARO RUS or FARO Remote Update System. This makes sure that the Start menu link to the RUS works correctly.
- On a license server--Double-click FaroRUS.exe to run it.
- When you see the RUS window, installation was successful. Verify that your version is now current.